Barcode printing in Jaldi Lifestyle POS
Barcode screen is the screen where we can take the barcode prints for the inventory products in the barcode labels. The print designs are predefined, we can also change barcode designs while taking the print from the predefined barcode design list.
Most of the times, We will take barcode prints right after the GRN entry for all the GRN products (To know how to take barcode print after GRN entry, click on this link – https://jaldi.store/grn-entry-in-jaldi-lifestyle-pos/ ).
But imagine this real time scenario, when the old barcode is not clear to scan by the device. we cannot load products manually all the time, right ?. So, to resolve this we have screen to take the barcode for any product at any time. So we can replace this new barcode labels on the old labels.
Check the following steps to know how to take the barcode for the products.
How to take barcode for the products ?
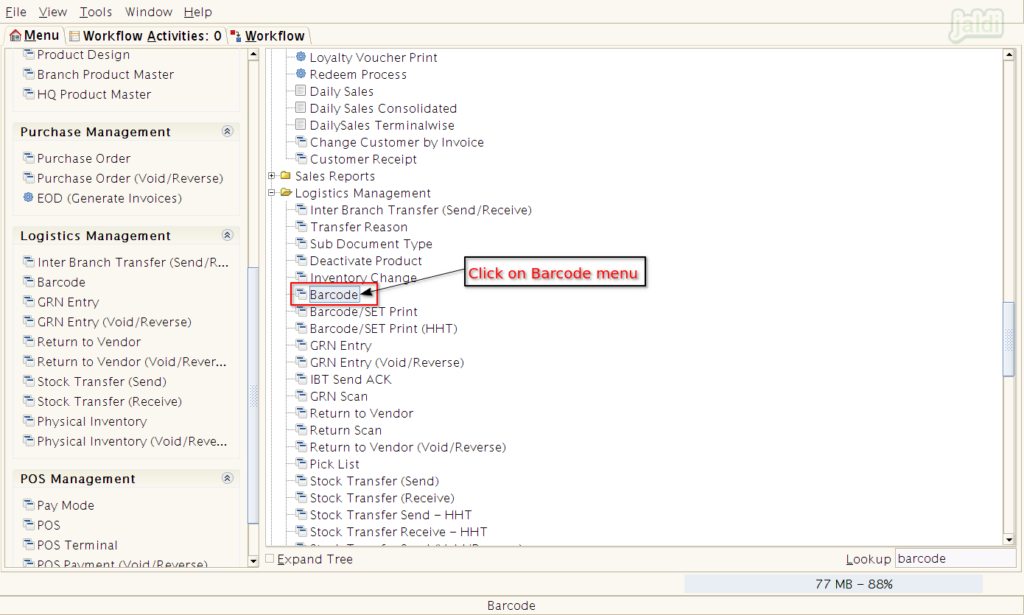
- Go to application path Logistics Management > Barcode.
- Click on the “Barcode” menu to go to barcode printing screen.

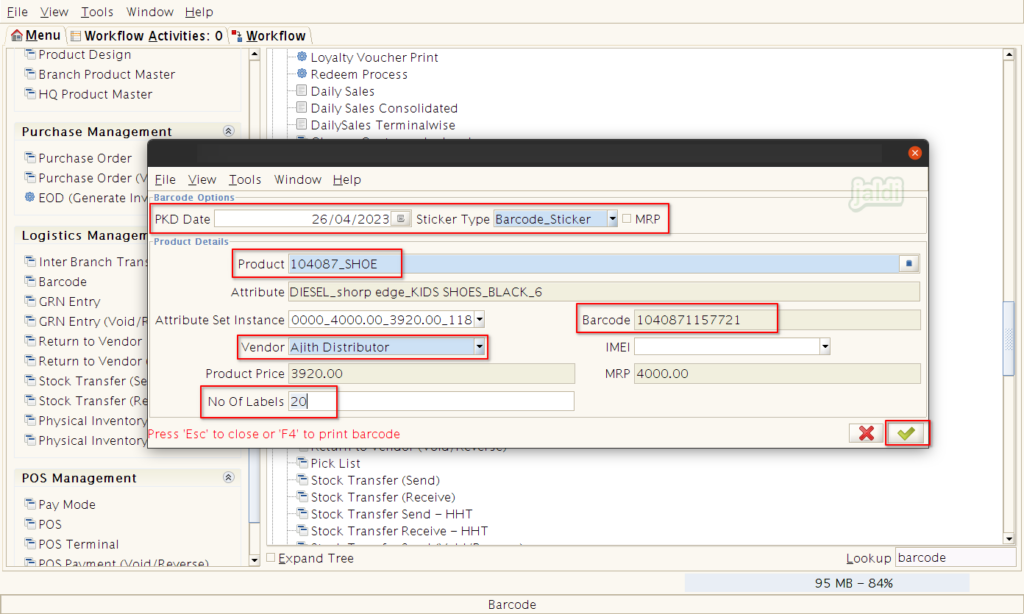
- In Barcode scree, fill the following details to take barcode print
- PKD Date – Packed Date of the product.
- Sticker Type – Select the print design
- MRP (check box) – Select MRP check box if you want to print MRP of the product in barcode labels.
- Product – Select the specific product
- Vendor – Select the vendor
- No of Labels – Enter the quantity count of the barcode prints.
- Barcode – We can see the scanning code of the product (Auto loaded field)
- Once all the products were filled, then click on the “green tick mark” to take the barcode print.

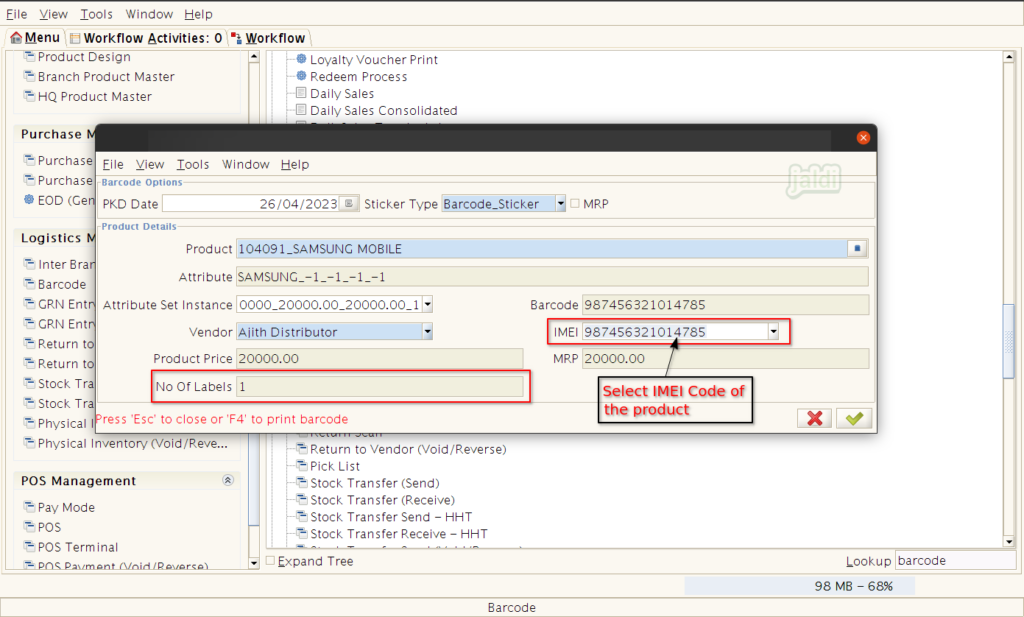
- If the selected product is an IMEI product, then in IMEI field, select the specific IMEI code before taking the print.
- For IMEI products, we cannot edit the No of labels, it will be 1 by default.
- Scanning code of the IMEI product will be IMEI Code which is shown like below image.
