Barcode/SET Print (HHT) in Jaldi Lifestyle POS
Barcode/Set Print is the screen where user can save the required products under different sticker types with predefined name and take barcode print in different sizes of label with different values.
How to save Barcode/SET print document using HHT web or mobile interface ?
- Open HHT web mobile interface URL in web browser or in HHT device.
- Login the URL with specific HHT role user.
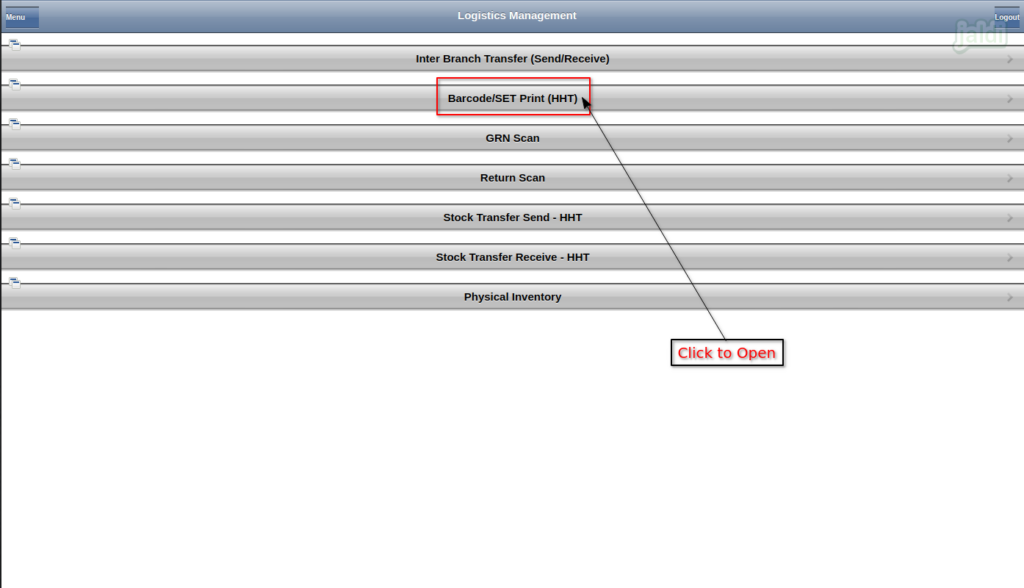
- Go to URL path Logistics Management > Barcode/SET Print (HHT).
- Click on the menu “Barcode/SET Print (HHT)” to open.
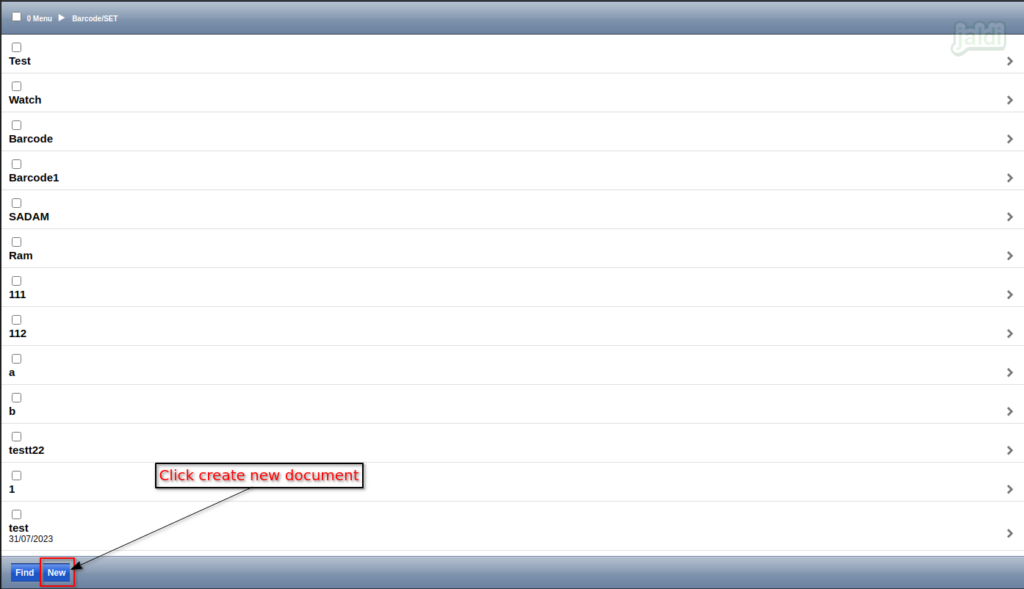
- Under Barcode/SET tab, press “New” function key to create a new document.
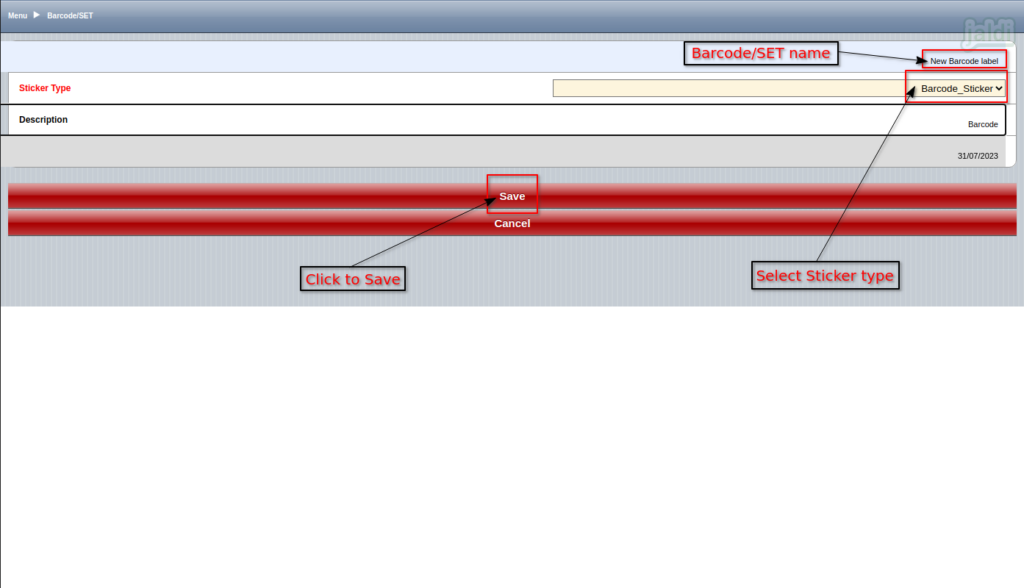
- Under “Barcode/SET” tab screen, Enter the following input details,
- Name – Enter “Barcode/SET” name
- Sticker Type – Select any one of the sticker type from the following drop down value. Based on selected sticker type the size of the barcode will be differ.
- Barcode_Sticker
- Jewellery_Sticker_4Cross
- Jewellery_Sticker_LA
- Jewellery_Sticker_MA
- Jewellery_Sticker_RA
- Description – Enter description for the barcode sticker
- Once the above input details were filled, press “Save” to save the current tab.
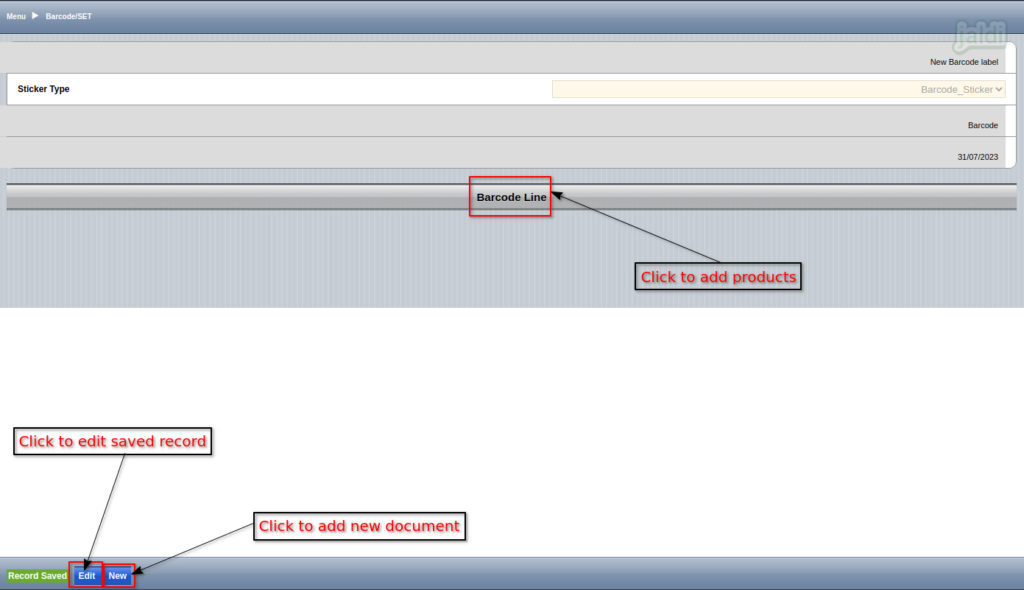
- Once data saved, system will show the function keys like edit & New.
- Press Edit function key to edit the saved record under Barcode/SET tab.
- Press “New” to create another new document.
- To add products in Barcode/SET document, press “Barcode Line” function key.
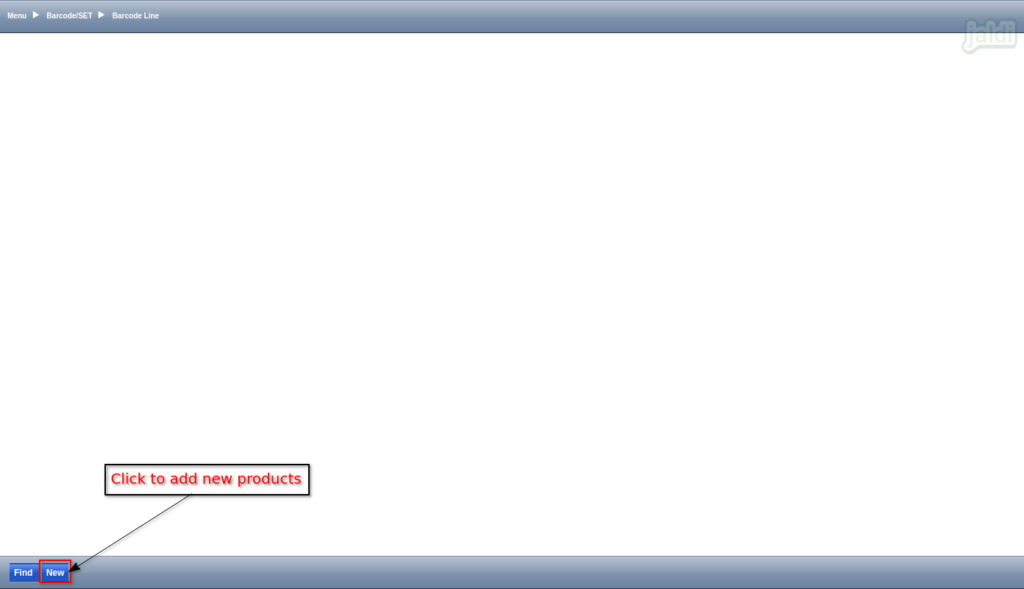
- In next screen, press “New” to add products to barcode line.
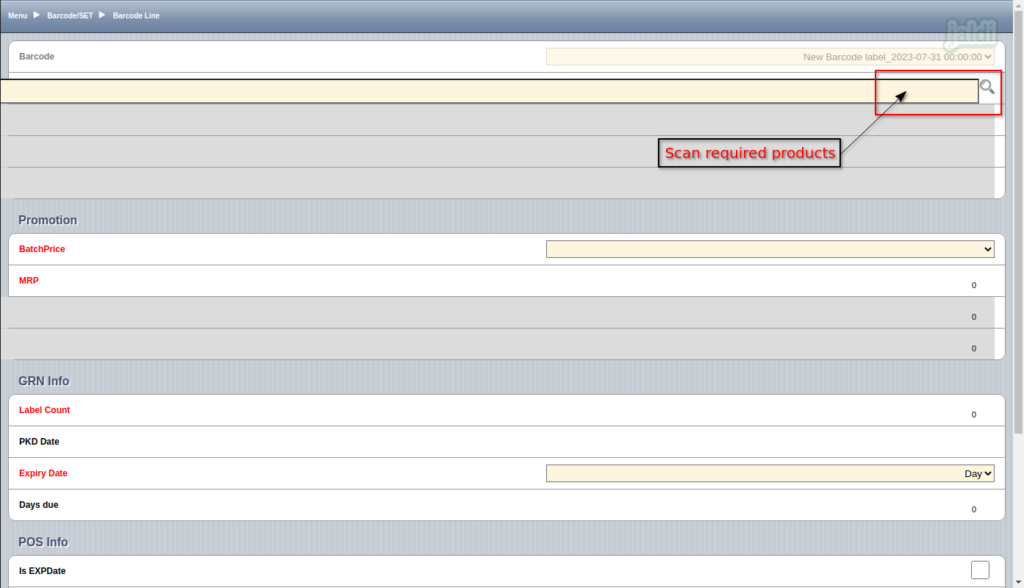
- Under barcode line, scan the product’s EANcode or barcode in below marked input field to load the required products in screen.
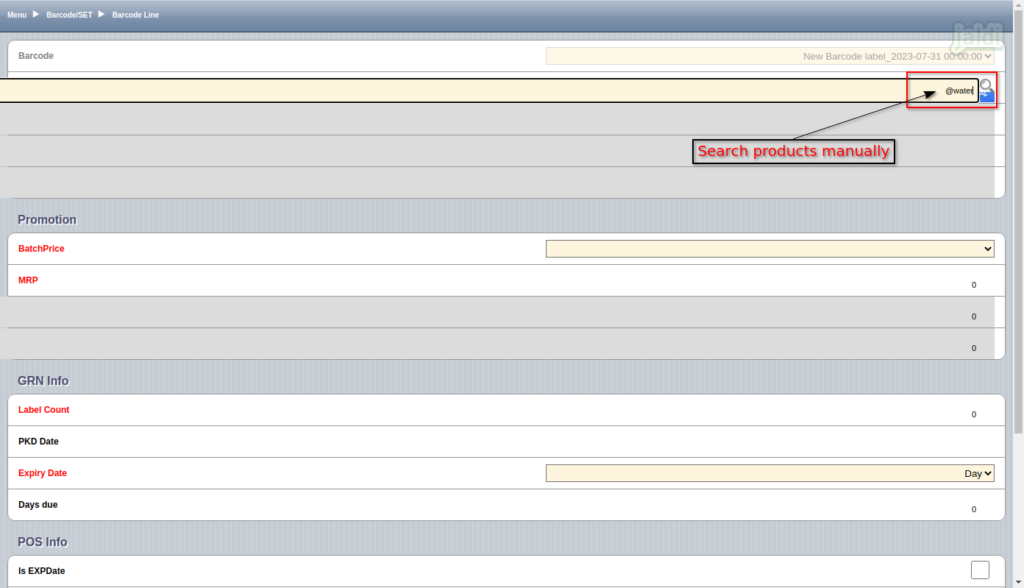
- Also We can search the product manually using the product name (@ should be prefix) to load the required products.
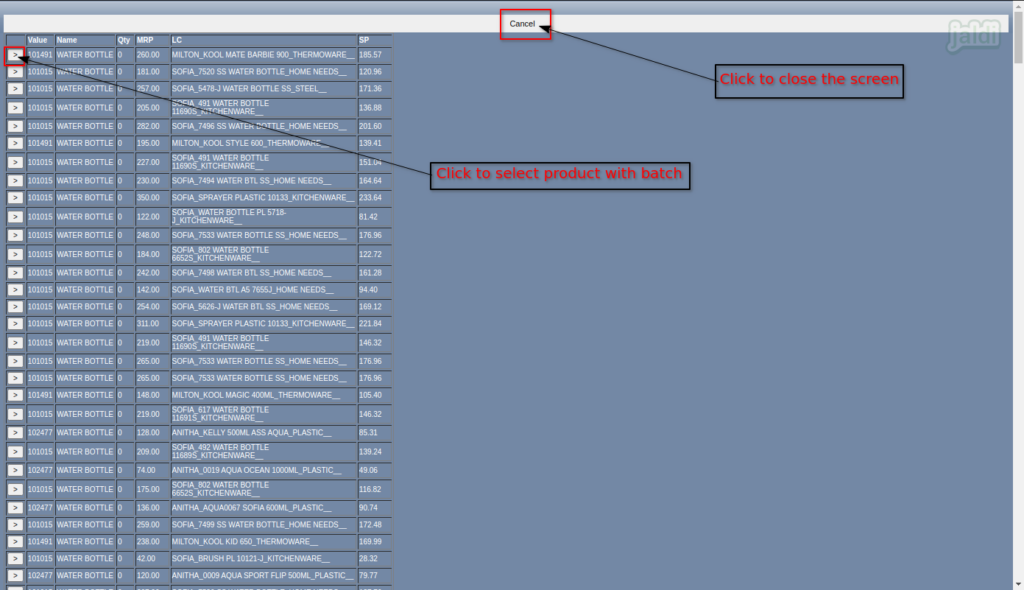
- Once product is searched, system will show the result which is matched with searched value.
- Click cancel to close the product list screen.
- To select the product click on the “>” arrow symbol on required products.
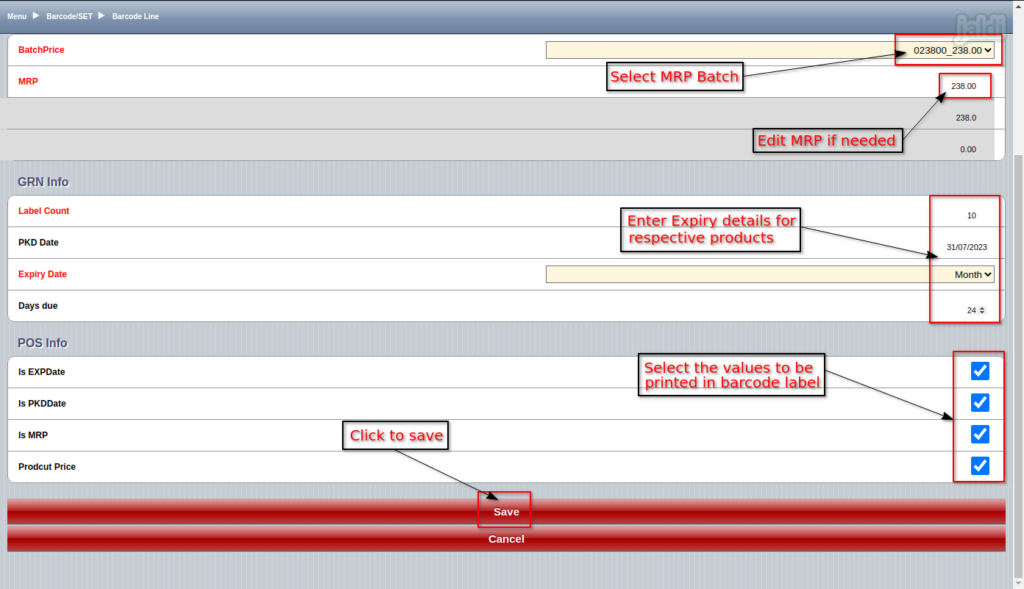
- After selecting the required product in Barcode line, enter the following input data,
- Batch Price – Select product batch
- MRP – Edit MRP price if needed
- Label count – Enter qty of label to be printed
- PKD Date – Enter PKD date of the product
- Expiry date – Select Expiry type (Day or Month)
- Days due – Enter expiry value
- Select the required check box of following data under POS info, only selected value will be printed in barcode label
- Is Exp Date
- Is PKD Date
- Is MRP
- Product Price
- Once the above mentioned input details were filled press “Save” function key to save the data.
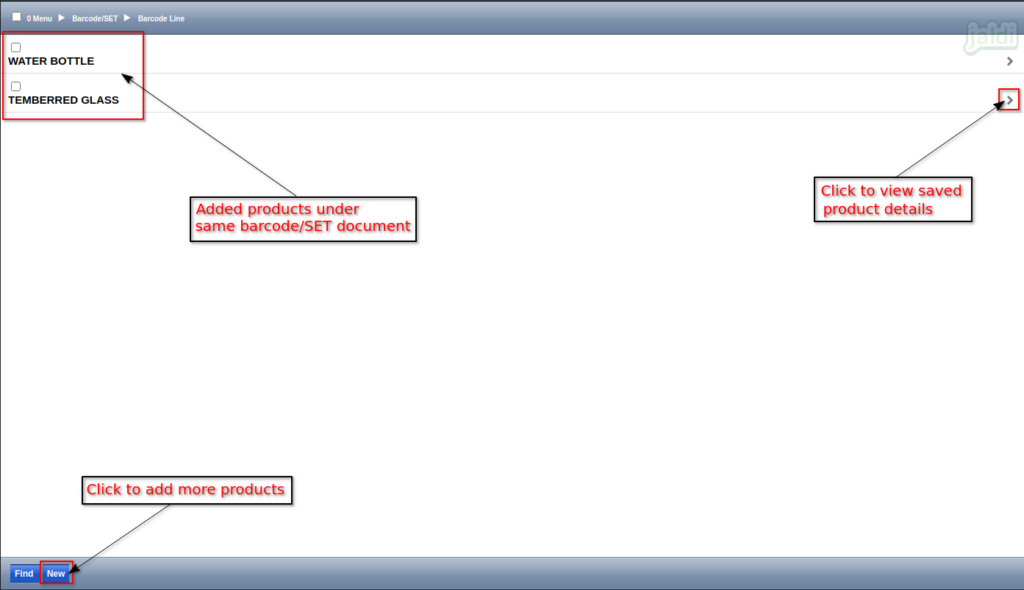
- We can add multiple product lines under barcode line like below shown image.
- Press “>” marked arrow symbol to view the product details in detailed.
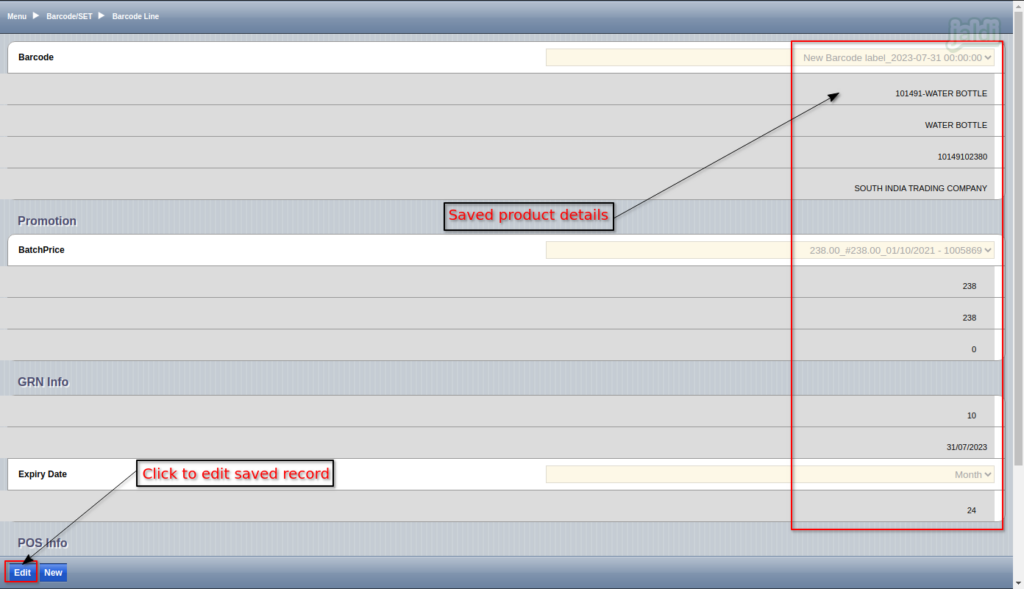
- Like below shown image, user can view the saved product data.
- Press “Edit” function key to edit the saved product record.
How to take barcode print of saved Barcode/Set print from HHT ?
- To take barcode print of saved barcode/set print document, go to application path Logistics Management > Barcode/SET Print.
- Click to “Barcode/SET Print” menu to open.
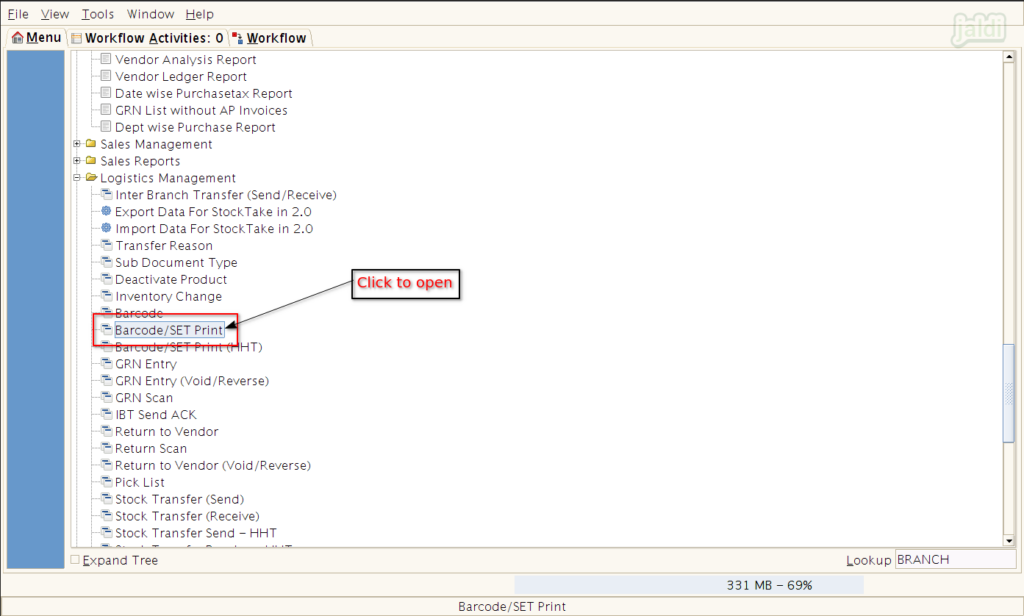
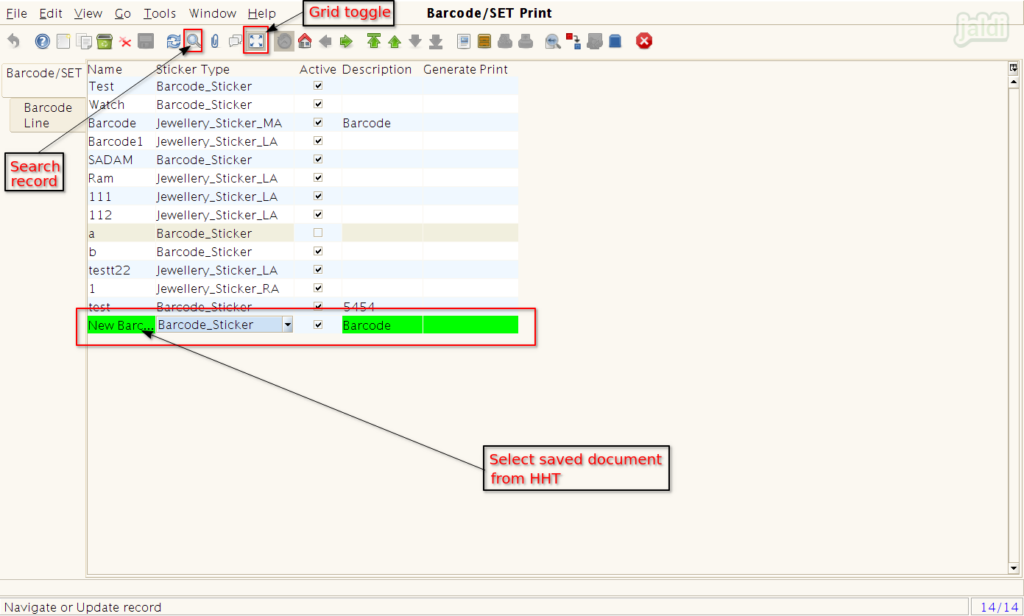
- In showing available barcode sticker list, select specific document name and press “Grid toggle” to detailed view from list view.
- To find the required document from list, use “Search” option to search the value.
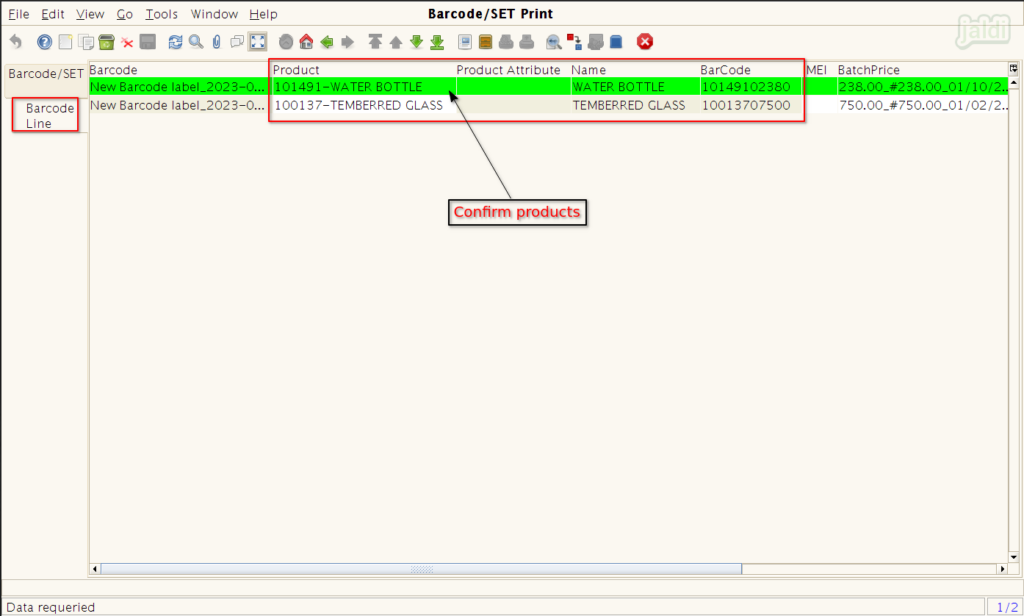
- Before taking print, we can confirm the saved products under Barcode Line tab like below shown image.
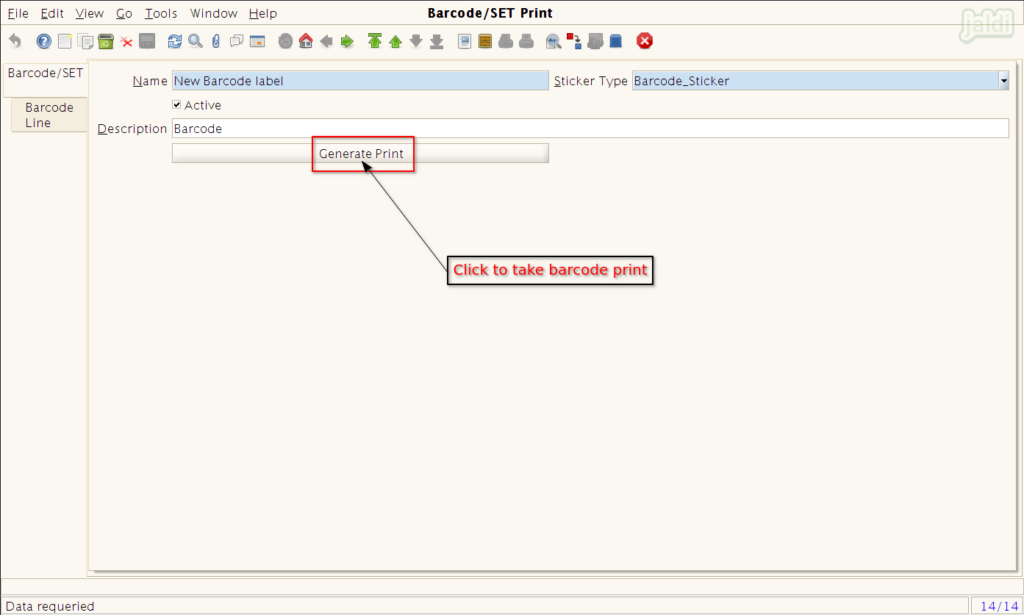
- Under Barcode/SET tab screen, press “Generate Print” to take barcode print of saved products.
