Barcode/Set Print in Jaldi Lifestyle POS
Barcode/Set Print is the screen where user can save the required products under different sticker types with predefined name and take barcode print in different sizes of label with different values. They can also store the list of products as a group for future printing if the same set of products is going to be printed repeatedly.
How to save Barcode/Set Print ?
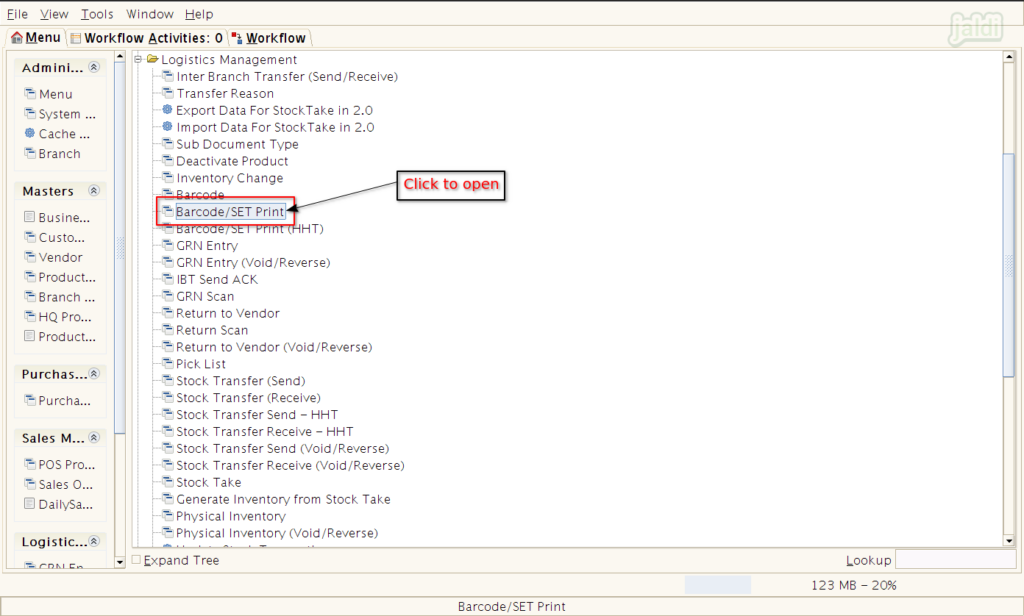
- Go to application path Logistics Management > Barcode/SET Print.
- Click on “Barcode/SET Print” menu to open.
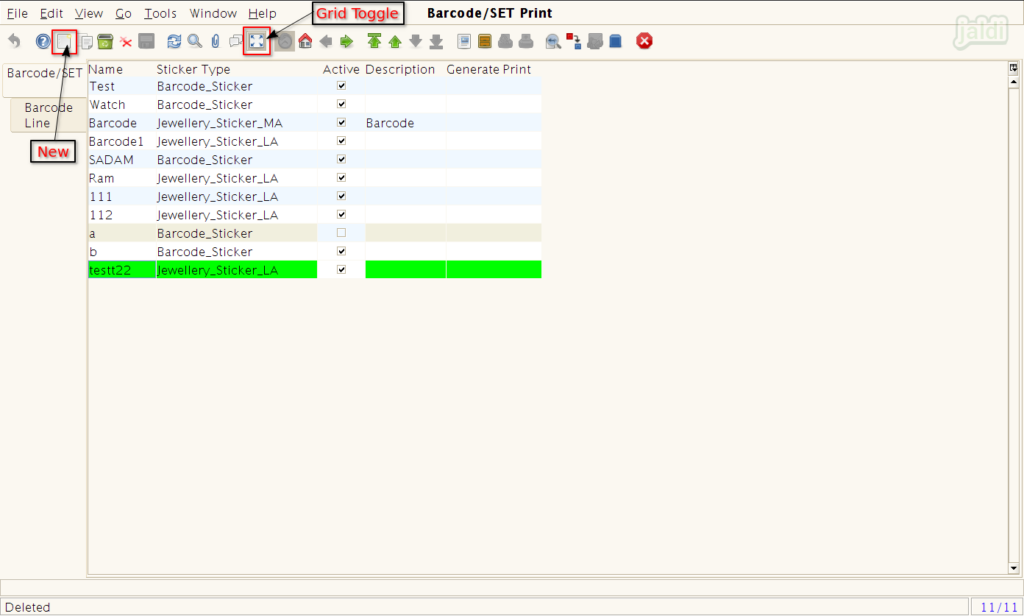
- Then press “New” to create a new barcode sticker profile.
- Press “Grid Toggle” to go detailed view from list view.
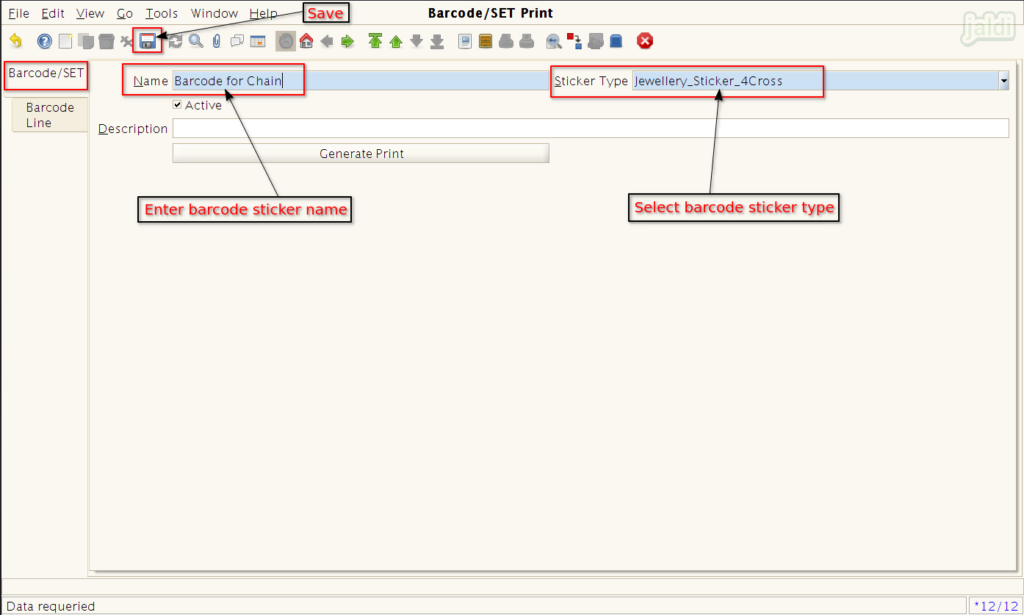
- Under “Barcode/SET” tab screen, Enter the following input details,
- Name – Enter “Barcode/SET” name
- Sticker Type – Select any one of the sticker type from the following drop down value. Based on selected sticker type the size of the barcode will be differ.
- Barcode_Sticker
- Jewellery_Sticker_4Cross
- Jewellery_Sticker_LA
- Jewellery_Sticker_MA
- Jewellery_Sticker_RA
- Description – Enter description for the barcode sticker
- Once the above input details were filled, press “Save” to save the current tab.
- Then move to “Barcode Line” and press “New” to add products to barcode sticker profile.
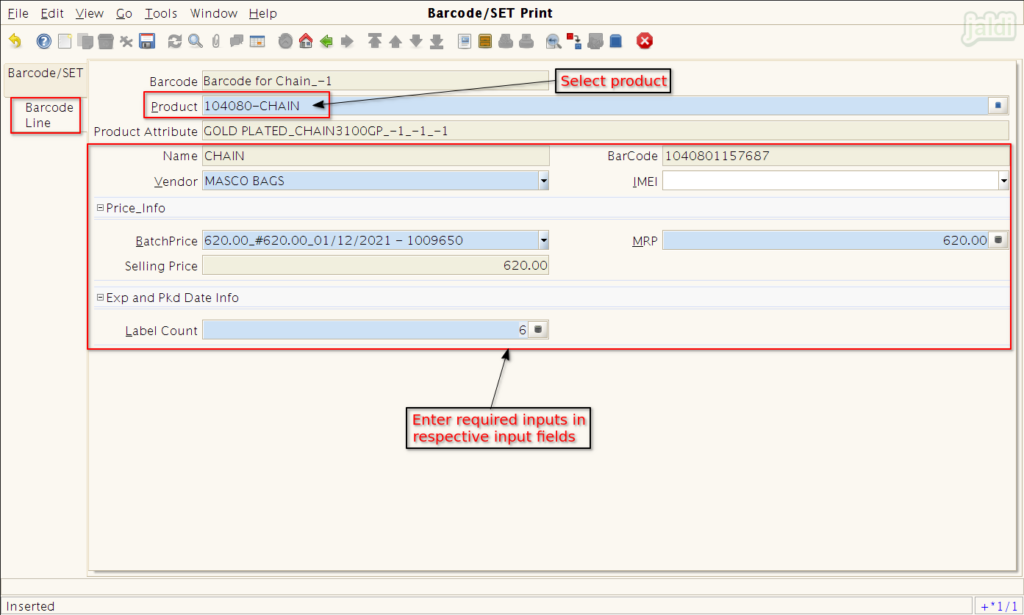
- To add product under barcode line, enter the following input details
- Product – Select product name
- Vendor – Select vendor name
- IMEI – Select “IMEI code” of the product (If the product is Mobile department product)
- Batch Price – Select product batch
- MRP – Select MRP price
- Label count – Enter qty of label to be printed
- PKD Date – Enter PKD date of the product
- Once the above mentioned input details were filled press “Save” function key to save the data.
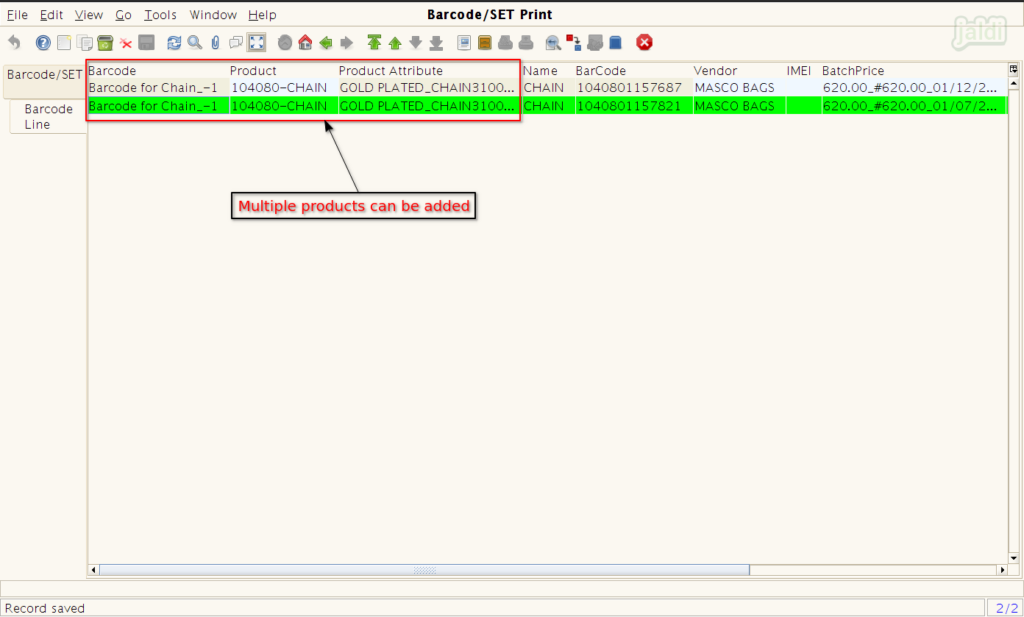
- Using the same process user can add multiple product details under barcode line.
- All the added products will be printed in barcode label.
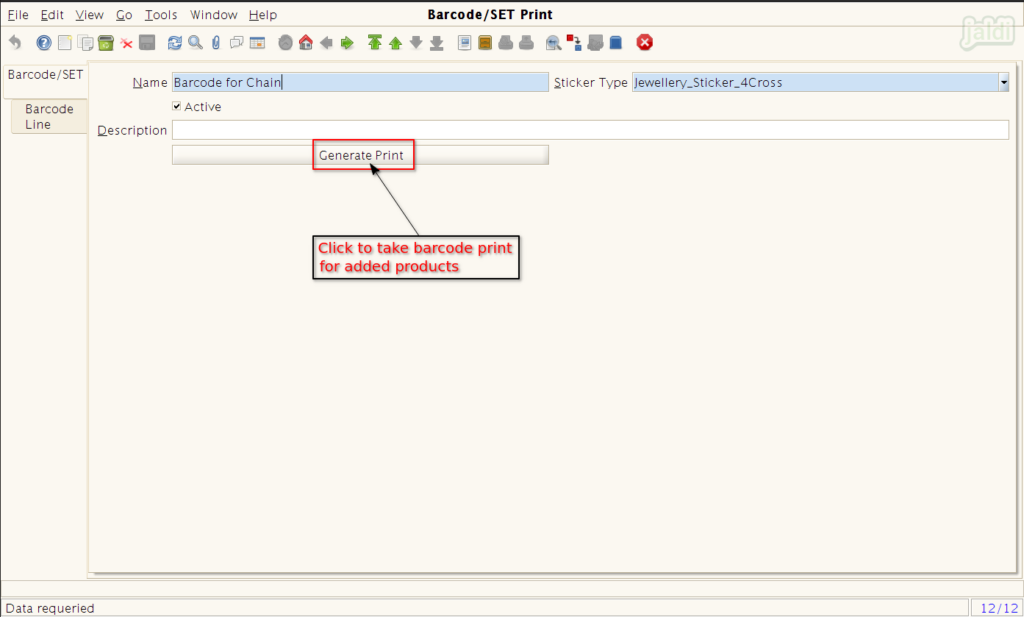
- Go back to “Barcode/SET” tab screen, Click on “Generate Print” to print the barcode stickers.
How to edit created Barcode/SET print ?
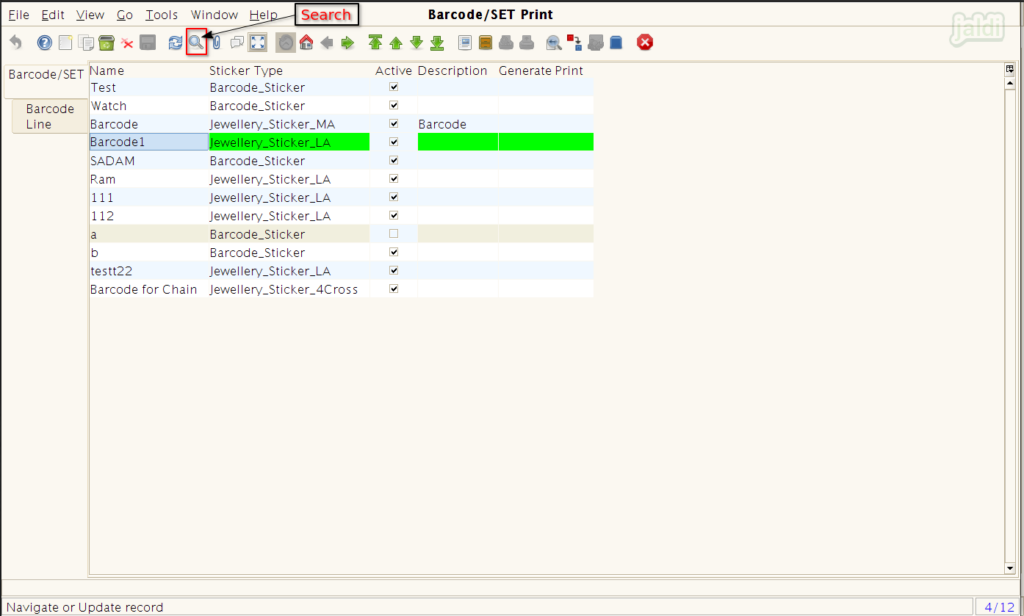
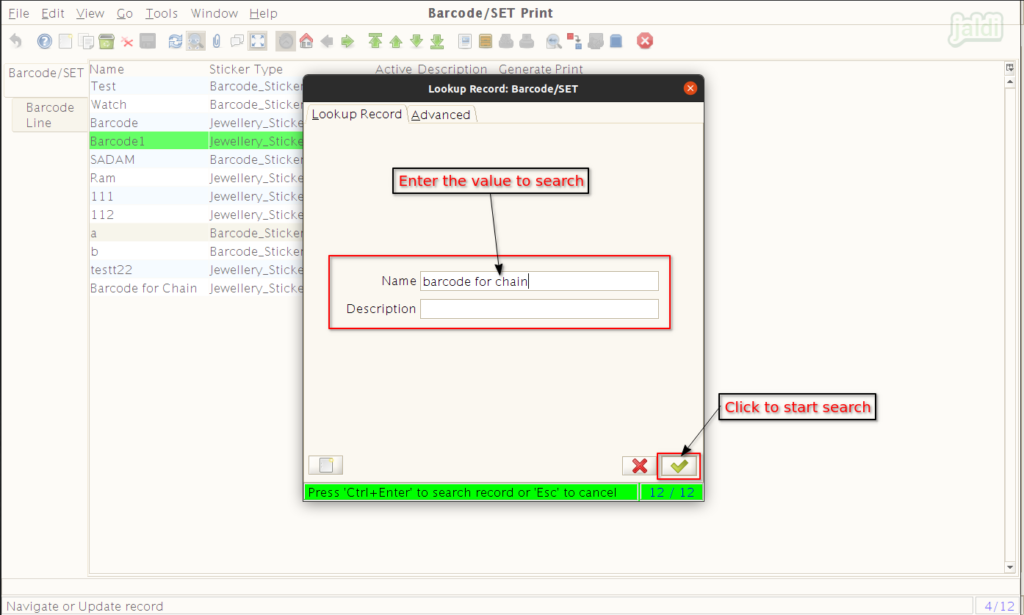
- Open Barcode/SET print list and press the function key “Search or Lookup” which is marked in below image.
- In lookup record screen, enter the text value to search in respective input data.
- Then press “green tick mark” which is marked in below image.
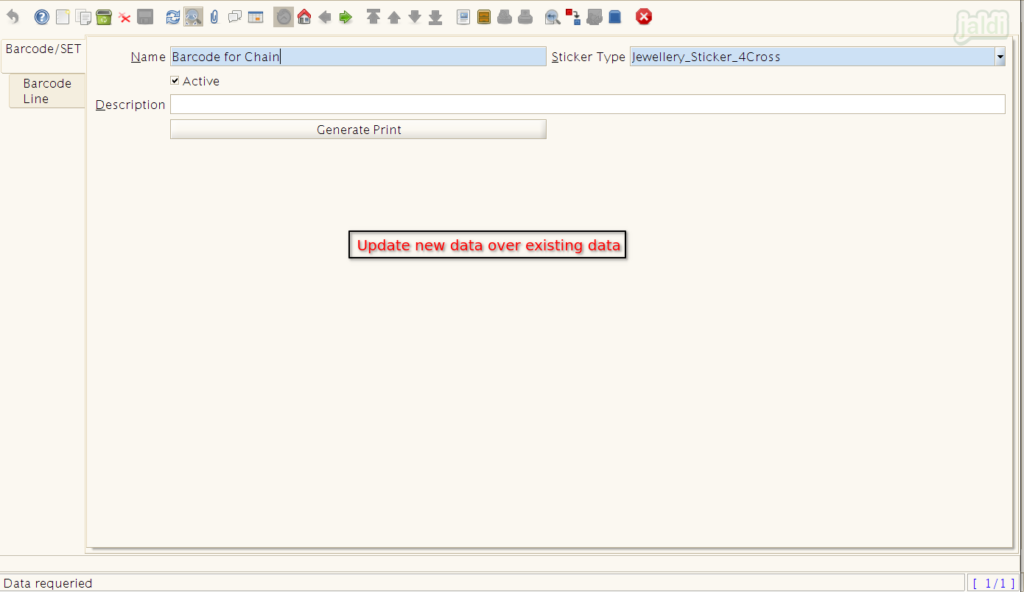
- Once the searched document is found, press “Grid toggle” to go detailed view from the list view.
- In both Barcode/SET tab and Barcode Line tab, update the new details over the existing details.
How to deactivate created barcode/SET print record ?
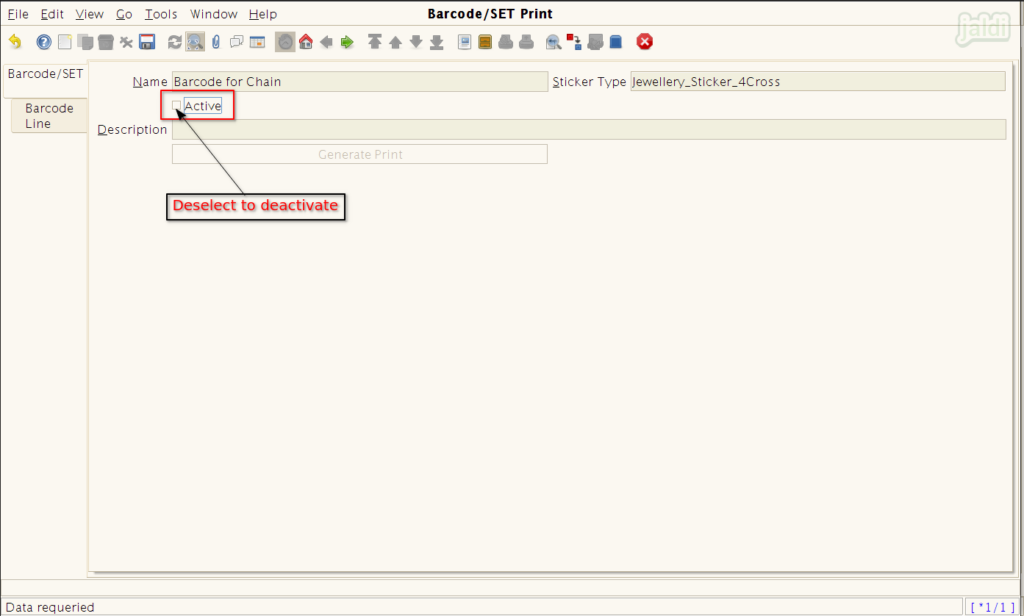
- To deactivate the Barcode/SET print document, under Barcode/SET print tab remove the Deselect the “Active” check box which is shown in below image.
- Once the document is deactivated, we cannot took the barcode print.
- To activate the document again, select the check box of “Active”.
How to delete created Barcode/SET Print ?
- Go to Barcode/SET print screen, select any specific document which you wanted to delete from the list.
- There should be the function key called “Delete” click on that to delete selected document.
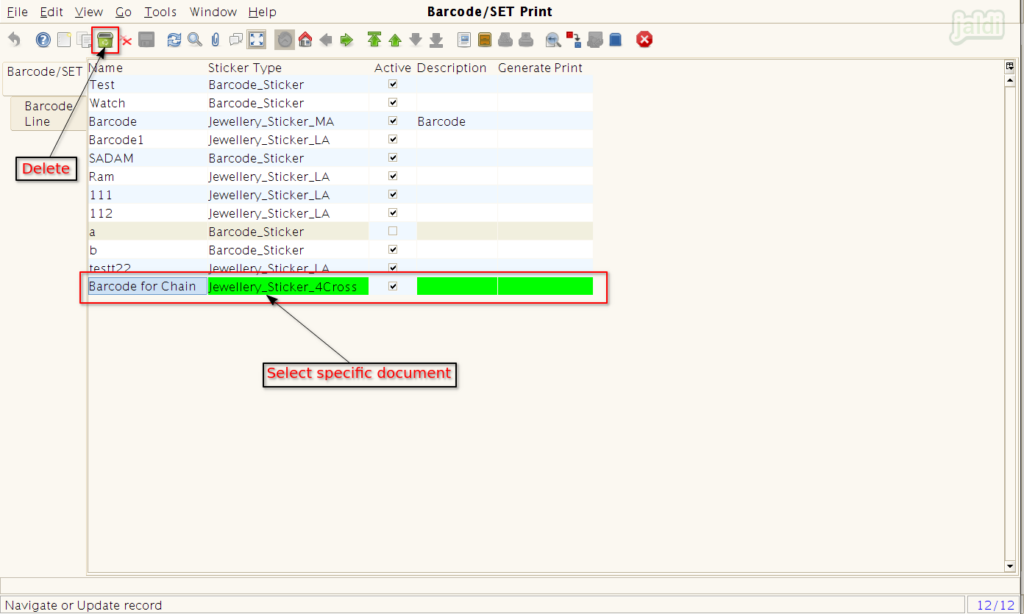
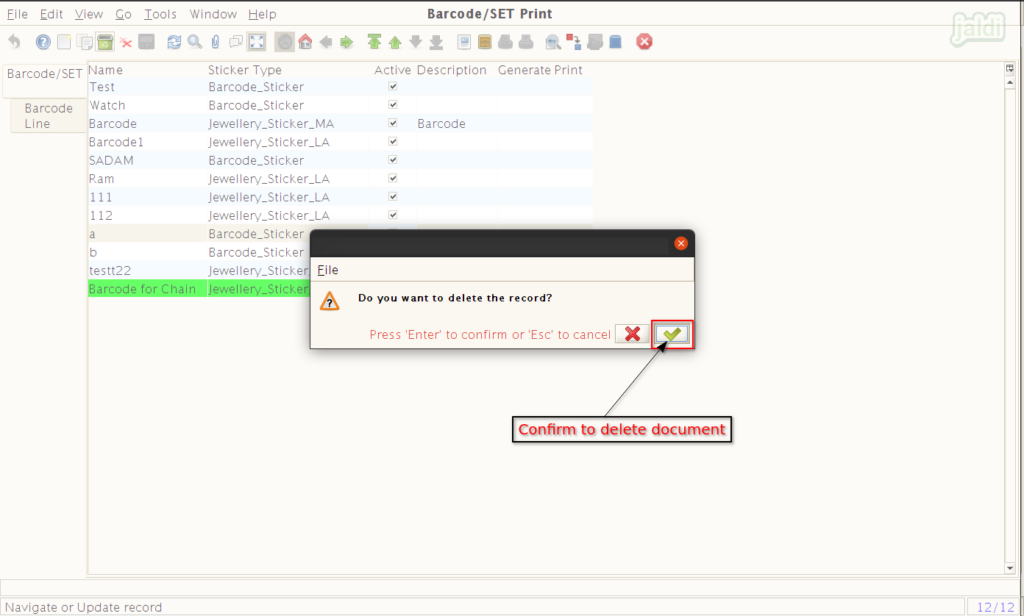
- Once the delete function key is pressed, system will show the confirmation popup message like shown in below image.
- Click on the “green tick mark” to confirm and proceed the delete process.
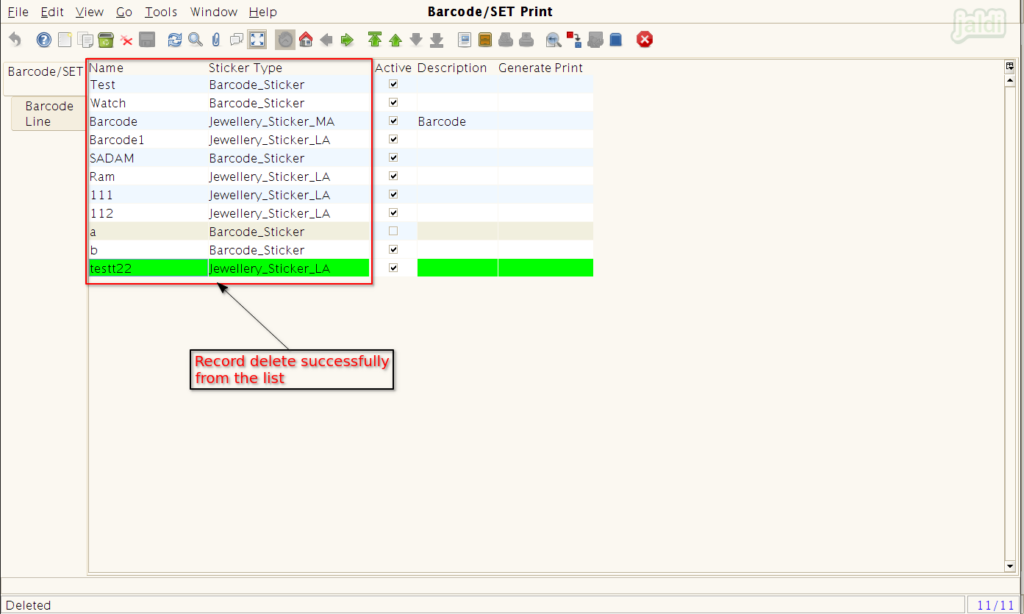
- Once the delete process is completed, the selected document will be deleted from the Barcode/SET list.
- Deleted record will not be recovered again in list.
