Bill only POS terminal process in Jaldi Lifestyle POS
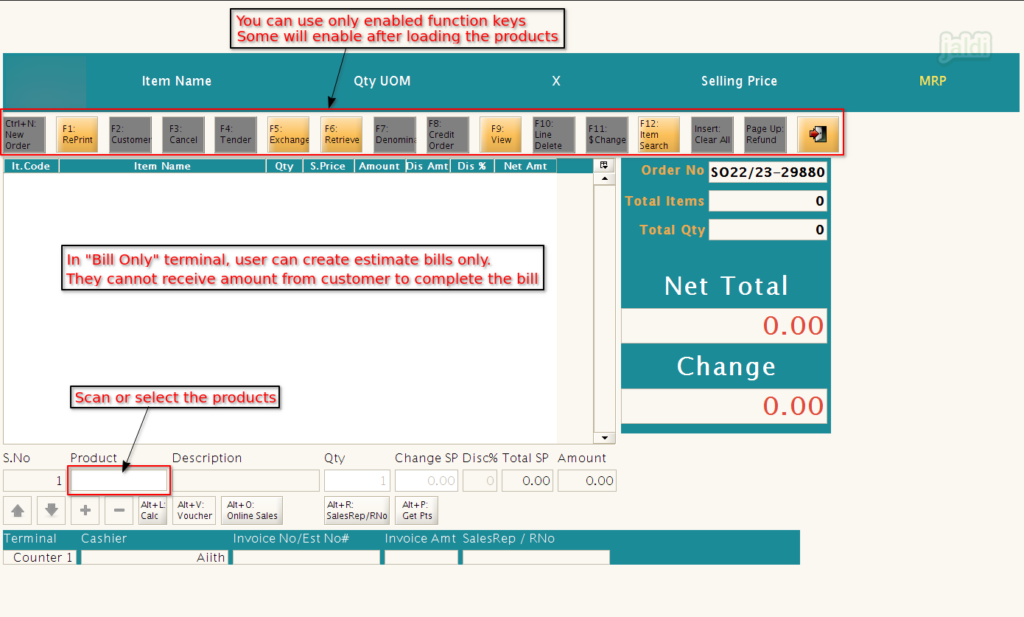
Bill-only terminal is one of the terminal type where user can create only an estimate bills. User cannot receive amount from the customer to completed the bill.
How to create a Bill Only POS terminal ?
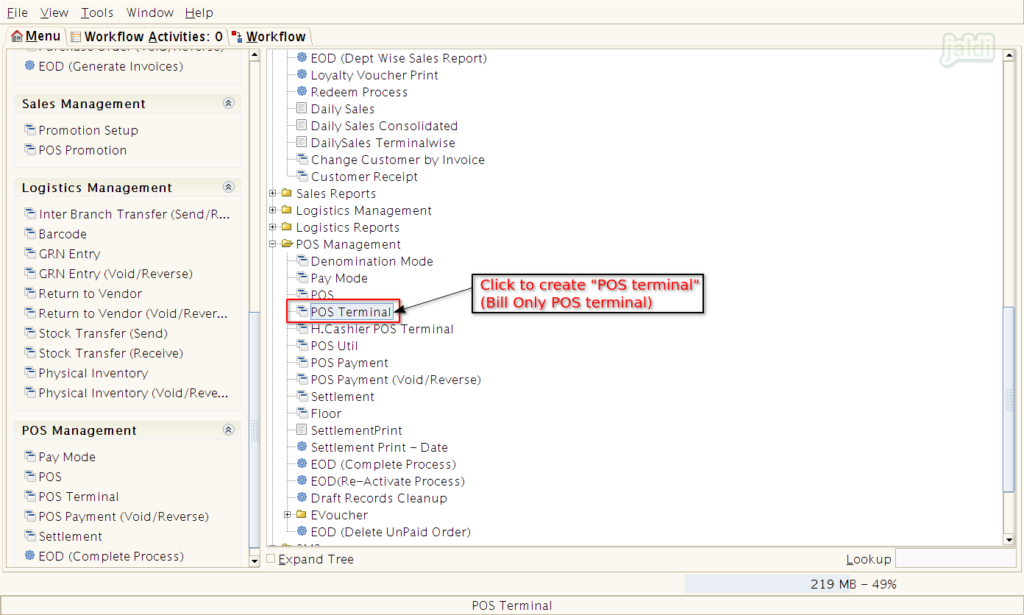
- Open ‘POS terminal’ menu to create new one.
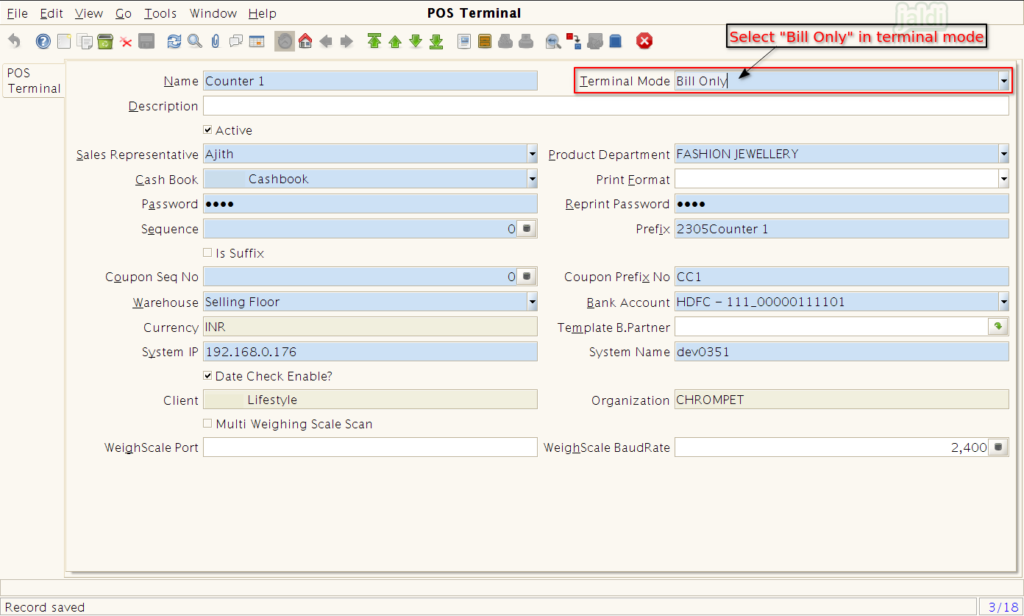
- Choose “Bill-only” as terminal mode and press save.
- To know more about POS terminal creation, refer following link – https://jaldi.store/pos-terminal-in-jaldi-lifestyle-pos/
POS features in Bill Only POS terminal
The following process or features will be done in this POS terminal,
- Loading customer purchase products
- Estimate bill generation
- Hold and retrieve bill
- View completed estimate bills
- Item search
- Line item delete
- Clear all
- Sales rep selection
- Receiving exchange products
- Reprint completed estimate bills
- Change items sale price
Note : Payment will be received only on Pay Only or Bill & Pay POS terminals.
How to generate Estimate products ?
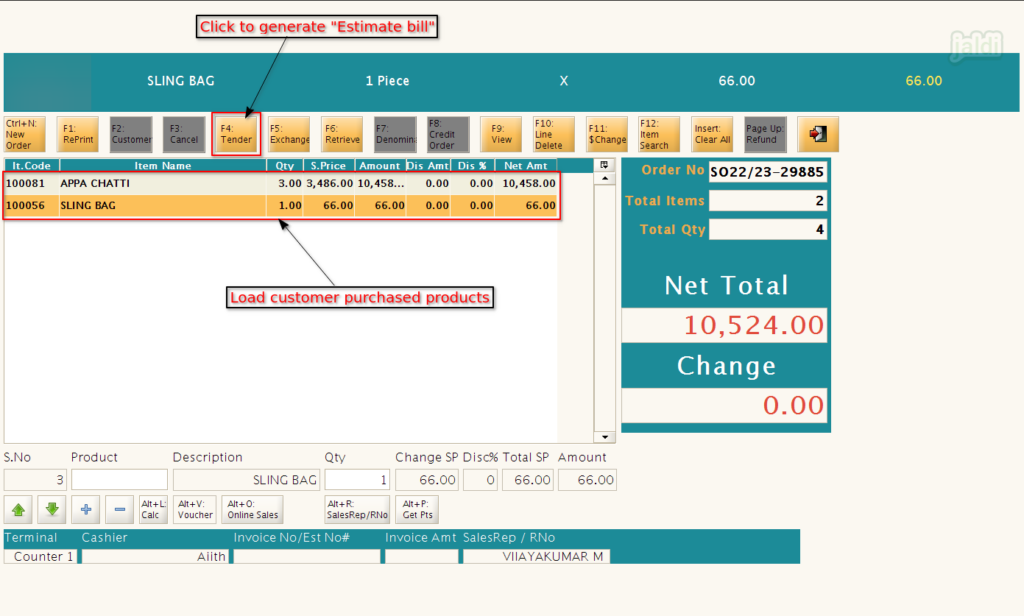
Lets imagine the real time scenario at lifestyle pos where the customer purchased 3 Appa chatti & 1 sling bag. The sales rep will take the customer purchased products to the “Bill Only” counter to generate the estimate bill.
Now check the following process to generate the estimate bill.
- Open POS screen, in Product search field, scan or select product by search (/product name).
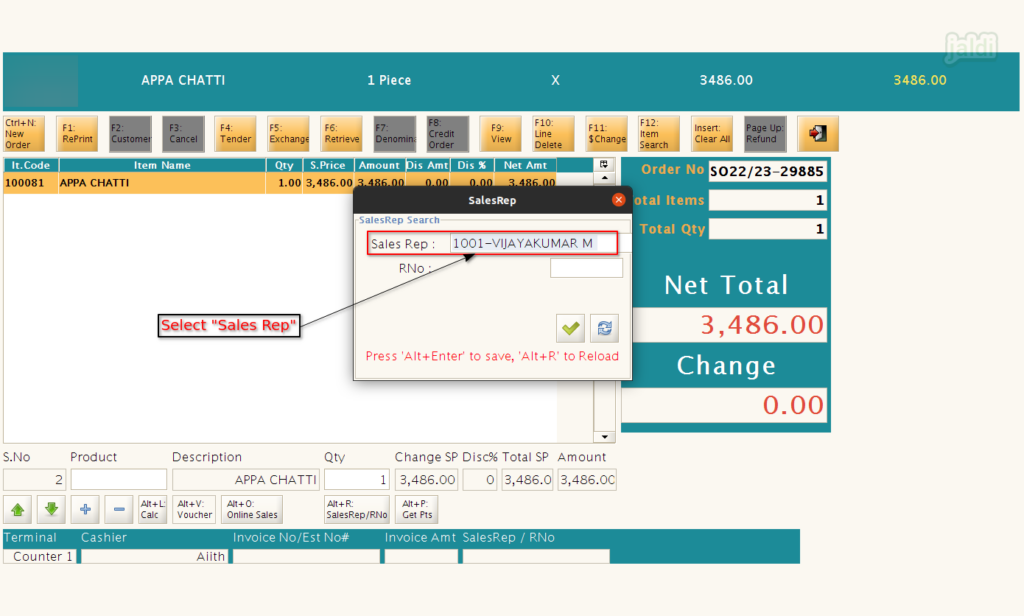
- Once the first product is selected, the Sales rep screen will appear, select the Sales rep by name or code.
- Use “Alt+R” to change the sales person for other products.
- Once the customer purchased products are loaded in POS screen, then click on “F4 – Tender” to generate estimate bill.
- Estimate bill print will have the “barcode” which will be scanned in Pay Only screen or other screens to load the exact estimate bill.
How to take Reprint of completed estimate bills ?
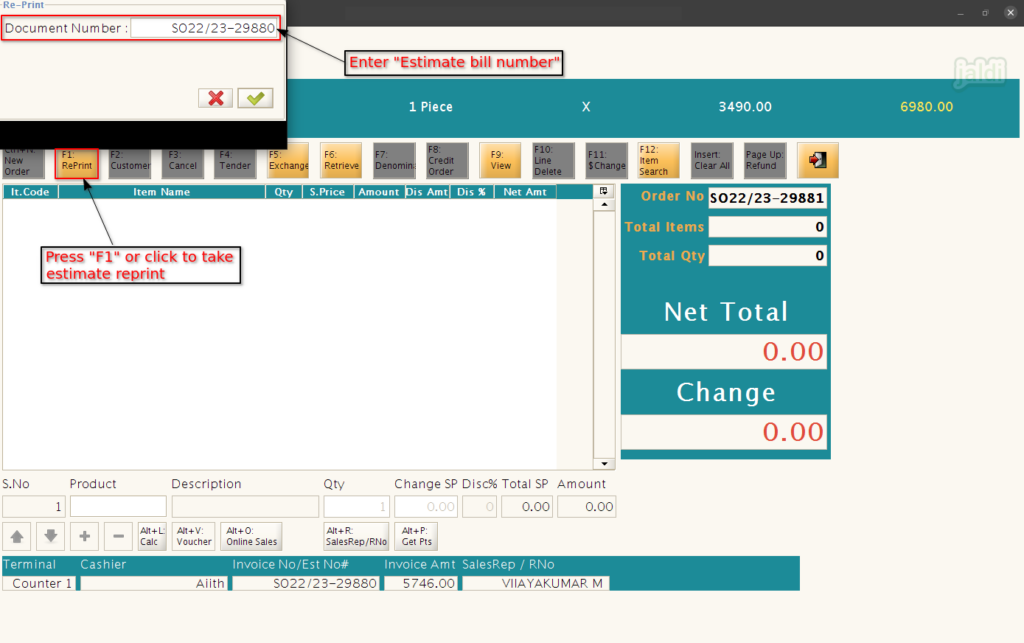
- There is a function key called “F1 – Reprint” which is marked in below image.
- Click on that or press “F1” function key.
- Then enter “password”
- After that enter or scan the “estimate bill number” in Document number field.
How to delete the line items from scanned list of products ?
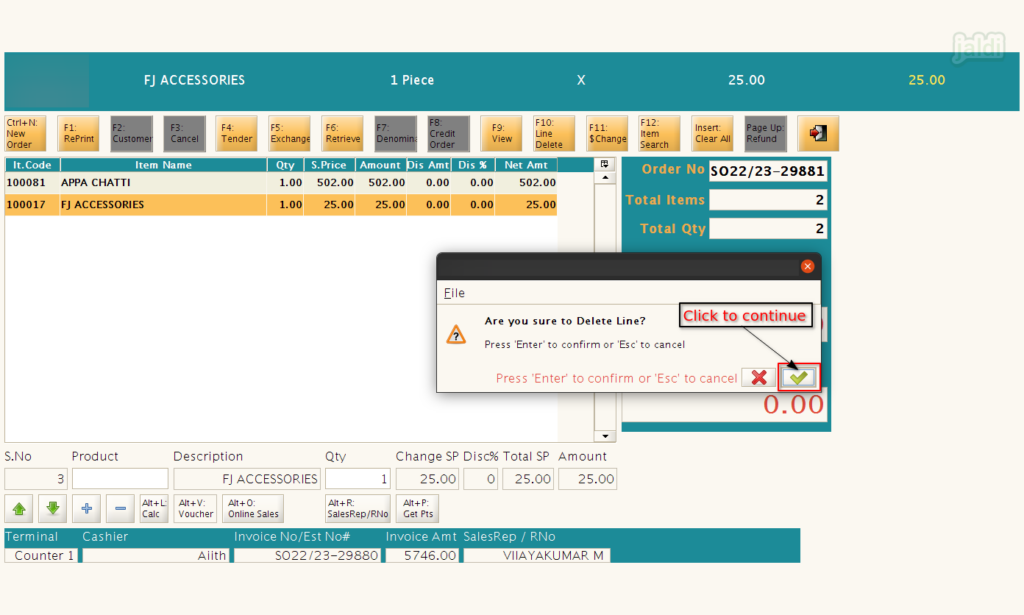
- After loading the products, if user wants to remove a specific product from the products list, click on the product.
- Then press “F10 – Line delete” function key which is marked in below image.
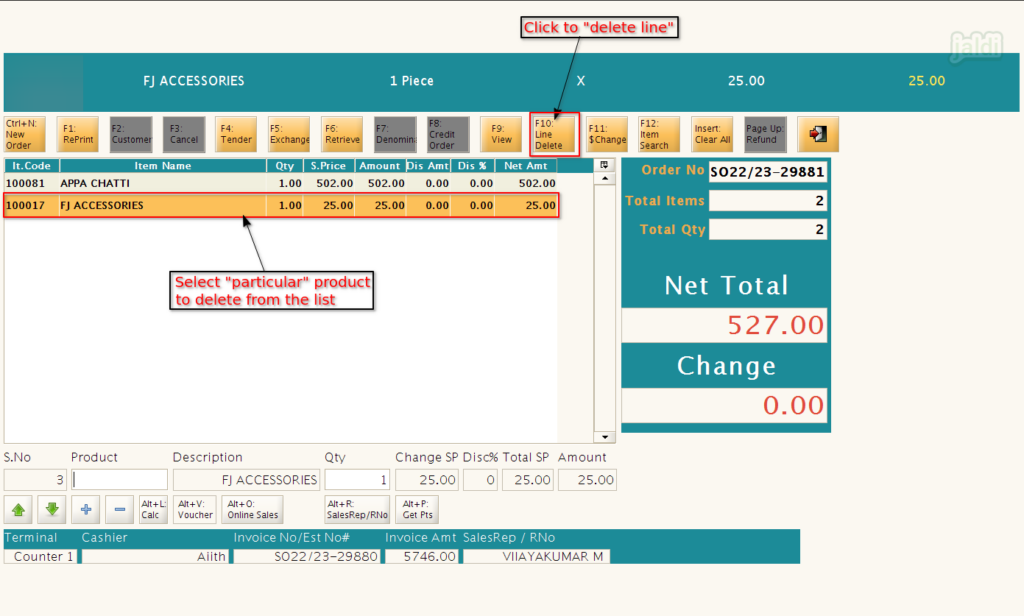
- Then confirm the line delete process by clicking on the green tick mark which is marked in below image.
How to clear all the loaded products from the POS screen ?
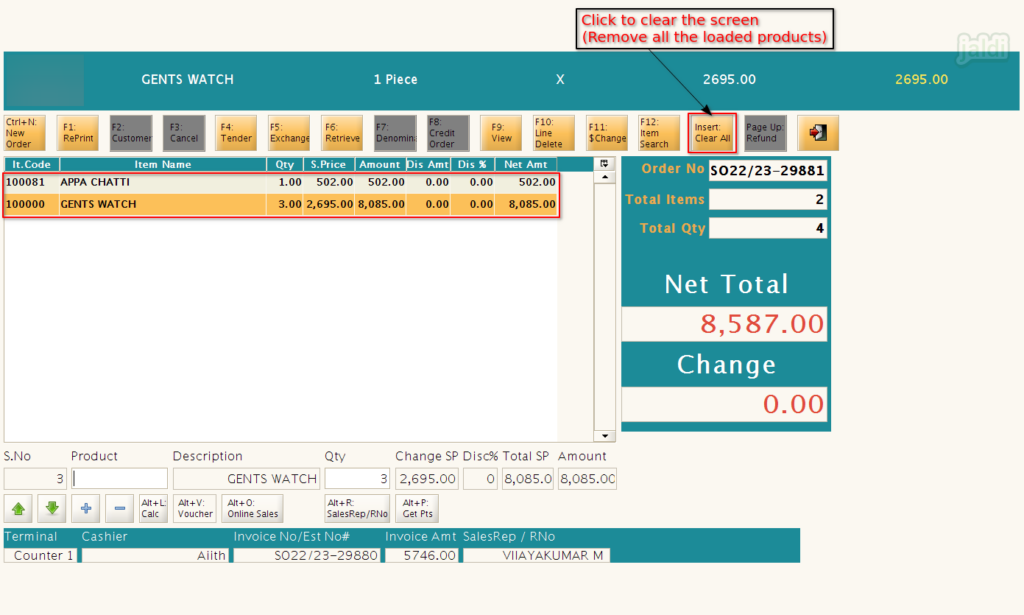
- After loading the products, if user wants to clear all product from the products list due to any reason.
- Then press “Insert – Clear All” function key which is marked in below image.
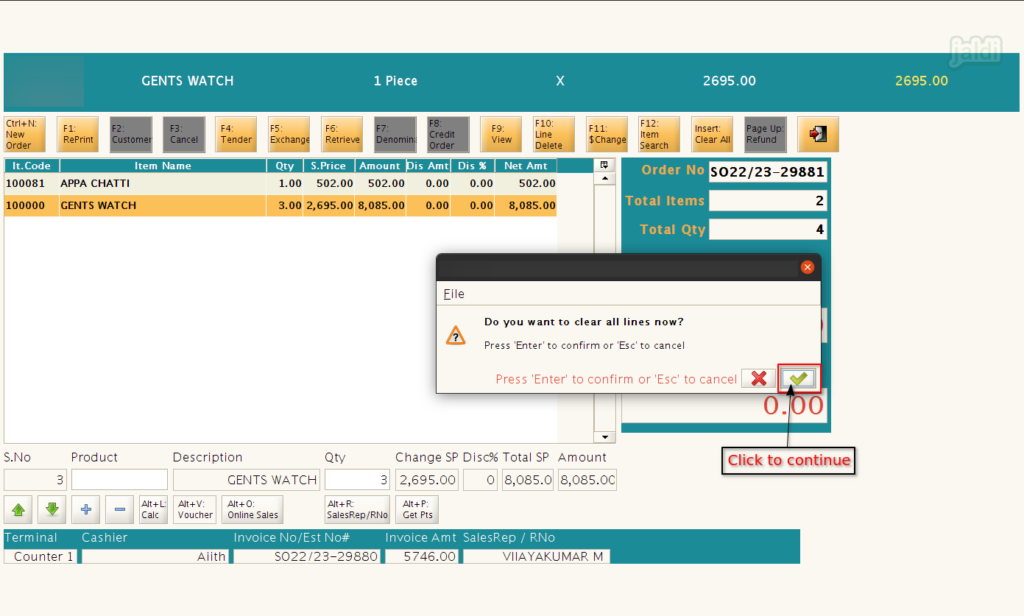
- Then confirm the clear all process by clicking on the green tick mark which is marked in below image.
How to hold and Retrieve held bills ?
- Scan and load the products in POS screenn.
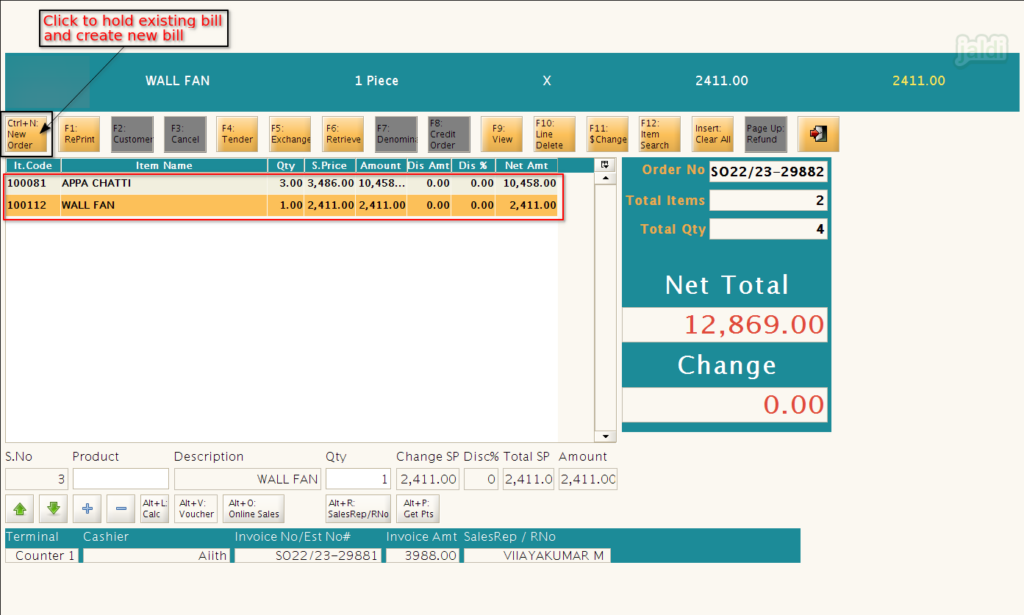
- If the current customer went to purchase new products or there is any other reason to hold the current bill, so that cashier can complete other customers bills, then press “Ctrl+N”.
- Then system will hold the loaded products and cashier can proceed other bills.
- To check the held bills, click on “F6 – Retrieve” which is marked in below image.
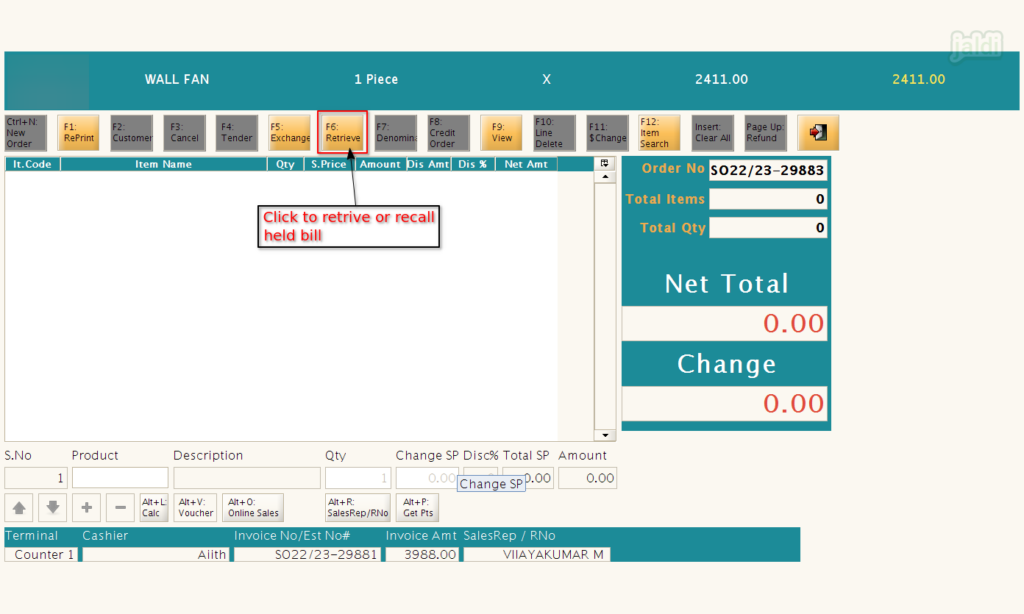
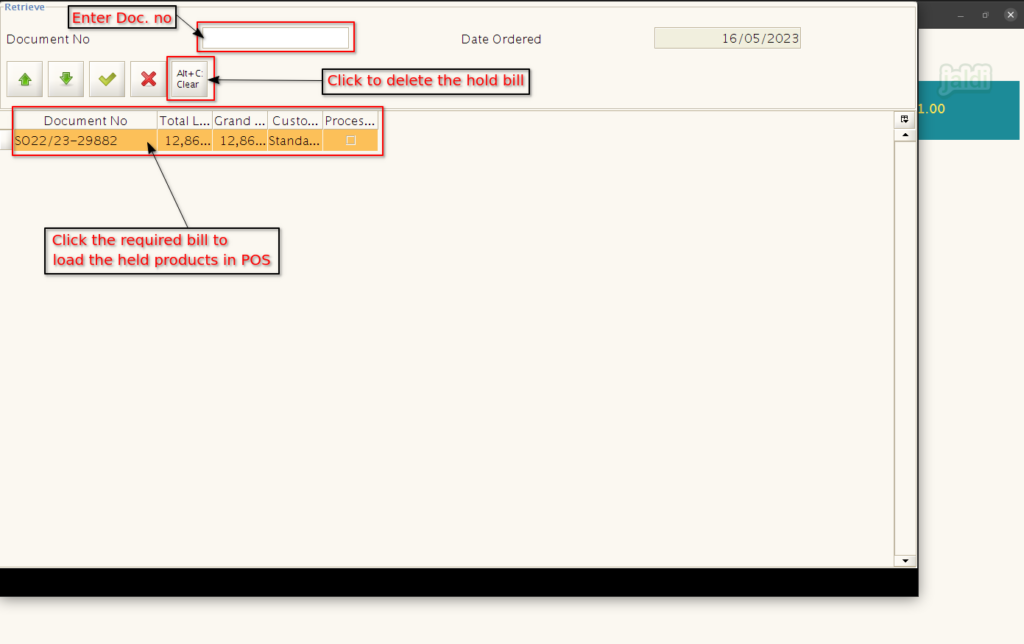
- In Retrieve screen, we can see list of held bills, we can also search the specific document number using the “Document No” field.
- Use “Alt+C – Clear” to clear the held bill from the application.
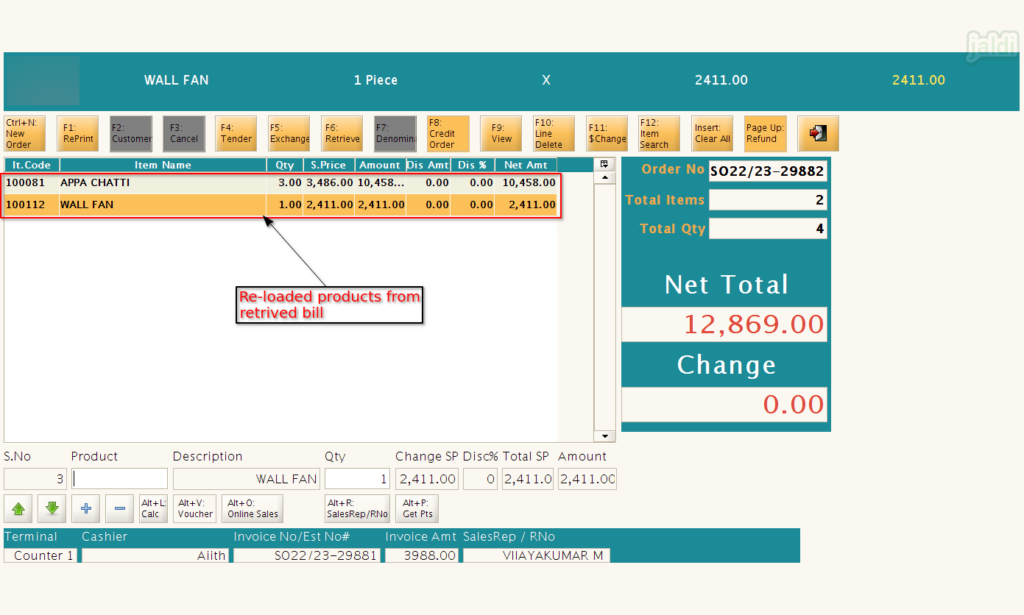
- After selecting the specific hold bill, then click on Enter or green tick mark to load the products from the held bill in POS screen.
- Then system will show the available products from the retrieved bill in POS screen like below shown image.
How to change the selling price of an items at POS ?
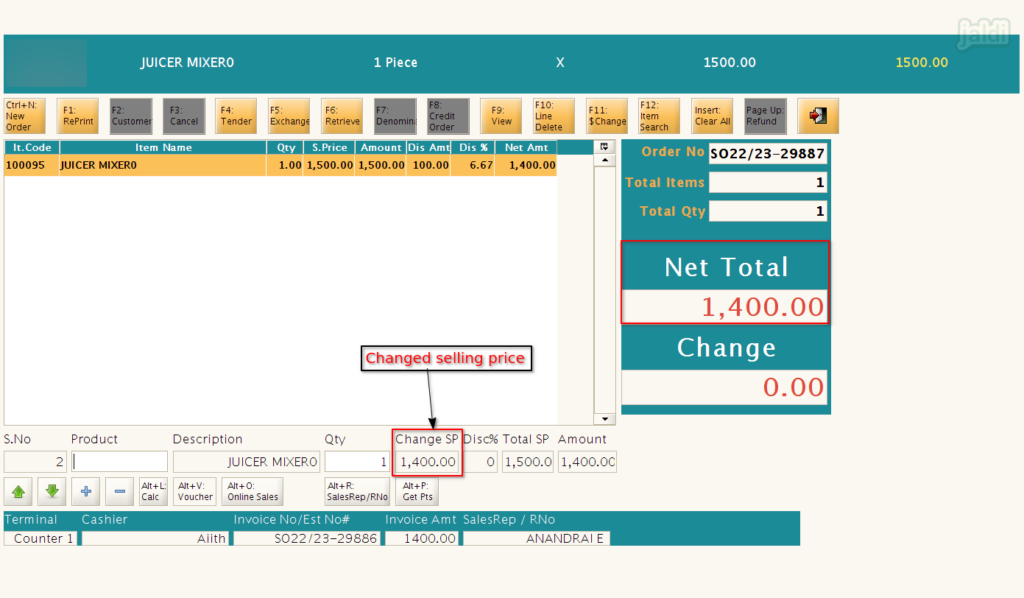
Sometimes, due to any reasons (wrong price, known person to owner) we needed to change the selling price of an item immediately at POS at that time we can use this feature called “$ change price”. Lets see in below how it has to be done.
- Load the customer purchase products in POS.
- Then press “F11 – $ Change” function key which is marked in below image.
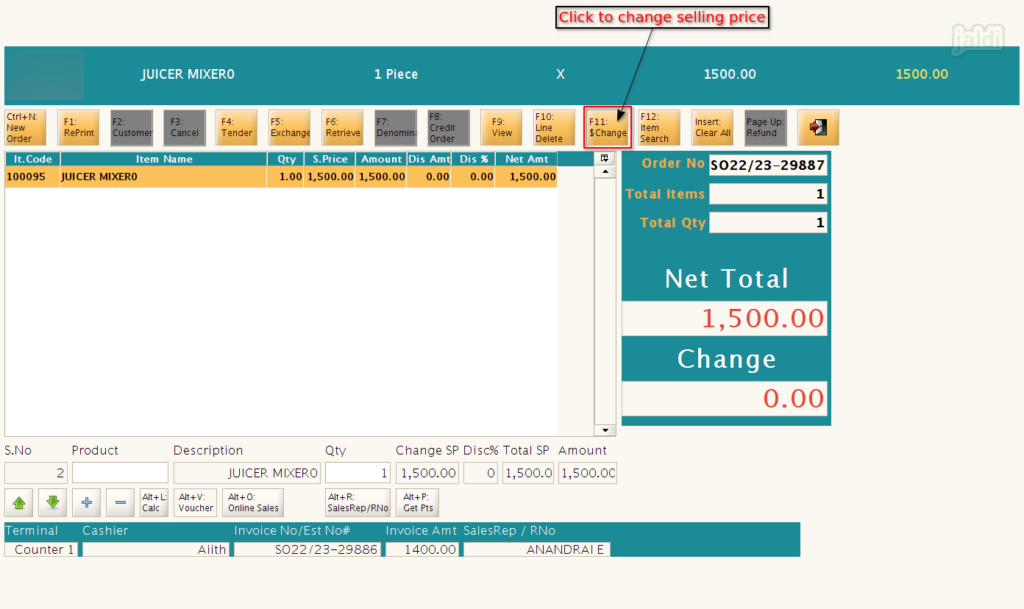
- Once the “F11” function key is pressed, the cursor will go to the “Change SP” field which is marked in below image.
- Also we can see “F11 – $ Change” function key is highlighted in red colour like shown in below image.
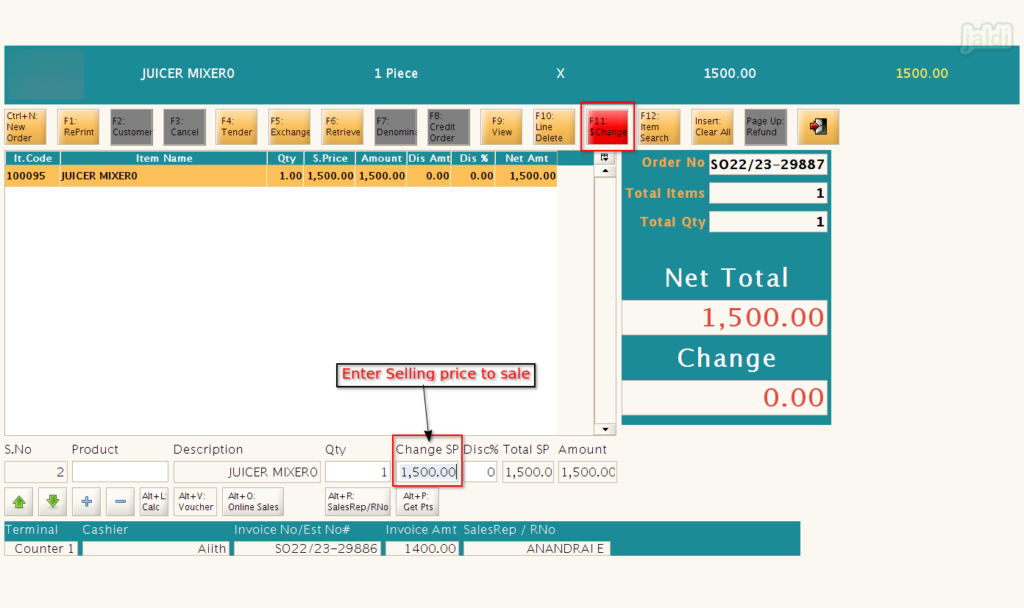
- Enter the required “Selling price” in change SP field and press Enter.
- Note :- Entered selling price should be less than or equal to MRP price and greater than or equal to landing cost of the selected products.
- Then you can see the Net total which will be calculated from the “Changed selling price” not from the actual selling price.
