Branch Product master in Jaldi Superstore POS
This is the screen which is used to add products for inventory transaction.
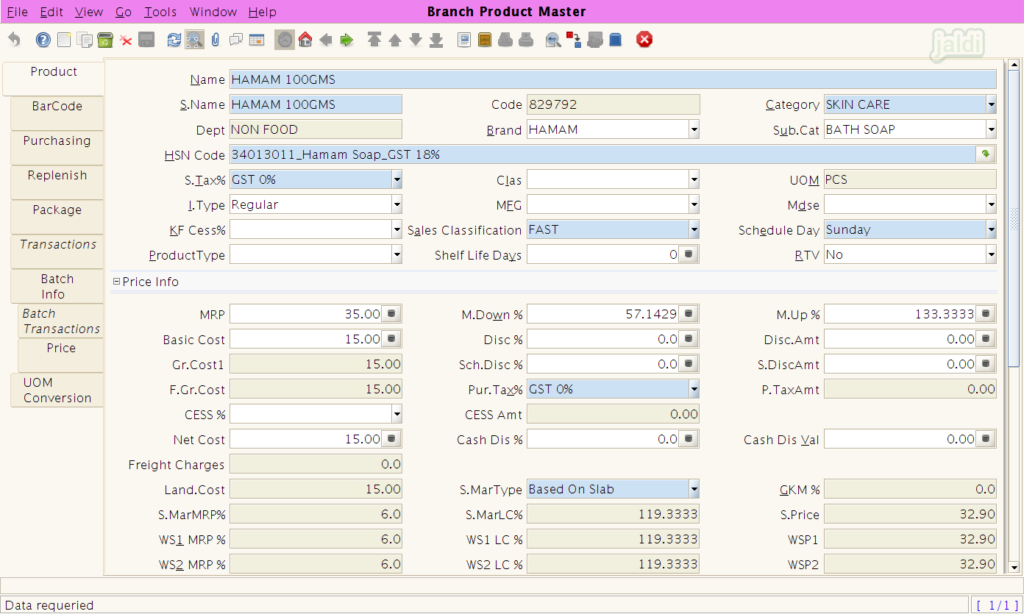
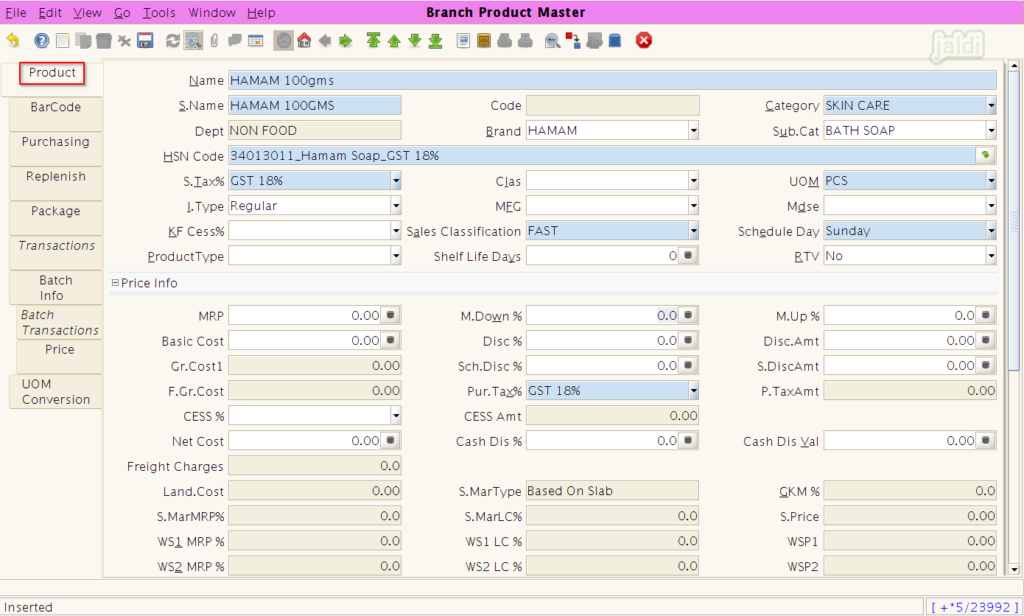
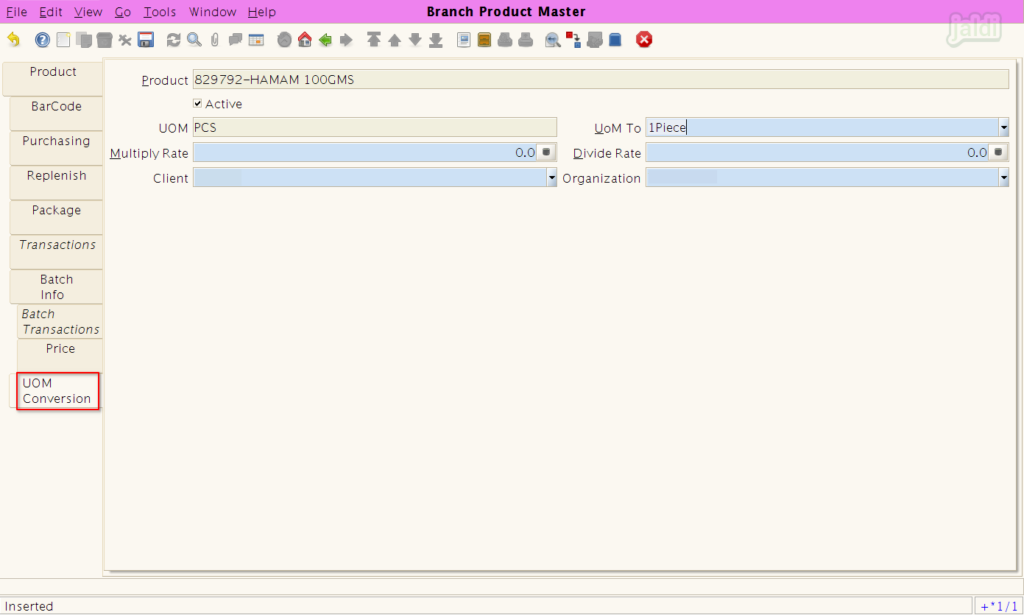
Let us examine a fictional scenario in that you should create a product in the branch product master called “Hamam 100gms.” To learn how to create a product, follow the steps below.
Add new item in master
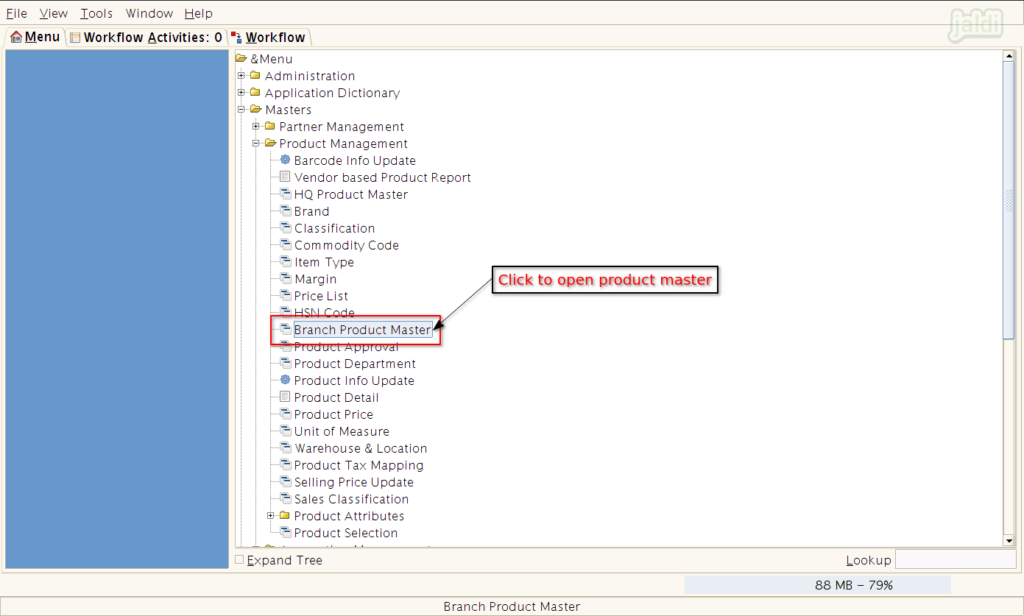
- Open “branch product master” and follow the below shown instructions.
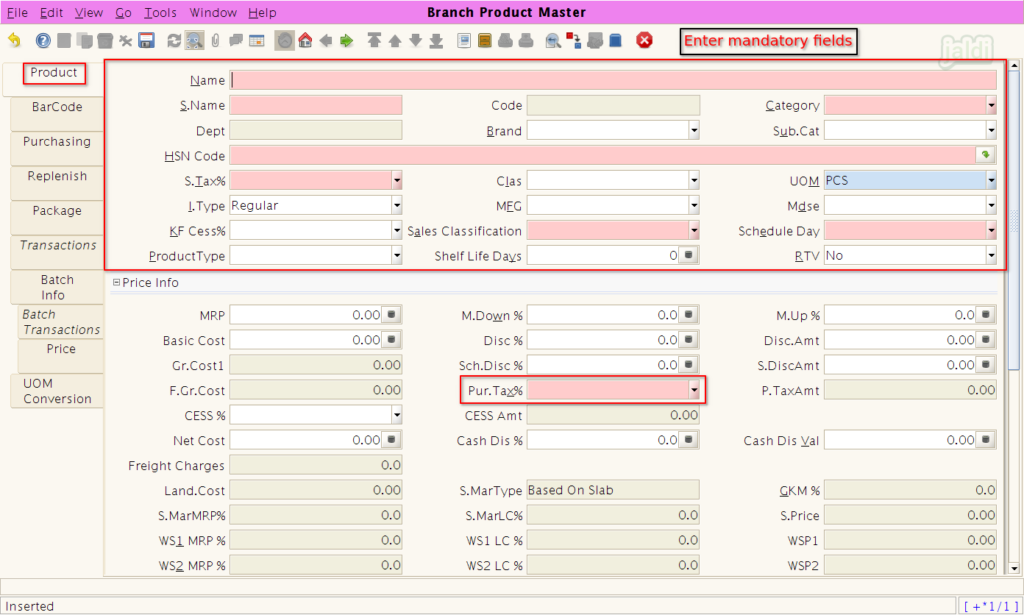
- Under Product tab, the field which are in “Red” colour are mandatory fields and other details are optional to fill (based on requirement of the item)
- Enter the required inputs in “Product” tab and press “Save”.
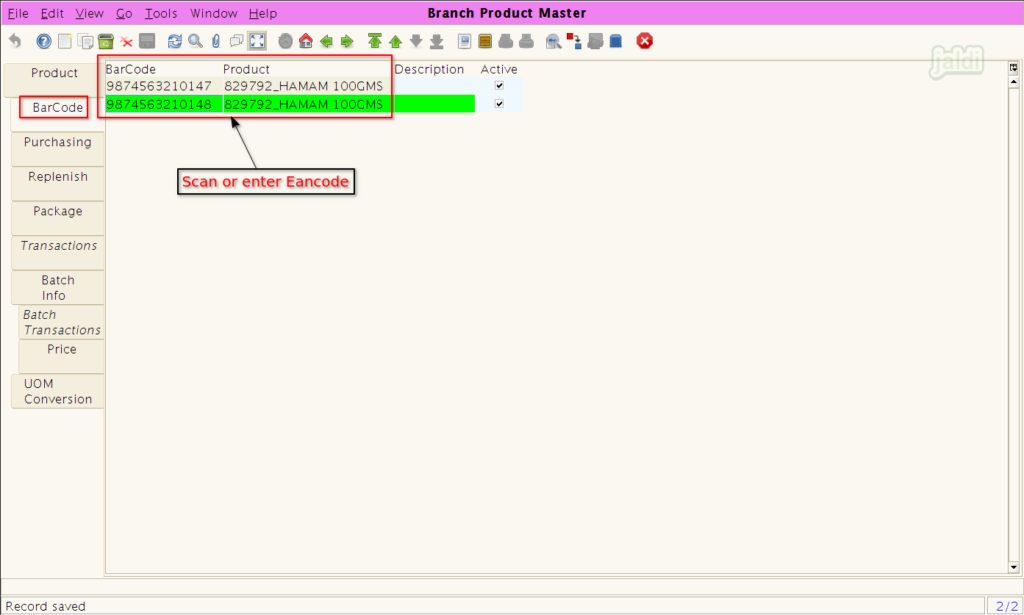
- Now move to Barcode tab, and in barcode field, scan or enter the EAN code for POS scanning.
- We can add multiple EAN code (barcode) for one specific product.
- Note : We cannot add same EAN code again for same or different product.
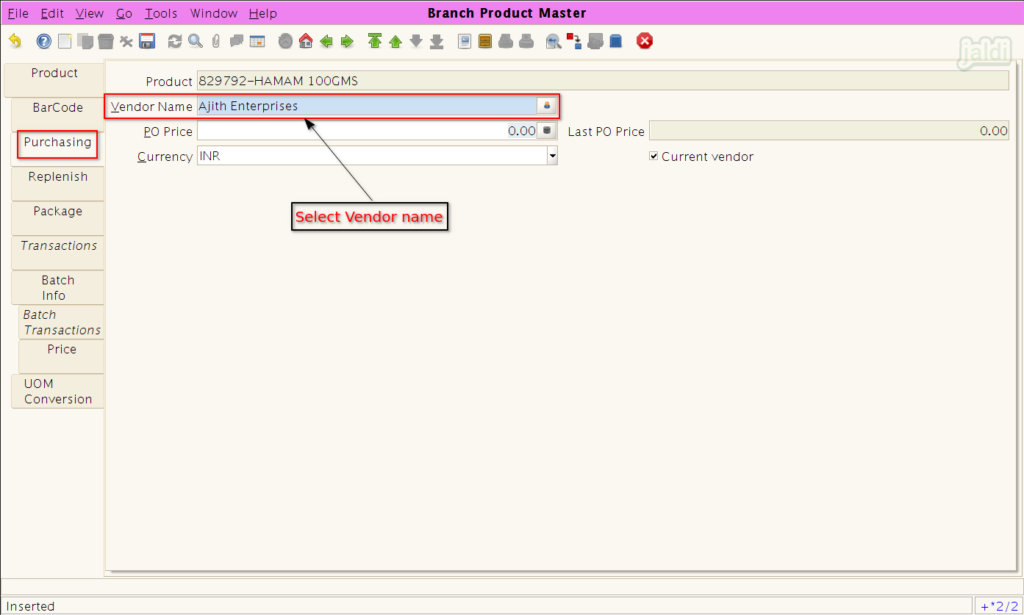
- Then go to Purchasing tab, Select required vendor name (from which vendor the creating product is going to get purchased) in vendor name field and click save.
- We can add multiple vendor name for one specific product.
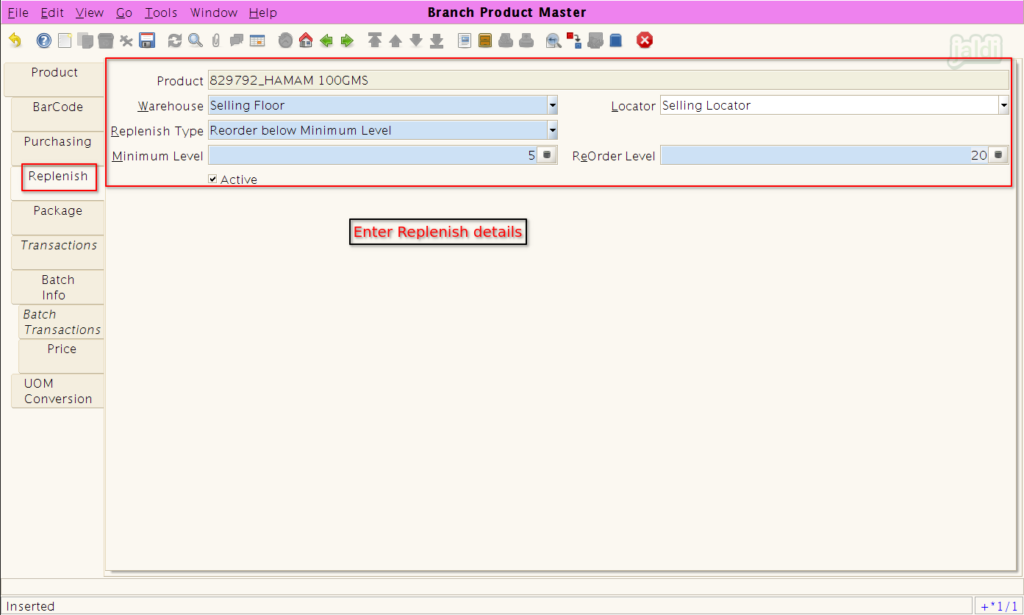
- Then move to Replenish tab, In this screen, select the replenish type (Reorder below minimum level).
- Also enter Minimum level and reorder level.
- Replenish data will be used to create a replenishment PO automatically without manual work based on current stock, minimum level stock and reorder level stock.
Uses of Other Branch product master tabs
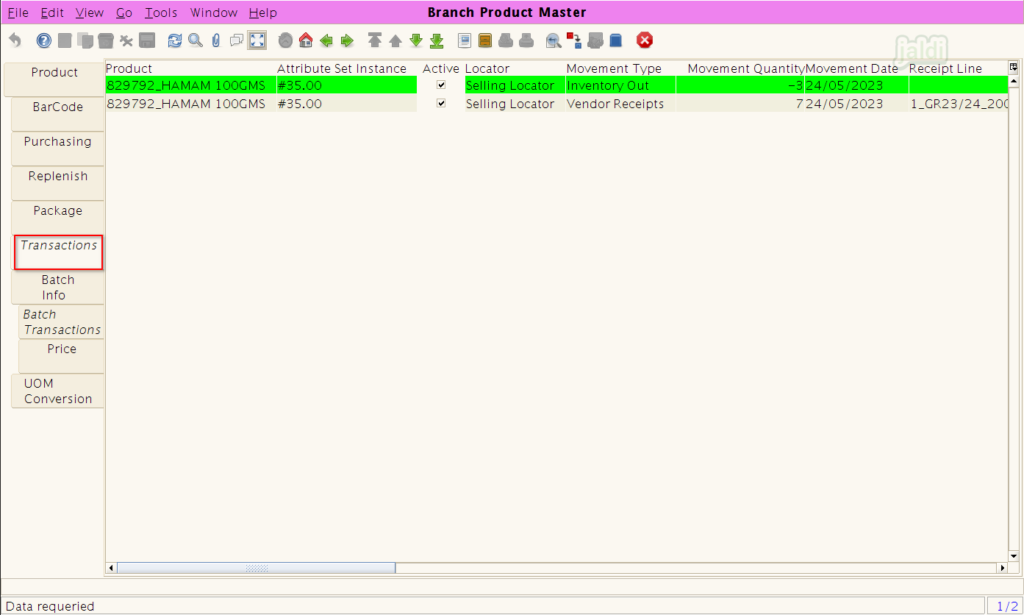
Transactions
- In Transaction screen, User can find the transaction entries details of each products. Check the below image for more clarity.
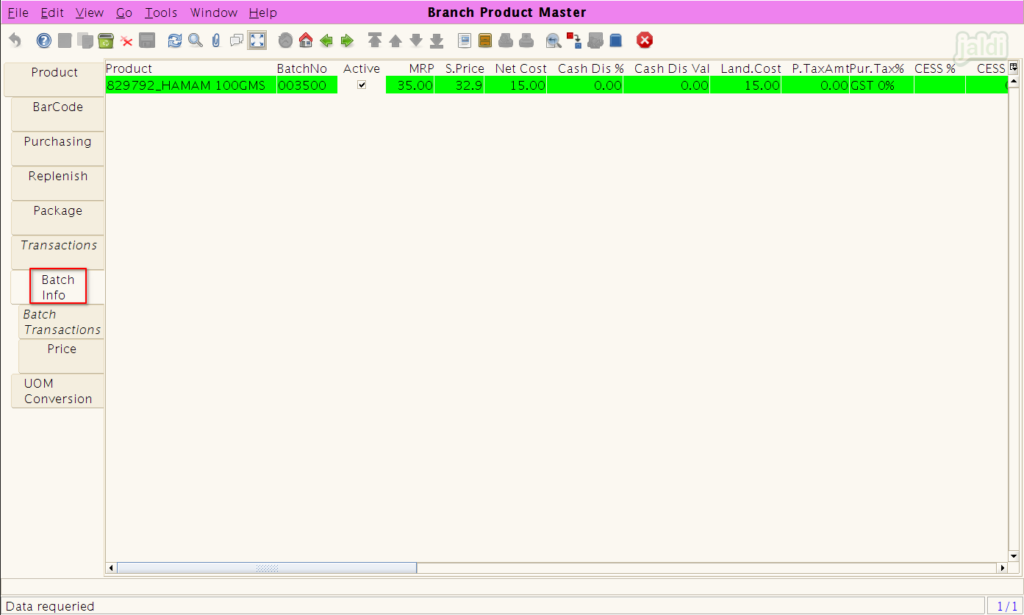
Batch Info
- In this tab, we can see the batch wise information based on GRN entries.
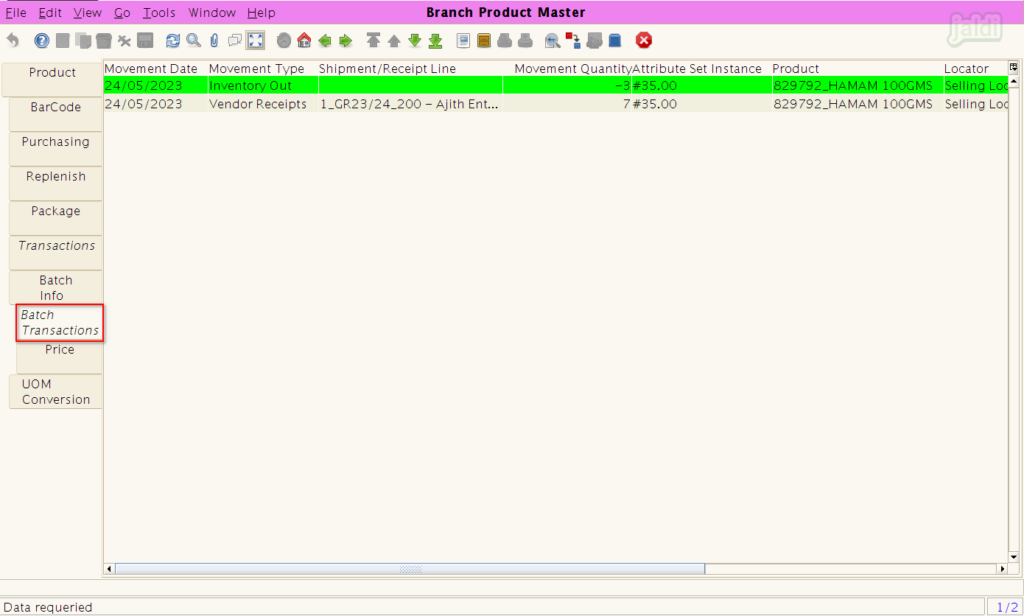
Batch Transactions
- In Batch Transaction screen, User can find the batch wise transaction entries details of each products. Check the below image for more clarity.
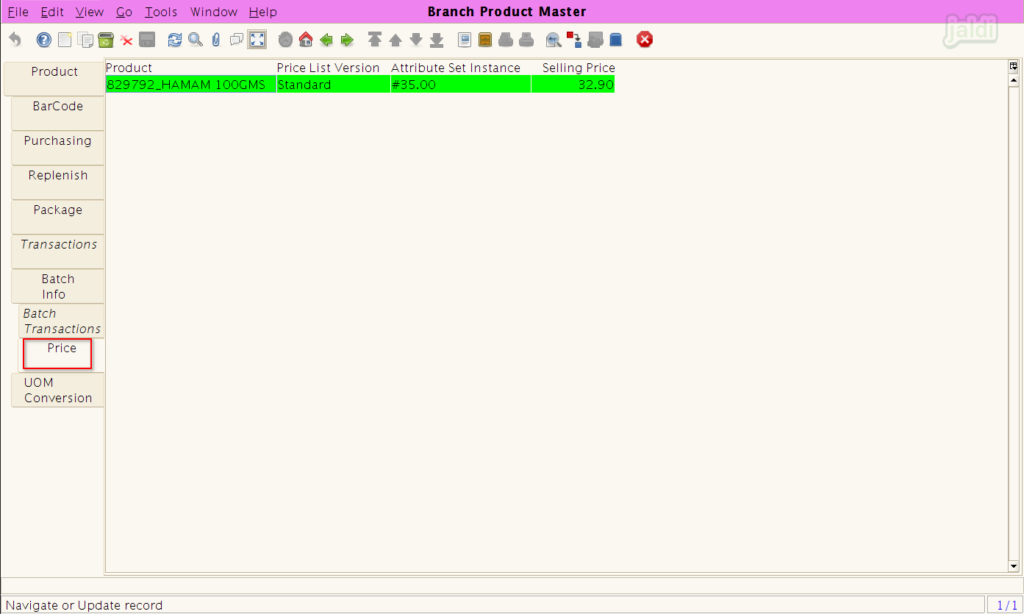
Price
- In price tab screen, user can find each and every prices of a single products (Multiple MRP and Multiple Selling price details).
How to edit product details ?
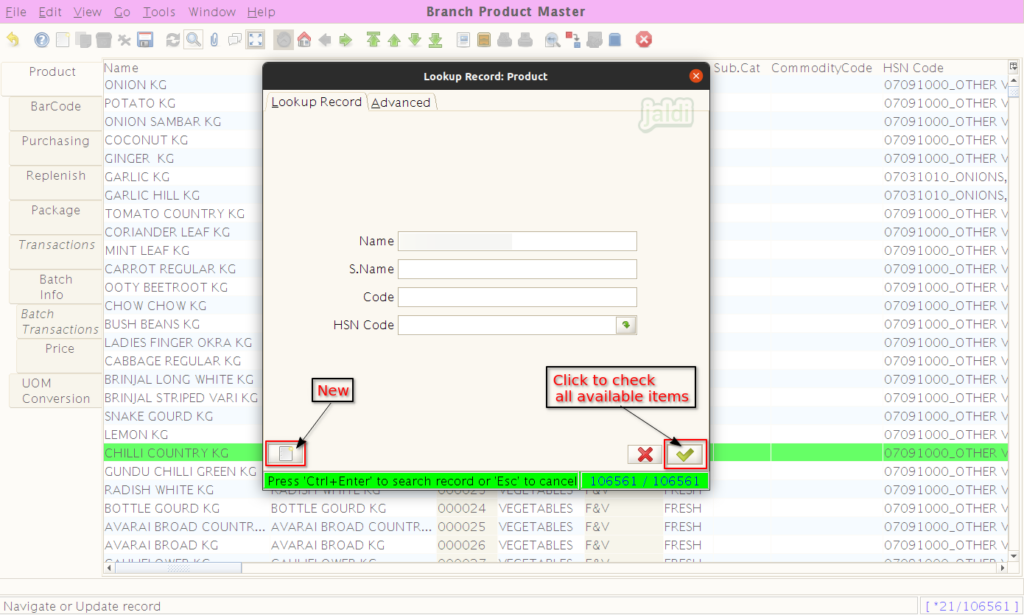
- Go to branch product master screen, Click on “Lookup / Search” function key.
- Then in Lookup record screen, enter data to be searched and start search like below shown image.
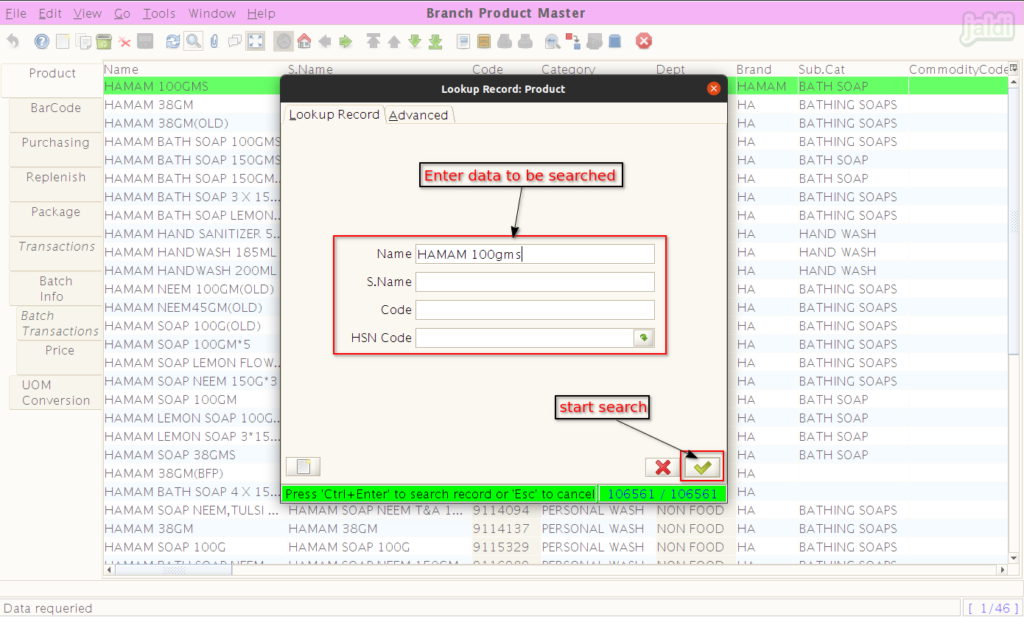
- Then open that specific product, update the product details and click “Save” function key to save the updated details.