Customer master in Jaldi Lifestyle POS
Customer master is the master screen where the business’s customers are created and maintained. Usually the new customers are created in POS billing screen and stored in customer master. So that during customer’s next purchase they will selected in POS billing screen.
But customers like Credit customer and B2B customers are mostly created by the authority person in a store in customer master not in POS billing screen by cashier.
How to create a new Customer ?
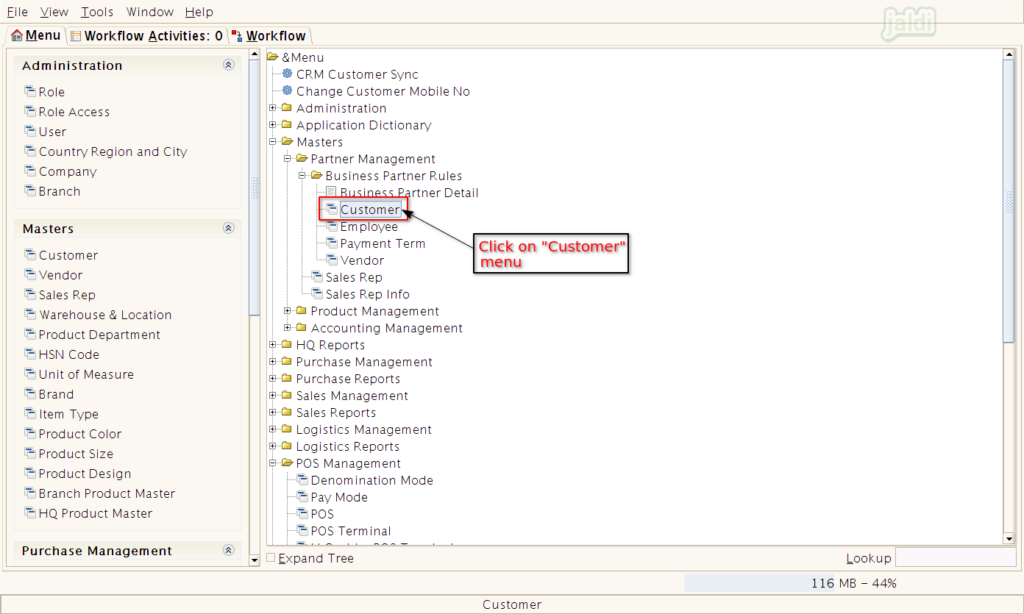
- Go to application path Masters > Partner Management > Business Partner Rules > Customer.
- Click on the “Customer” master menu which is marked in below image.
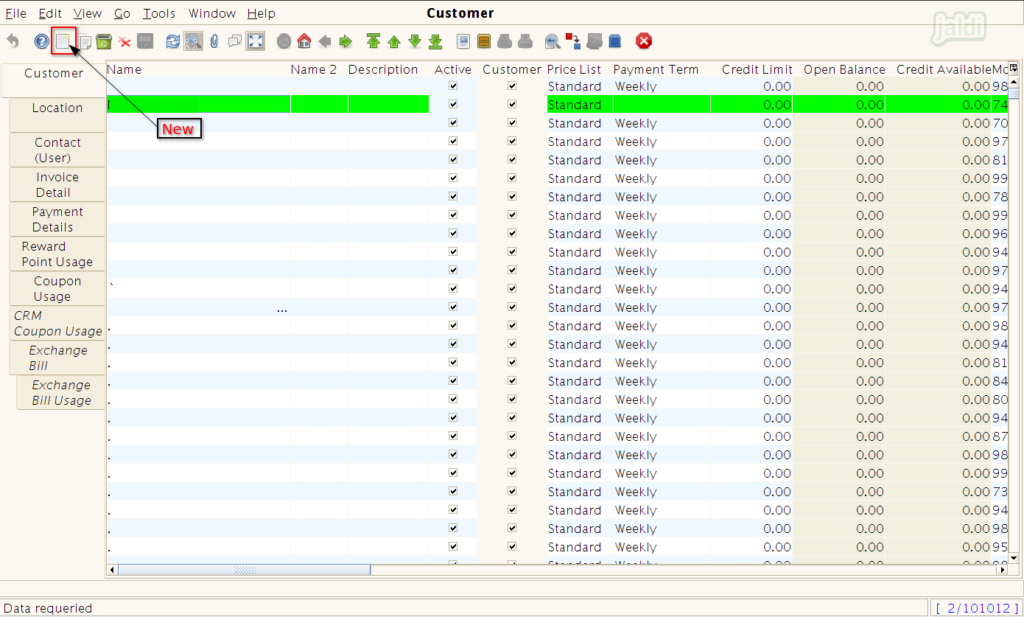
- In customer list screen, click on the “New” option which is marked in below image to create a new customer.
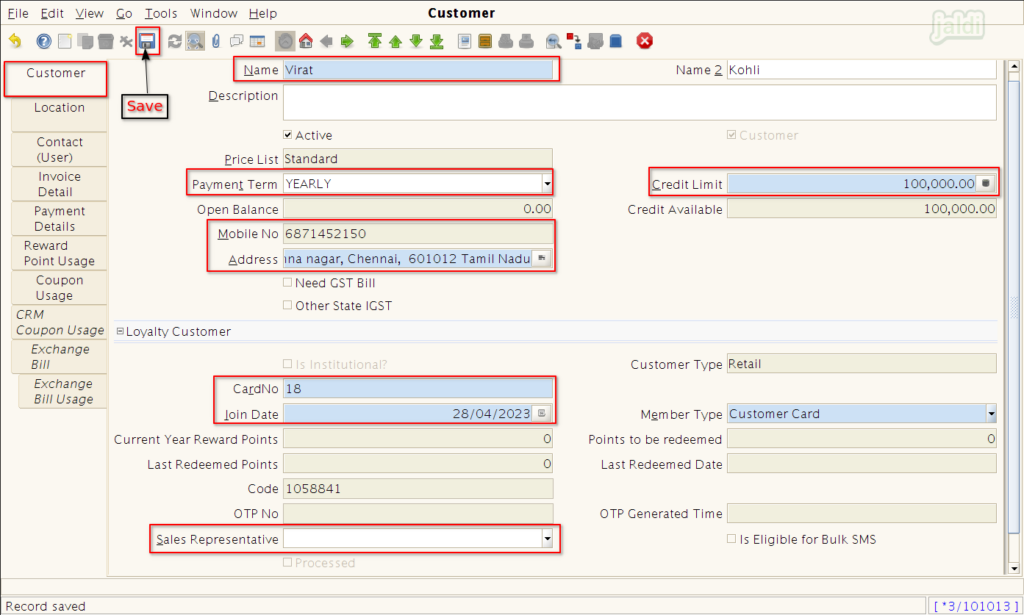
- Then in new customer creation screen, under customer tab enter the required details in following fields, ( Highlighted in red are mandatory fields)
- Name – Enter Customer name
- Payment term – Select the payment term (weekly, monthly and yearly)
- Credit limit – Enter Credit limit amount (if the customer is credit customer)
- Mobile No – Enter customer’s mobile number
- Address – Enter customer’s full address
- Card No – Enter the loyalty card number
- Join Date – Select the date of customer joined
- Sales Representative – Select Sales rep for customer
- To create a GST (B2B) customer, select the check box called “Need GST Bill” under field address. Once this selected, system will show the “GSTin No” input field to enter GST number of customer.
- If the customer is IGST customer, then select the check box called “Other State IGST”.
- If the creating customer is institution (is a company not a specific person), then select the check box called “Is Institutional”, if it is not selected, then existing customer will be a retail customer. For institutional customer loyalty points will be not added.
- Once the required details were filled in customer tab, click on the save option and move to Location tab.
- Under location tab, we can see the auto loaded address from the customer tab.
- We can also create multiple address for single customers ( like home address, office address)
- Select and remove the required check box which are marked in below image.
- Once the required details filled save the existing screen and move to next tab “Contact(user)”.
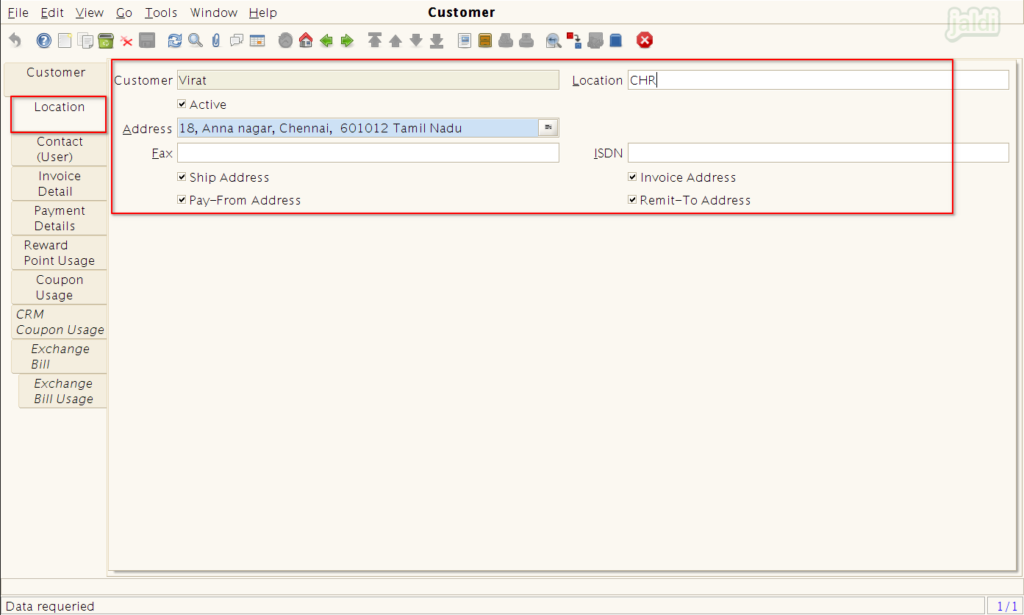
- In contact user tab, enter required details in available fields.
- Every field in this tab is optional to fill.
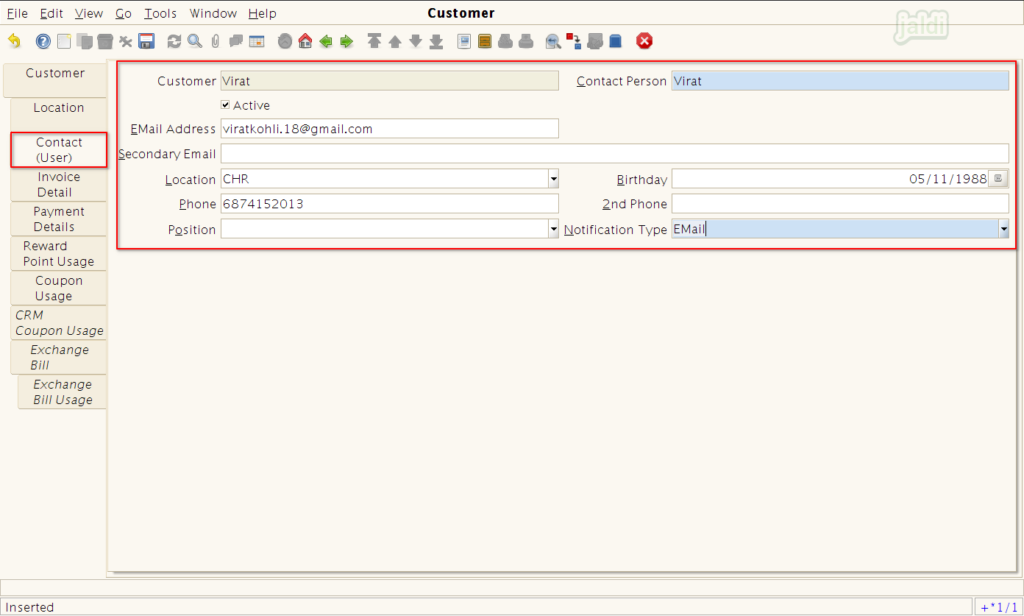
- Only first three tabs are is enough to create a new customer in customer master.
- Other tabs are like reports which will show the data after the sales transaction of a created new customer.
How to deactivate a customer ?
- Created customer will not be deleted due to audit reason.
- We can deactivate the customer.
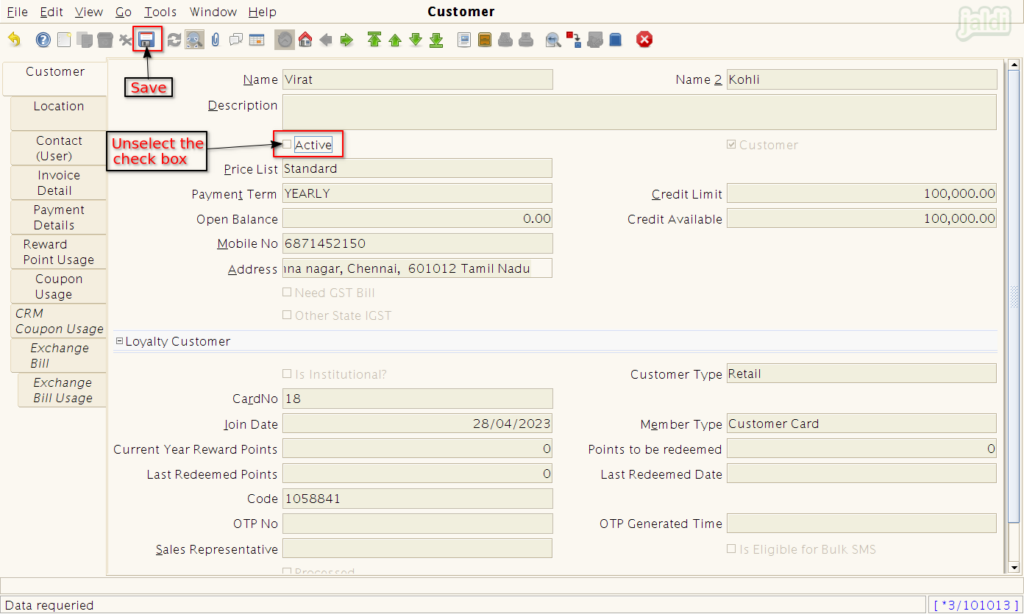
- To deactivate a customer, open the customer and under the customer tab, remove the selected check box of the field “Active” and save.
