GRN Entry in Jaldi Superstore POS
GRN entry screen is the menu used to enter the delivered product details of a purchase document from the vendor or supplier. If we purchasing the goods from vendor, They will provide us a invoice document which will consist the received products, received qty, purchase cost, MRP of each product, GST rates, HSN and etc. Once the grn user complete the GRN entry, the stock of entered items will be increased.
Creating Direct GRN
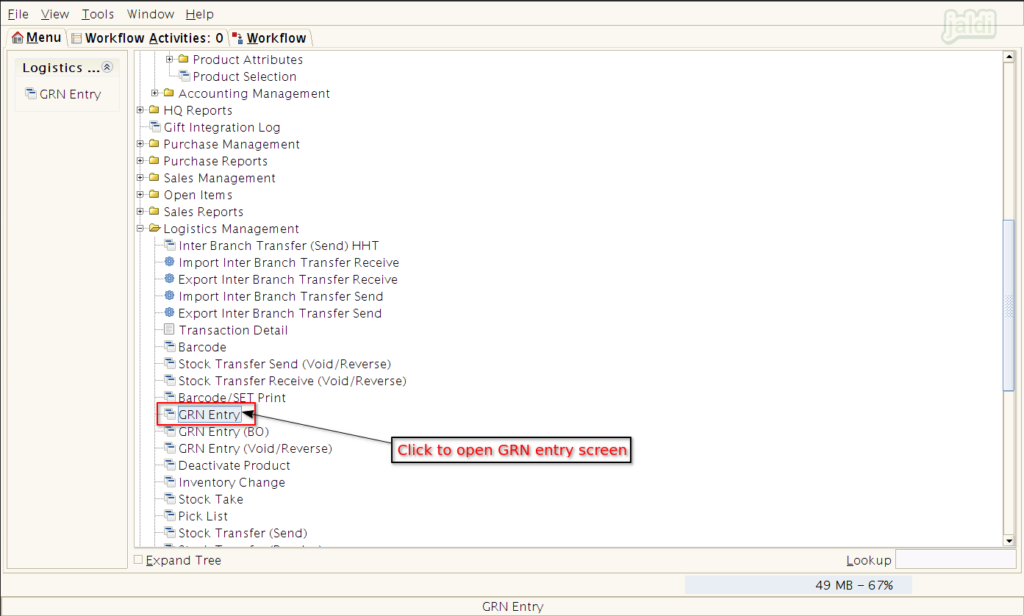
- Open ‘GRN-entry’ screen to create a new one.
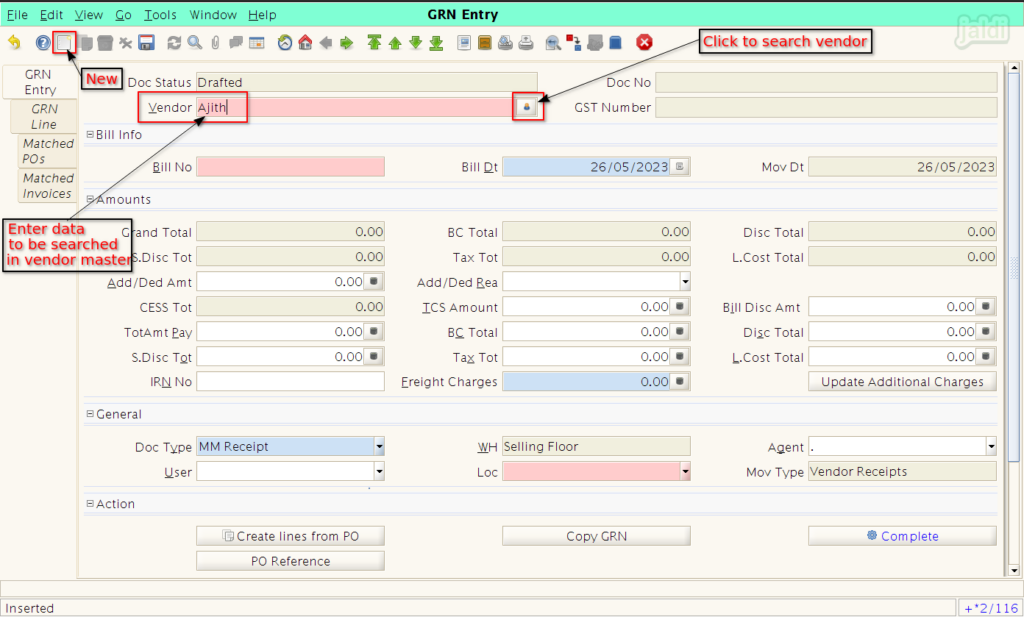
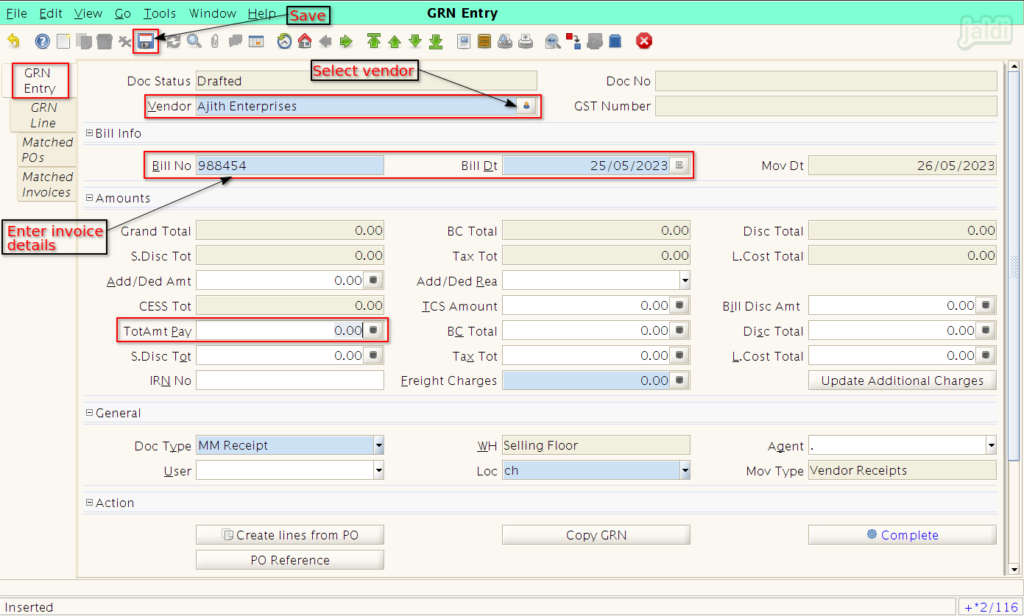
- Click on “New” function key and select vendor name in respective field.
- If the invoice vendor is not in the vendor list, right click on vendor field and select “Zoom” option and move to vendor master screen, in vendor master screen, we can create that new vendor details. To know more about vendor creation, click on this link – https://jaldi.store/vendor-master-in-jaldi-superstore-pos/.
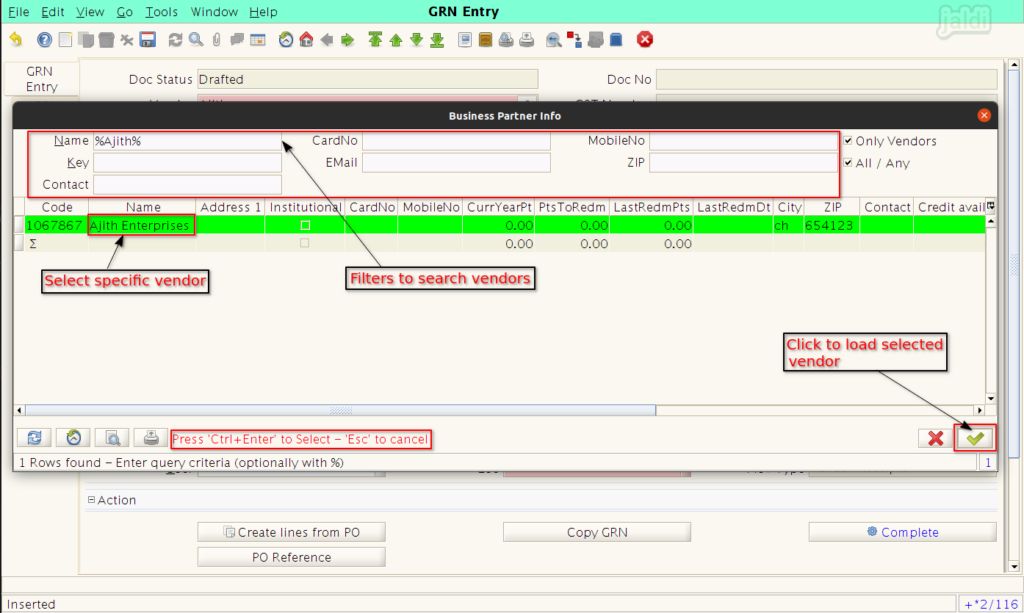
- In vendor search screen, you can find the filters like Name, Contact, email, mobile number etc enter the specific values and load specific vendor.
- After selecting the vendor, enter the following details
- Bill No – Invoice no
- Bill Dt – Invoice date
- TotAmt Pay – Invoice amount
- Then click on save to save the details in GRN entry tab.
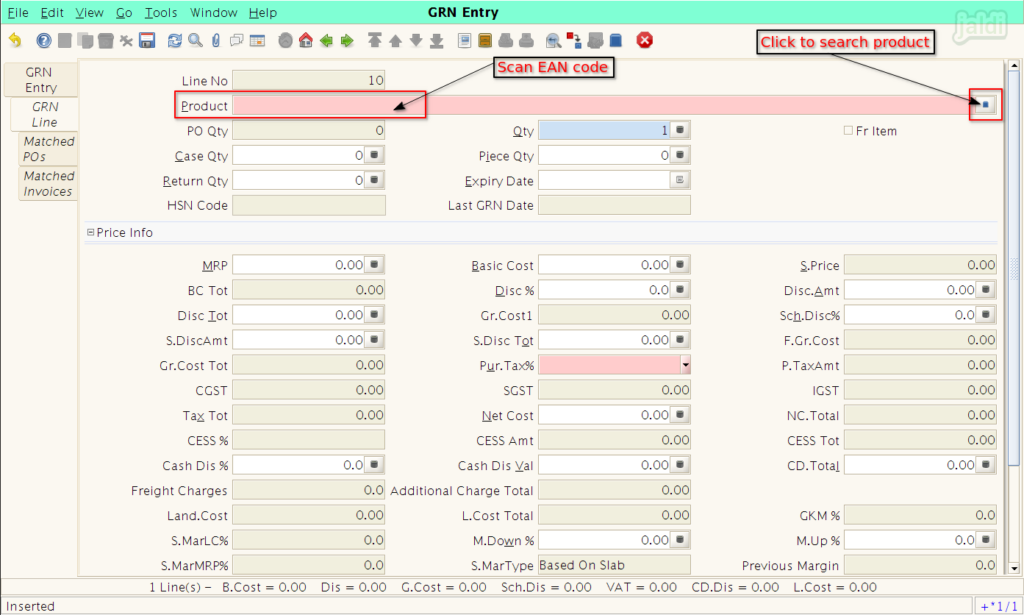
- Then move to GRN line tab and click on new function key.
- To load the purchase products, scan EAN code of an items in product input field or click on the product search symbol.
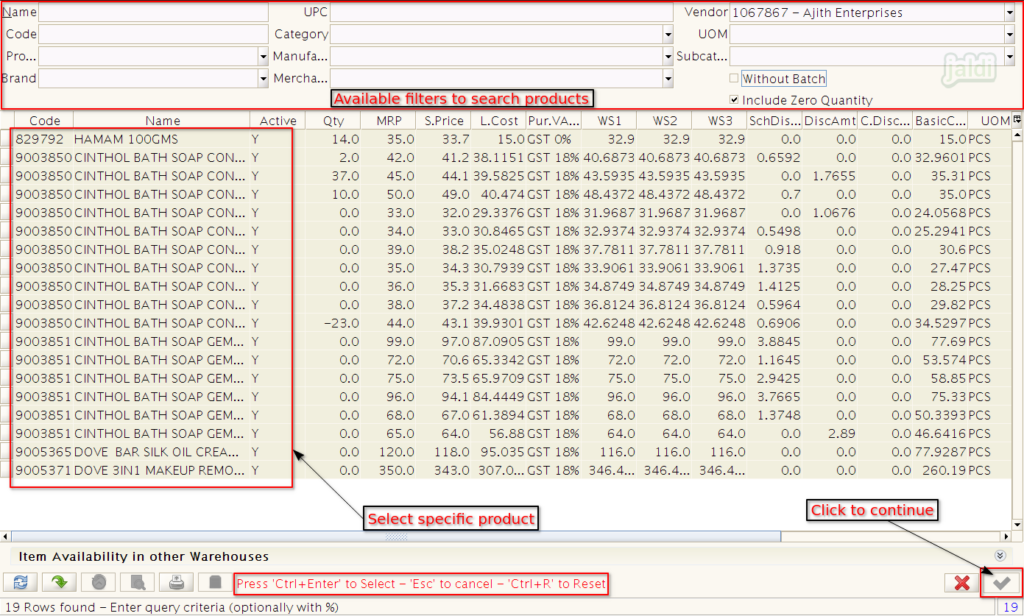
- In product info screen, You can find multiple filters (marked in below image) to search particular products.
- The list of products will be shown after the search and then click on “green tick” to load the selected product.
- If the products is not in master, right click on product field and select “Zoom” option. It will lead you to “Branch product master”.
- There we can create the new product. To know more about product creation click on this link – https://jaldi.store/branch-product-master-in-jaldi-superstore-pos/.
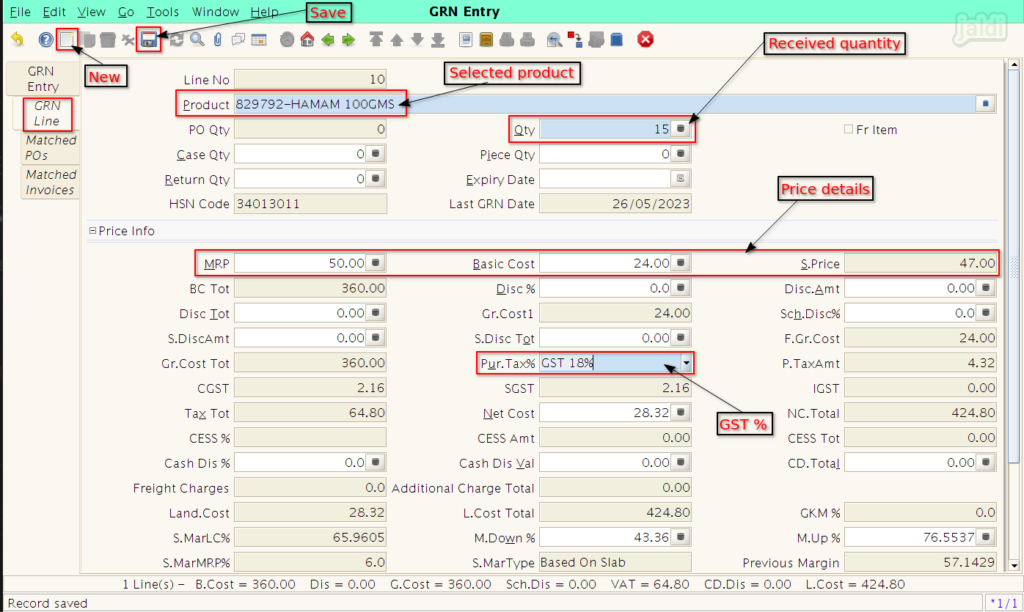
- Once the specific product is selected, enter the following details,
- Qty – Product received qty
- MRP
- Basic cost – Purchase cost (without GST rate)
- S.price – Auto loaded from MRP, cost and margin or we can enter manually (below MRP and above Net cost).
- Pur.Tax% – Select Purchase tax %.
- Disc % and Disc amt – Product line discount in percentage or in amount.
- We can also enter the other available input data based on the requirements and invoice.
- Once the required details were filled, click on save to save the GRN line of an single product.
- In same way, click and new and start adding multiple products under the GRN line and once all the invoice product is saved in GRN line then move to GRN entry tab.
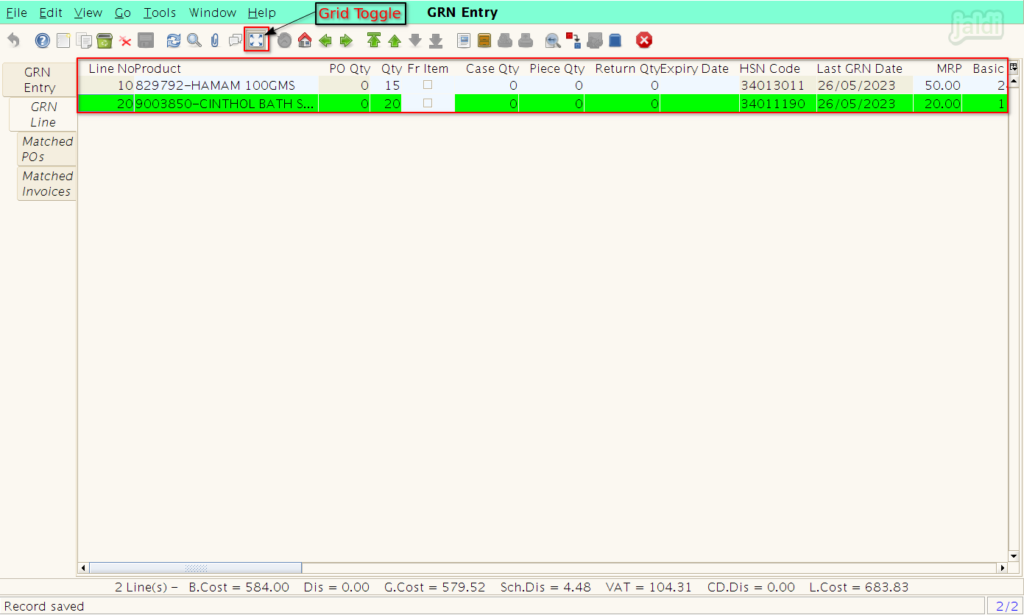
- We can also enter the products in list view, to that, click on grid toggle to go from detail view too list view.
- There you can find the added products in list view like below shown image.
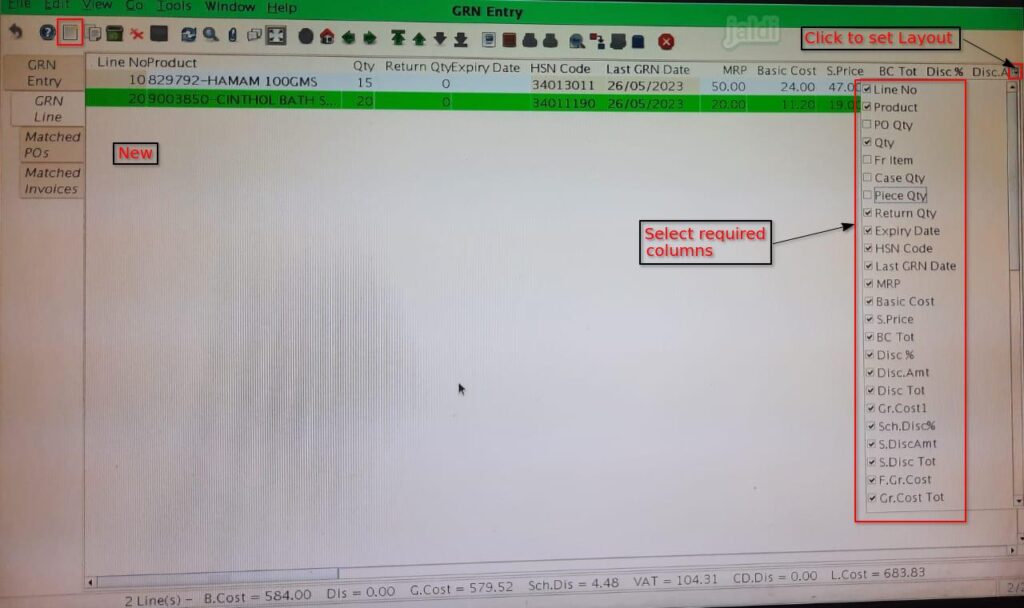
- If you want to remove unwanted columns, click on “Layout” option.
- Then deselect the columns you do not want to see in screen.
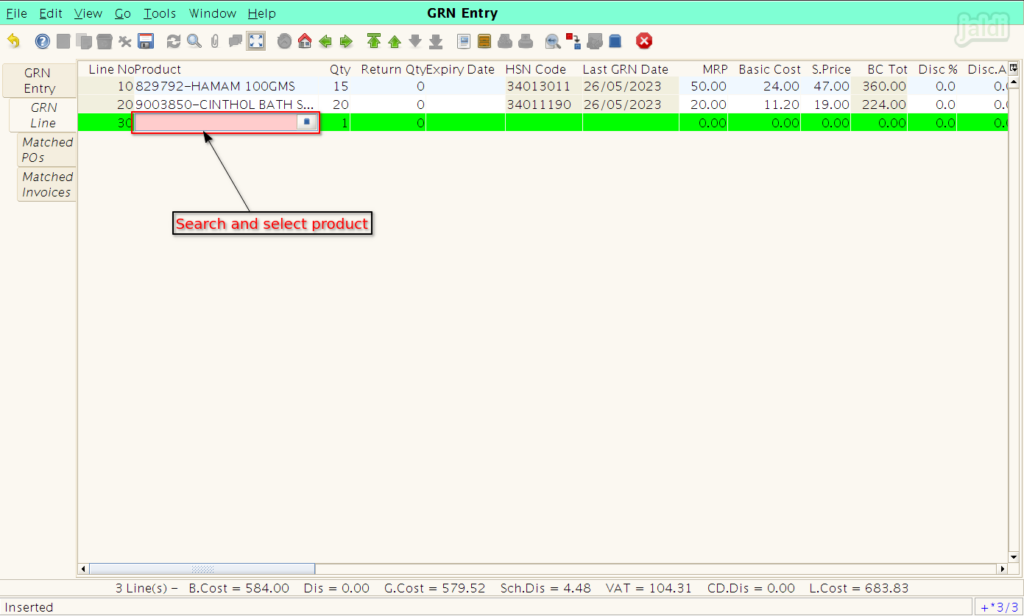
- Once the columns are enabled, click new to add new products in a row.
- In product column, scan EAN code to load product or search and select the required products.
- Once product selected, enter Qty, MRP, Basic cost and selling price and other details like below shown image.
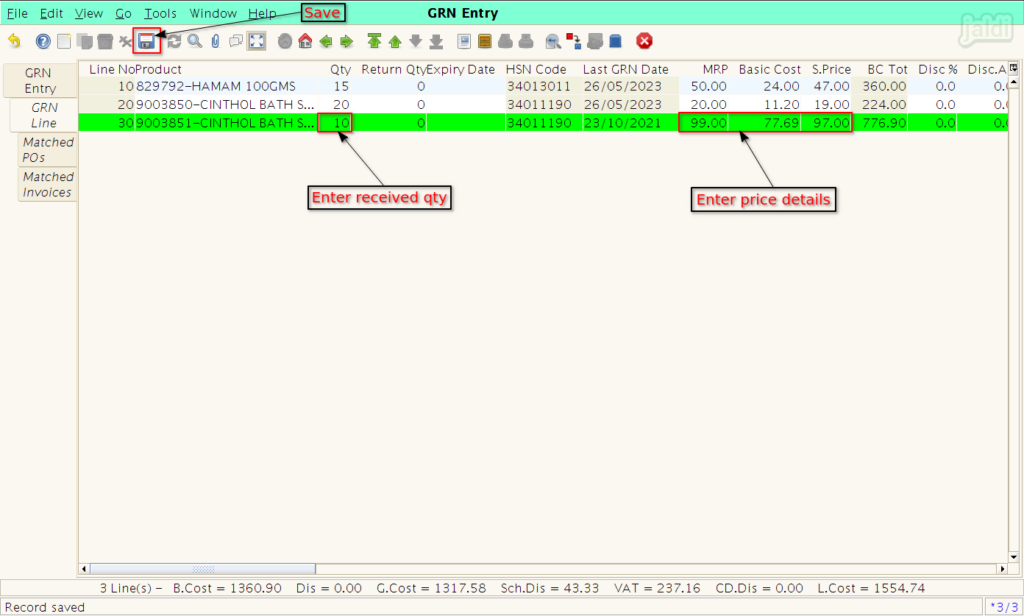
- After completing the product entries, go back to GRN entry tab.
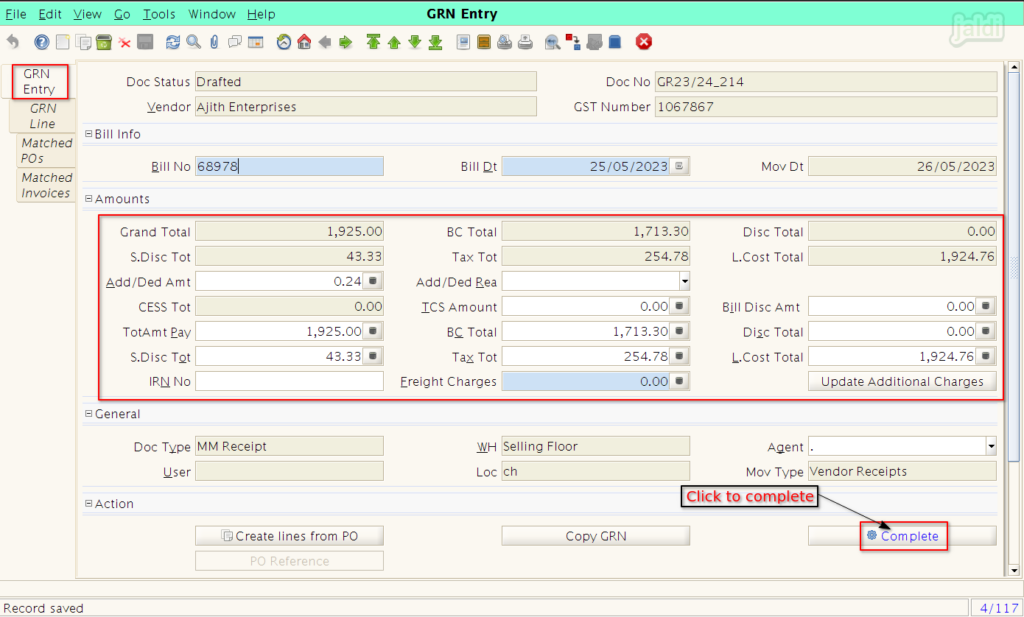
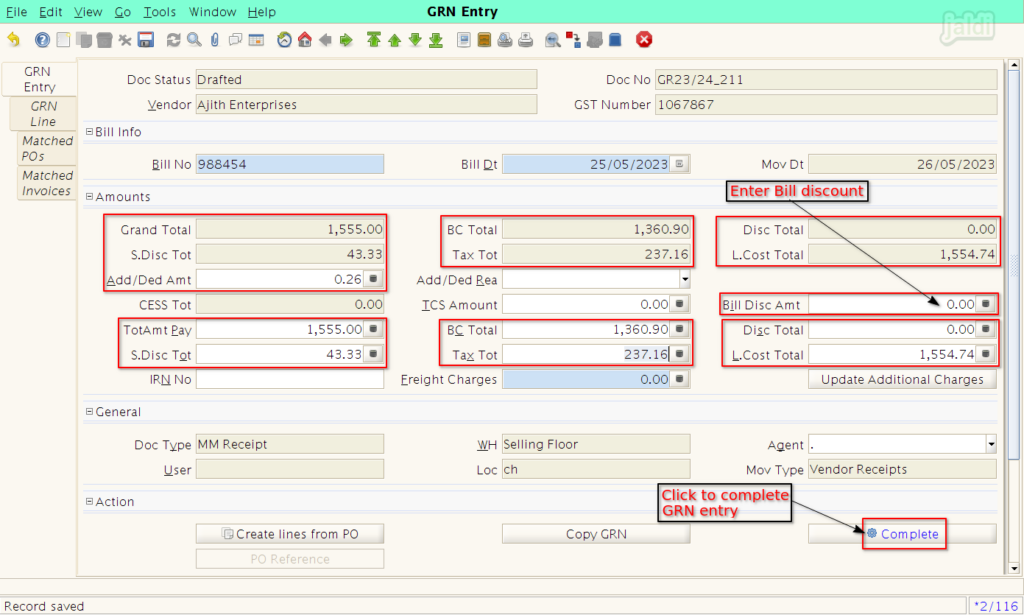
- Update the manual fields like TotAmt Pay, S.Disc Tot, BC total, Tax total, disc total and landing cost total. (Auto loaded value should equal to manually entered value in same name field)
- Finally complete the document using complete.
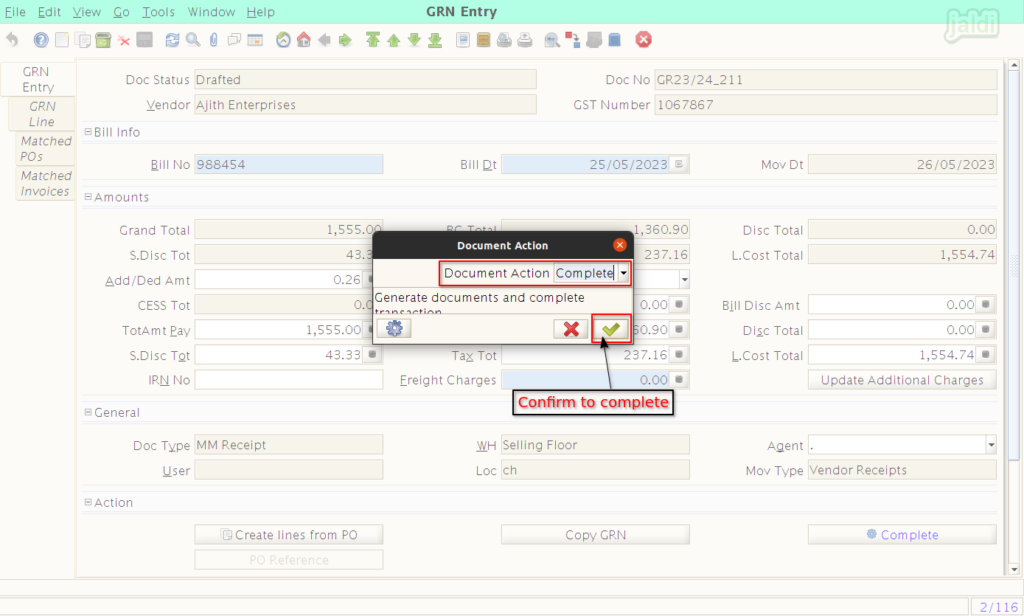
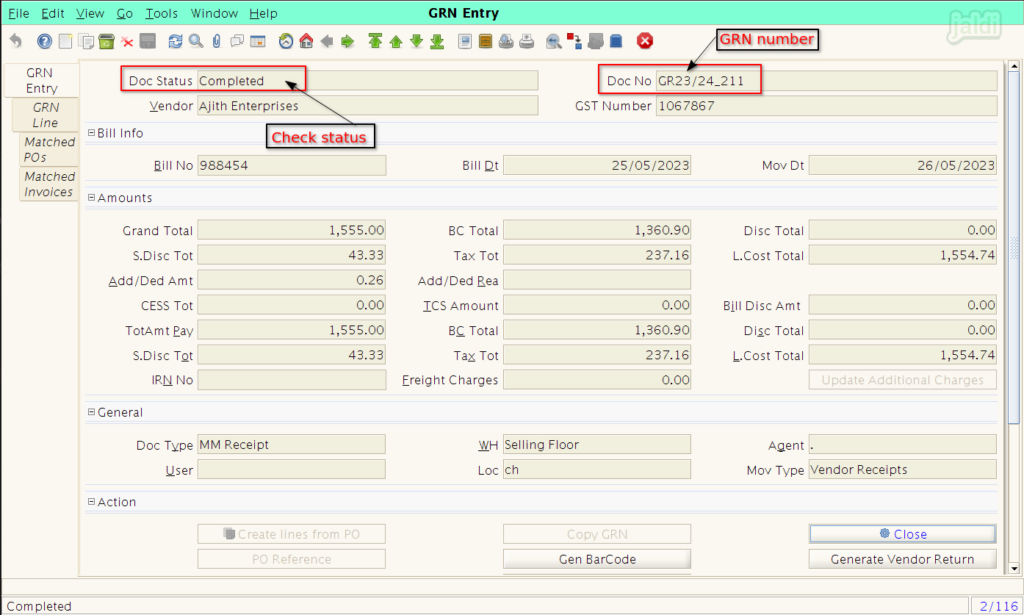
- Once complete process is done, you can see Doc status as completed and also note down the GRN number from Doc No.
How to Generate Barcode labels after GRN entries ?
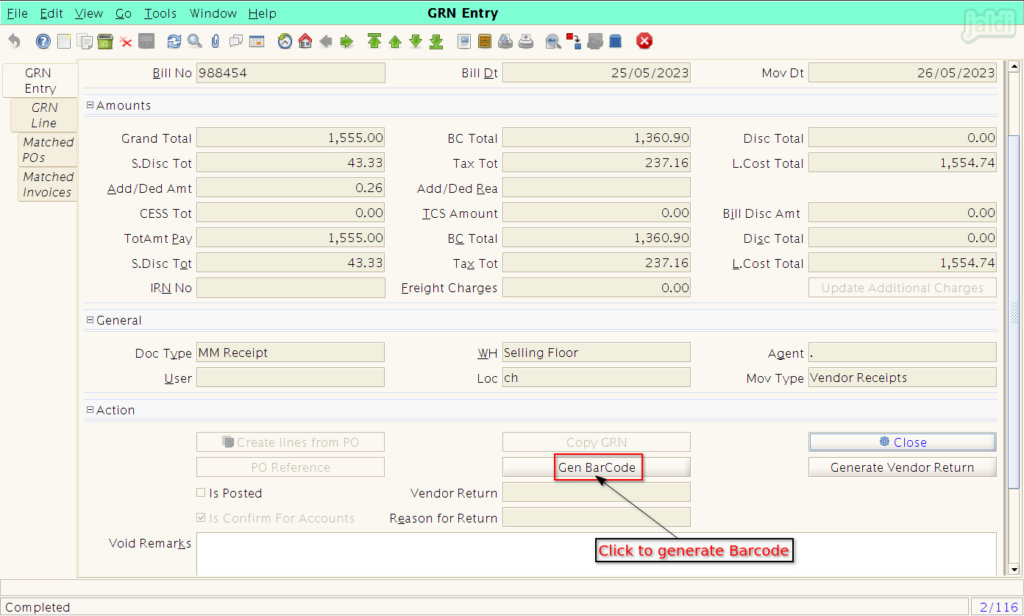
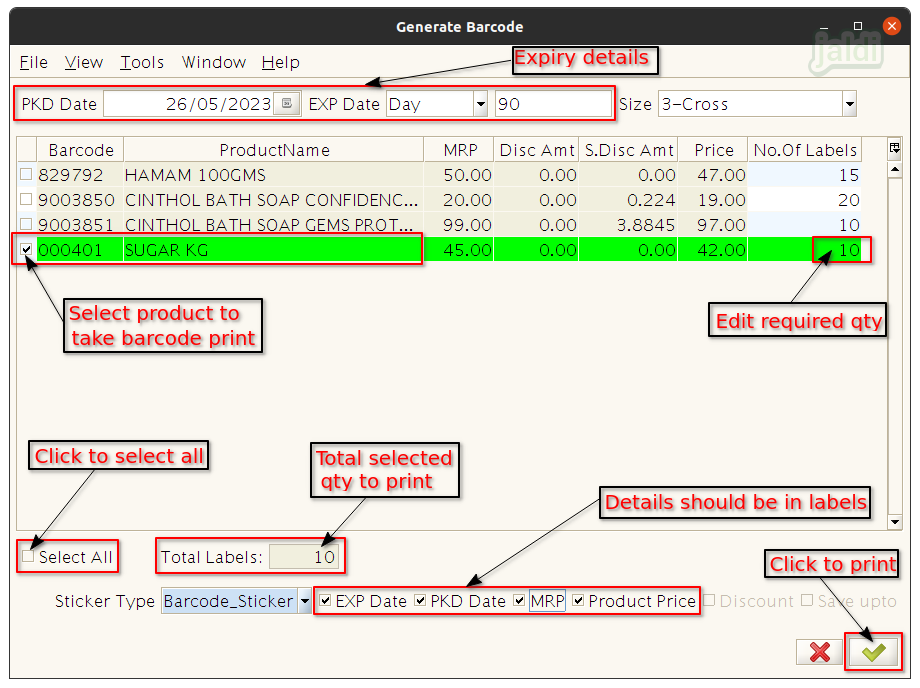
- Press “Gen-Barcode” to take the barcode print.
- Here we can see all the GRN products with price and qty details.
- Select required products or select all products, you can edit and change the No of labels.
- Enter following details for Expiry management
- PKD date – packed date
- Exp date – Expiry date (day or month) and enter No (day or month).
- In below we can see the check box for Exp date, PKD date, MRP and product price. Select and deselect based on barcode print requirements.
- Once each details were filled and selected, then click “green tick” to take the label print.
How to void completed GRN entry ?
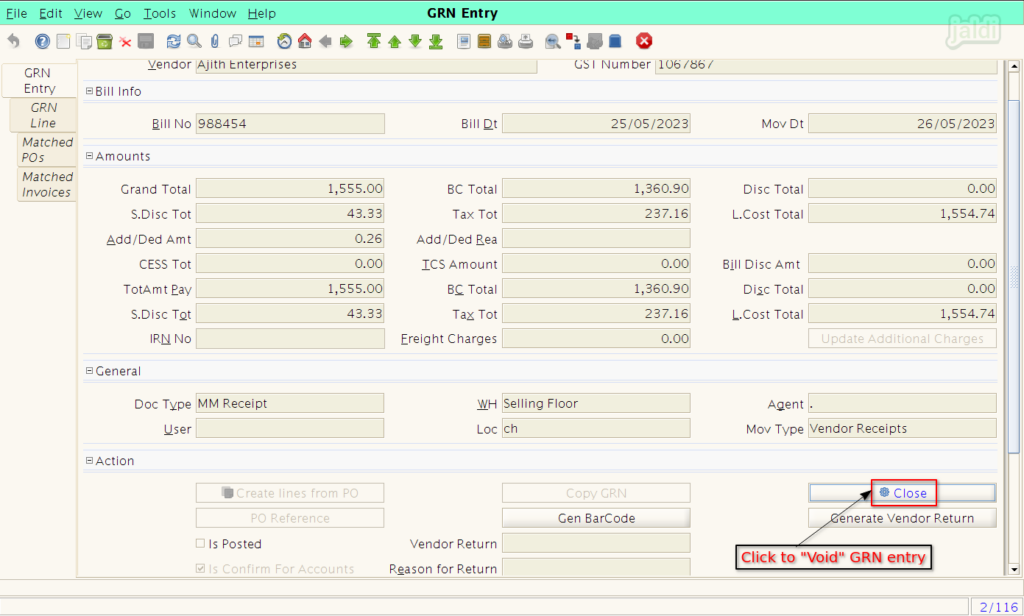
- Only completed GRN entries can be voided.
- Go to GRN entry screen, Select specific completed GRN entry.
- There should be the option called “Close”. Click on that.
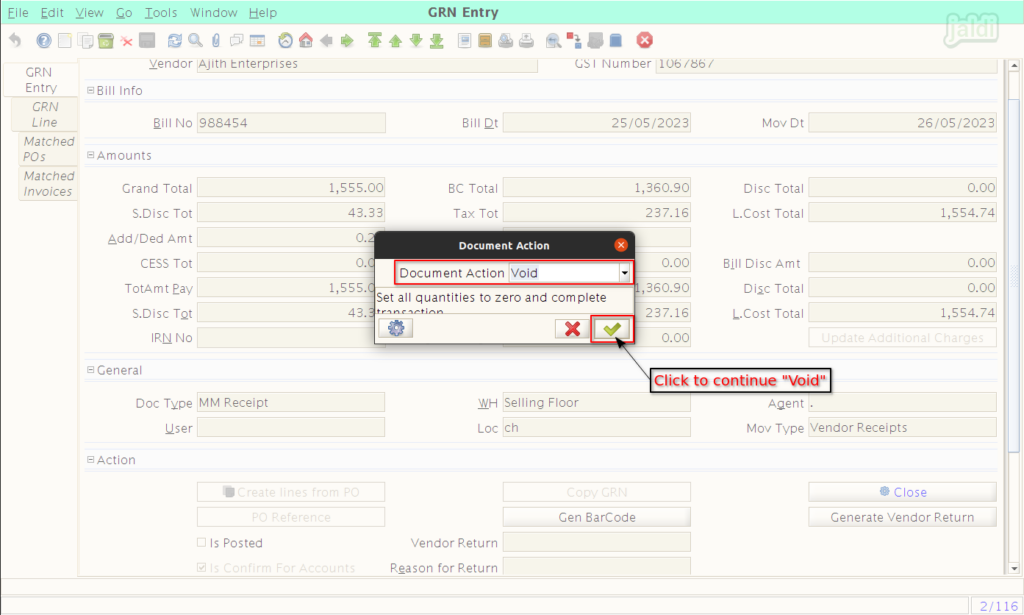
- In Document action screen, make sure you have selected “void” in a popup.
- Click to continue to complete the void.
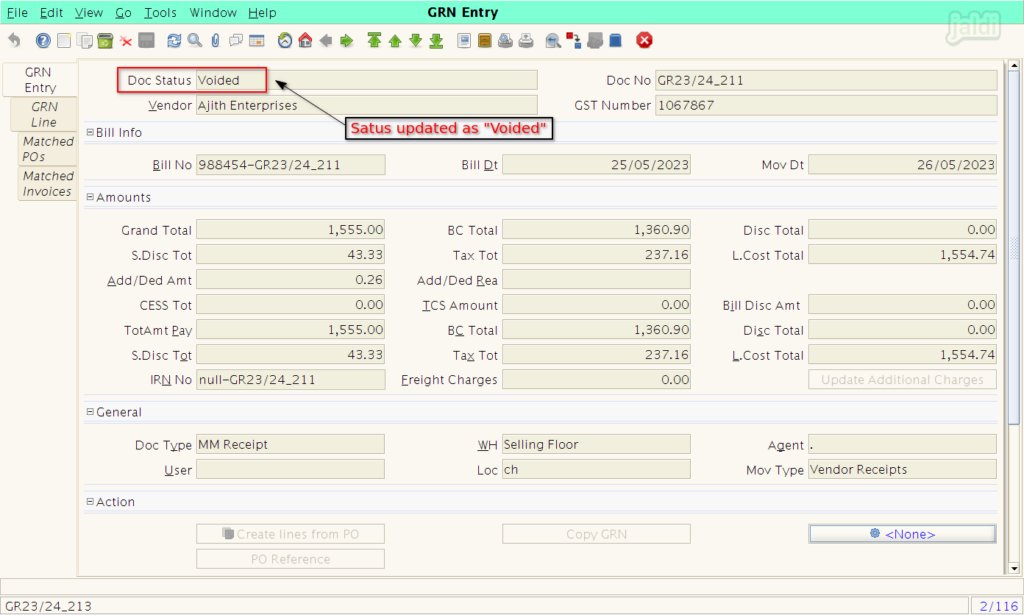
- Once the void process is completed, you can see the doc status as “Voided”.
How to reuse the voided GRN ?
- Go to GRN entry screen, Select vendor name, Bill no & Bill date under GRN entry tab.
- Then click on “Copy GRN” option which is marked in below image.
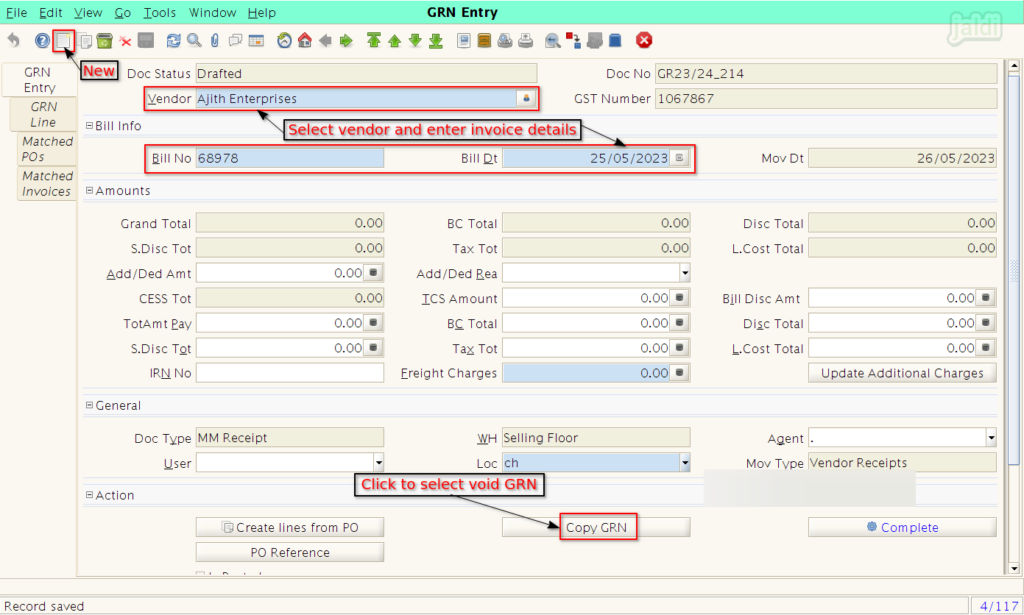
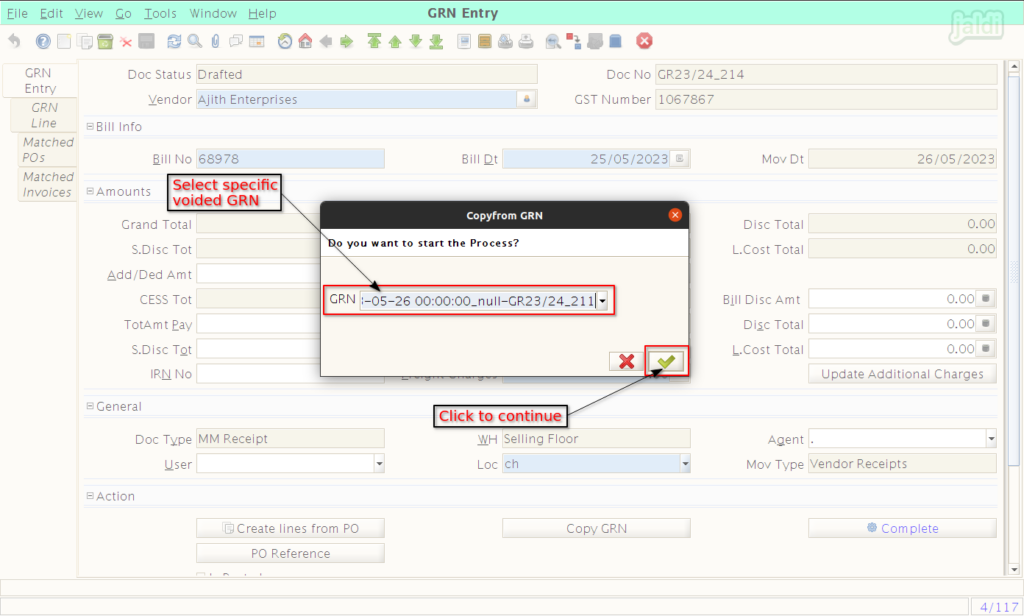
- Select the GRN number which is voided before.
- Note : Supplier should be same for current GRN entry and voided GRN entry.
- After selecting the specific void number, click (green tick mark) to continue the process.
- Then you can see all the products from the voided entry in GRN line screen.
- We can also add new products in product list.
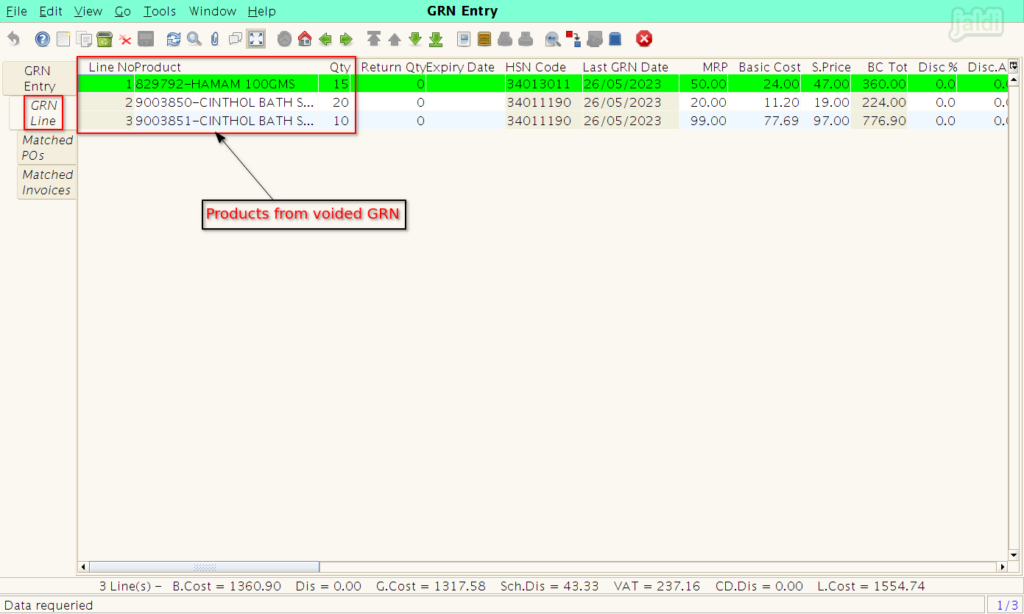
- Once the products are saved, then move back to “GRN entry” tab.
- Fill the required details and click on “complete” option to complete GRN entry.
