GRN Scan using HHT in Jaldi Superstore POS
GRN Scan is the feature screen where the GRN products are received in HHT Web Mobile interface URL using the HHT device.
How to do GRN scan entry using HHT device ?
- Open HHT Web mobile interface URL in HHT device.
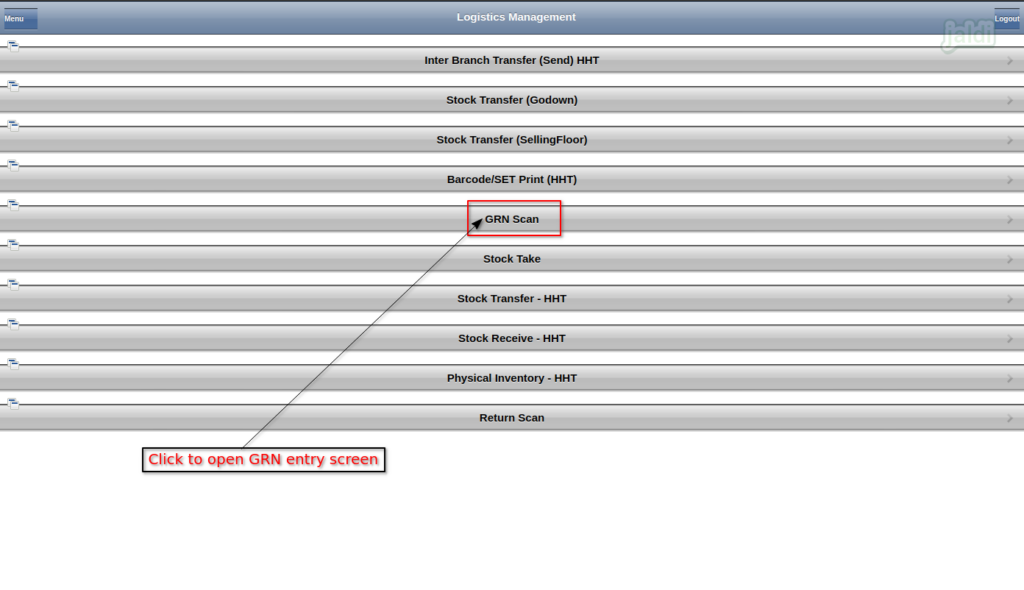
- Login the URL and go to the path Logistics Management > GRN Scan.
- Click on that “GRN Scan” menu to make new GRN entry.
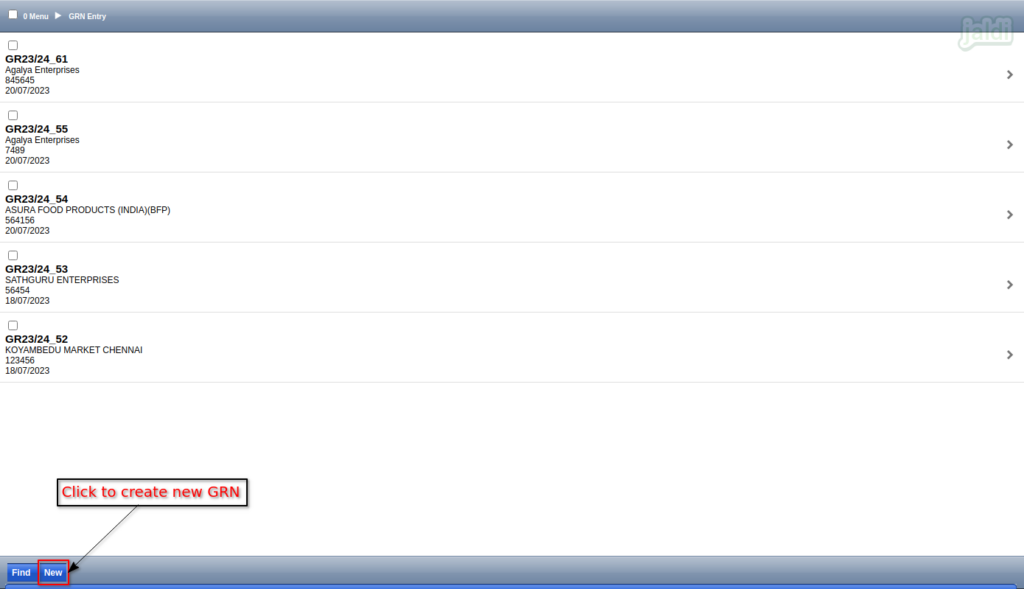
- In GRN Entry screen, There should be the function key called “New”. Click on that “New” function key to make new GRN entry.
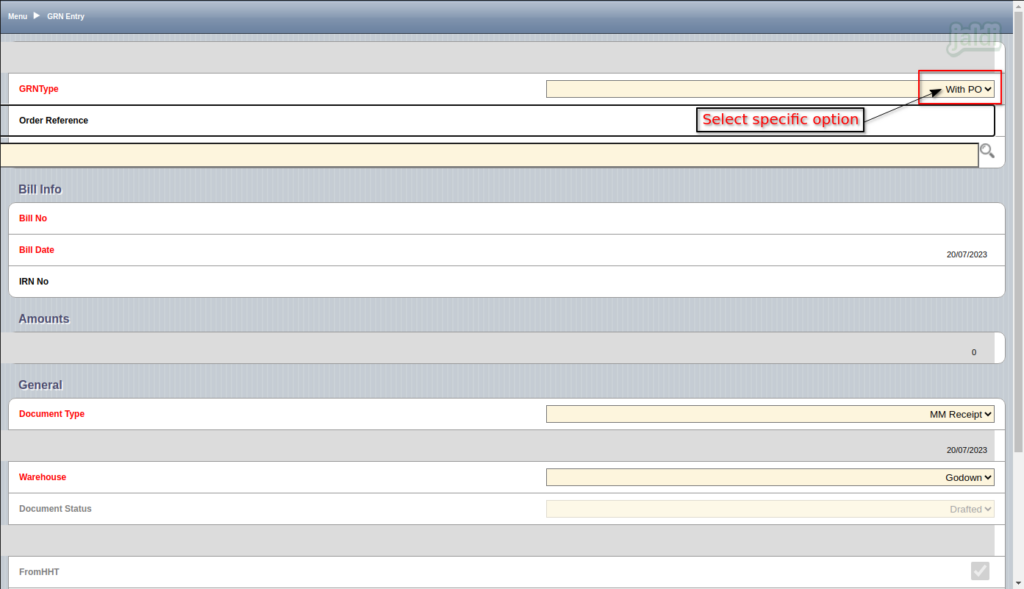
- There is two type of GRN entry which we can complete using the HHT device,
- With PO – Need completed purchase order document number to complete GRN entry.
- Without PO – Direct GRN entry without any purchase order document.
- The required GRN type option will be selected in the input field “GRN Type” which is marked in below image.
GRN Type – Without PO
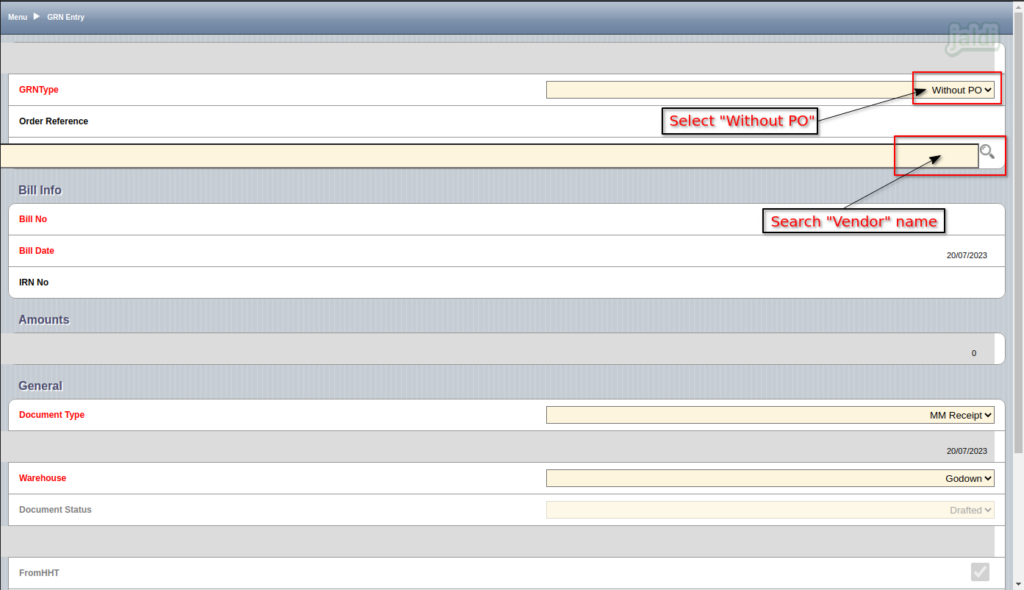
- Open GRN entry screen, Select the GRN type as “Without PO”.
- Search and load the specific vendor for GRN entry in marked place in below image.
- In vendor list screen, select the required vendor for GRN entry.
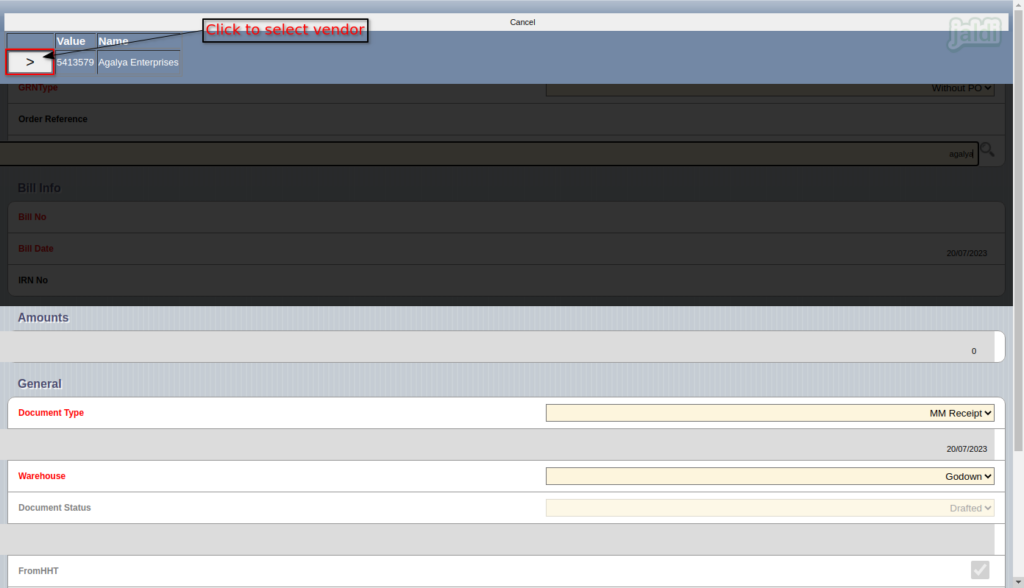
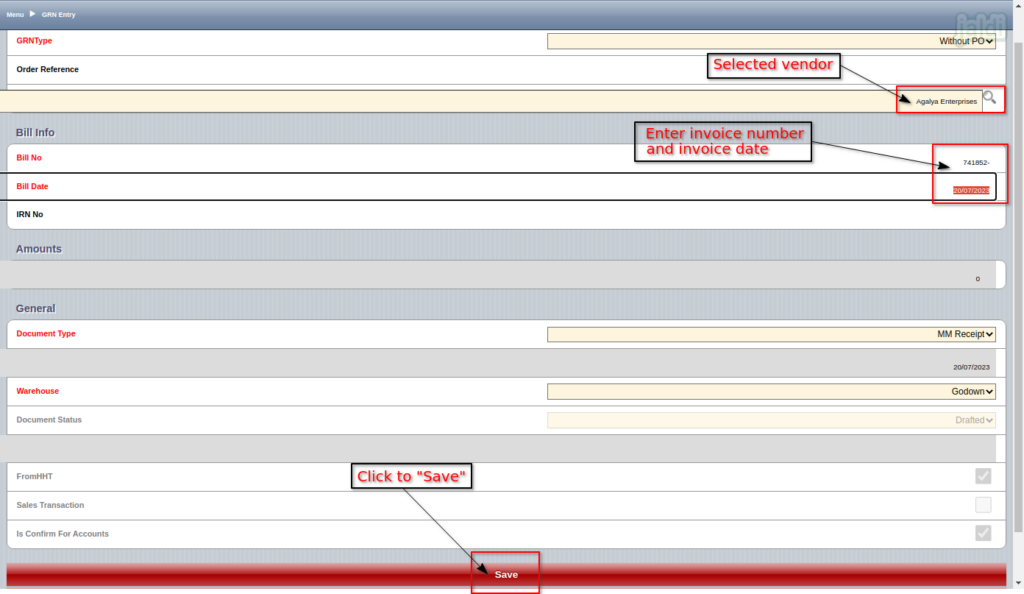
- After selecting the vendor enter the following input details,
- Bill No – Enter invoice number
- Bill Date – Enter invoice date
- Document type – Select “MM Receipt”
- Warehouse – Select the location name
- Once the required details were filled, press “Save” option to save the record.
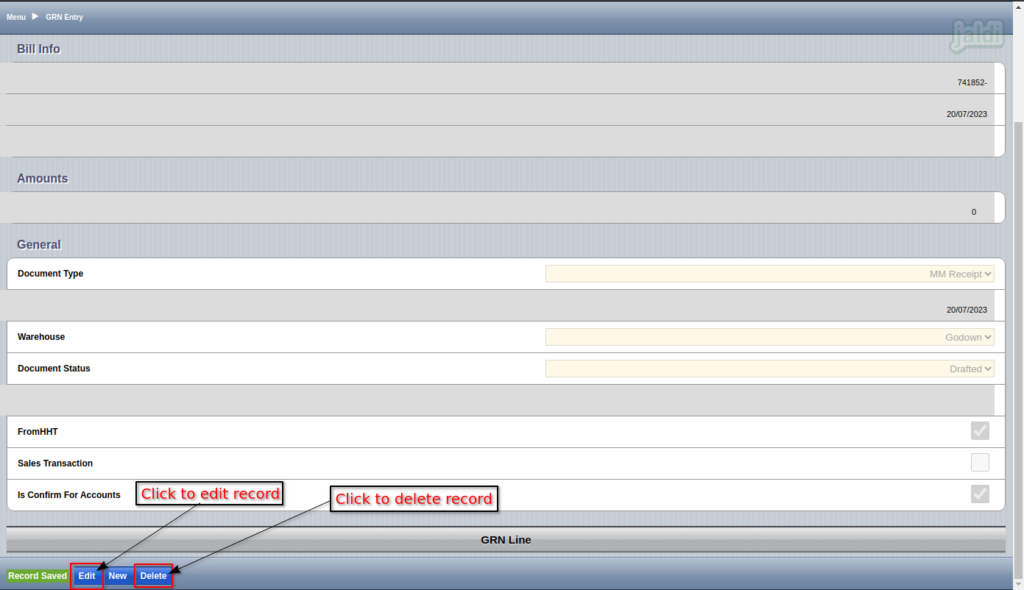
- After saving the record, system will show the the function keys called “Edit & Delete”.
- Press “Edit” option to edit the saved record.
- Press “Delete” option to delete the saved record.
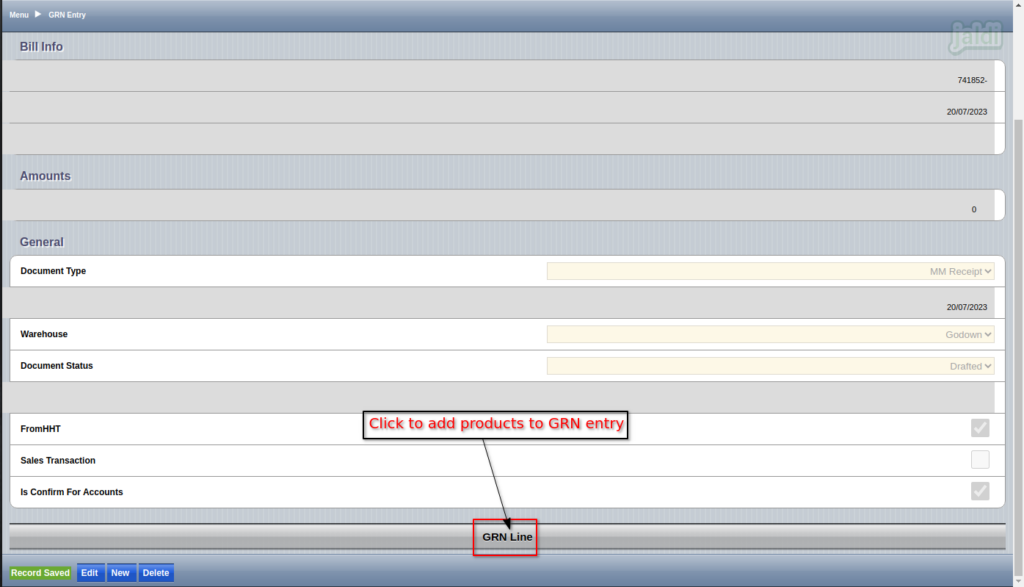
- To add products for GRN entry, press the option “GRN Line”.
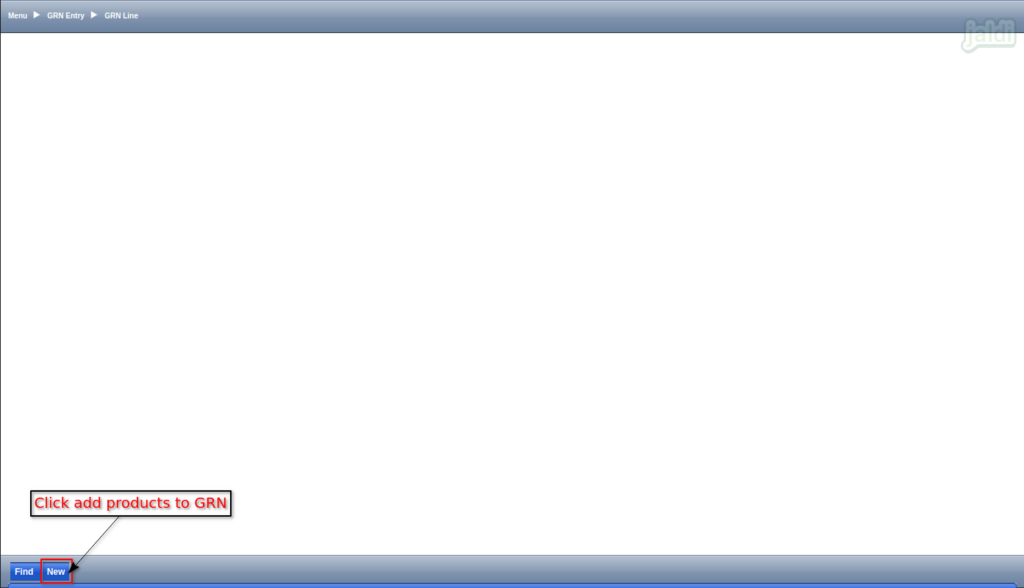
- Then press “New” function key which is marked in below image to add new products to GRN Line.
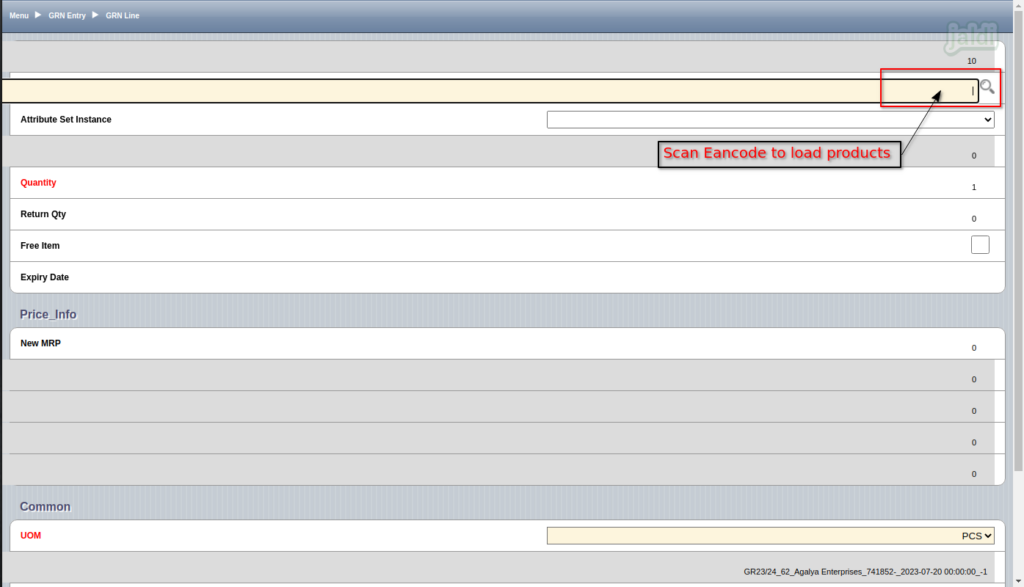
- In a marked place scan the Eancode or barcode to load the required products.
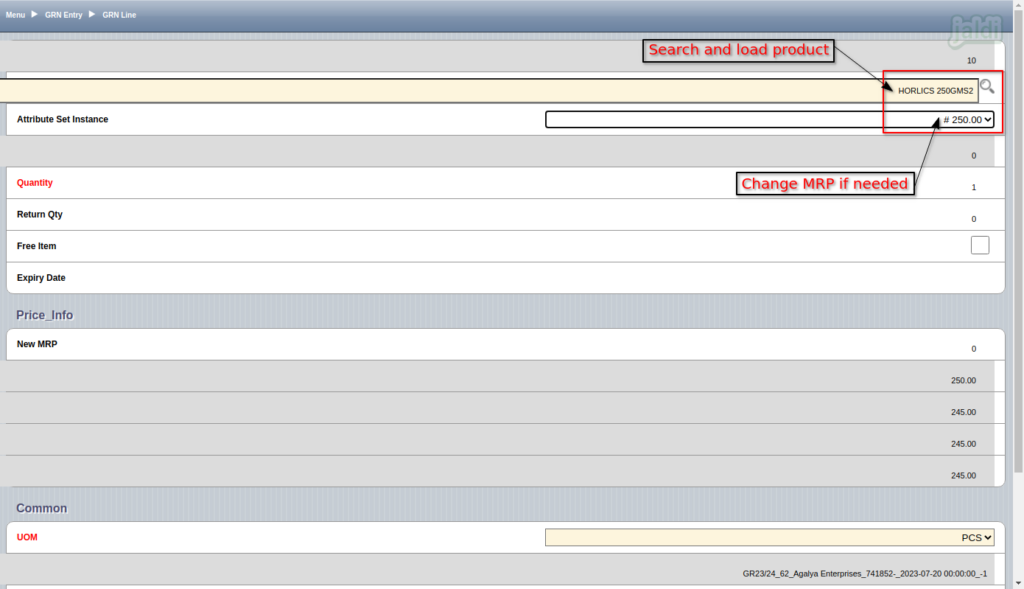
- We can also manually search a required products manually ( use @ as prefix to searching products)
- Products will be loaded with batch MRP, change loaded MRP if needed.
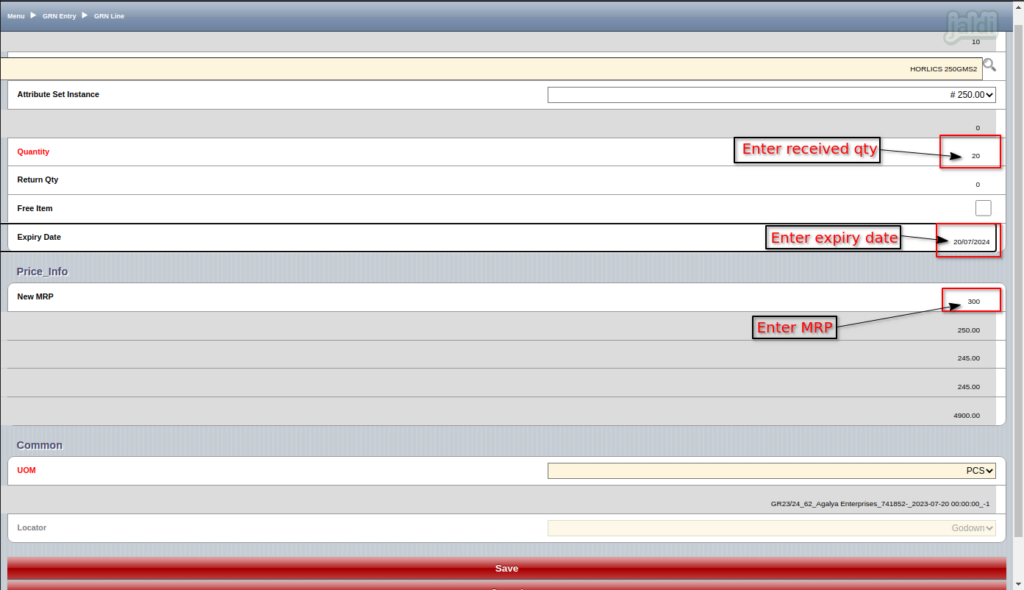
- Then enter the following details to save the GRN line,
- Quantity – Enter GRN received Qty
- Return Qty – Enter return qty if any
- Free Item – Select the check box if the received qty if free
- Expiry date – Enter Expiry date of the product
- New MRP – Enter MRP price of the received product
- UOM – Select UOM
- Once the above details were filled, then press “Save” function key to save the GRN line record.
- In same way, we can save all the GRN received products one by one.
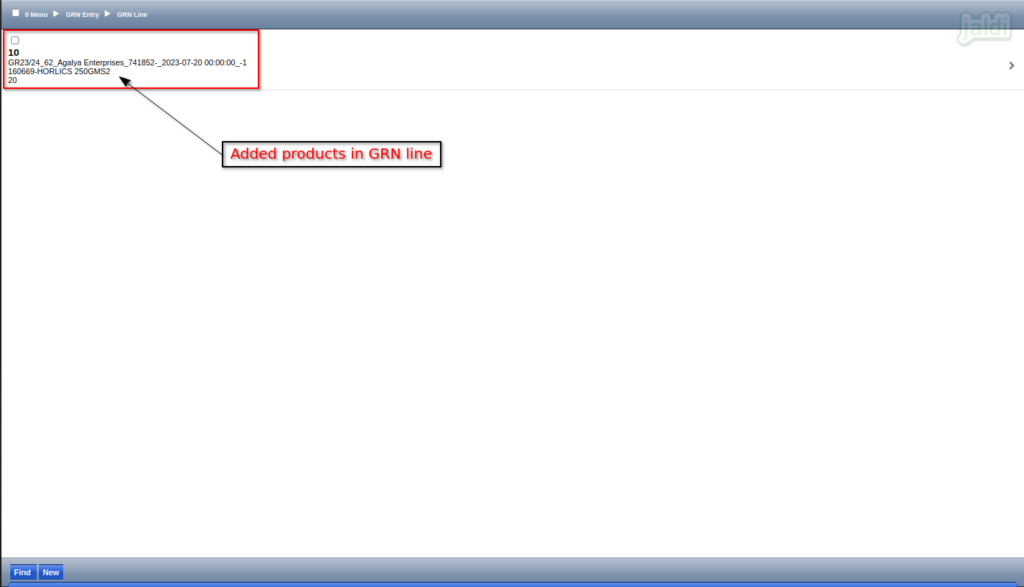
- Once the product record is saved, we can see the products in list like below shown image.
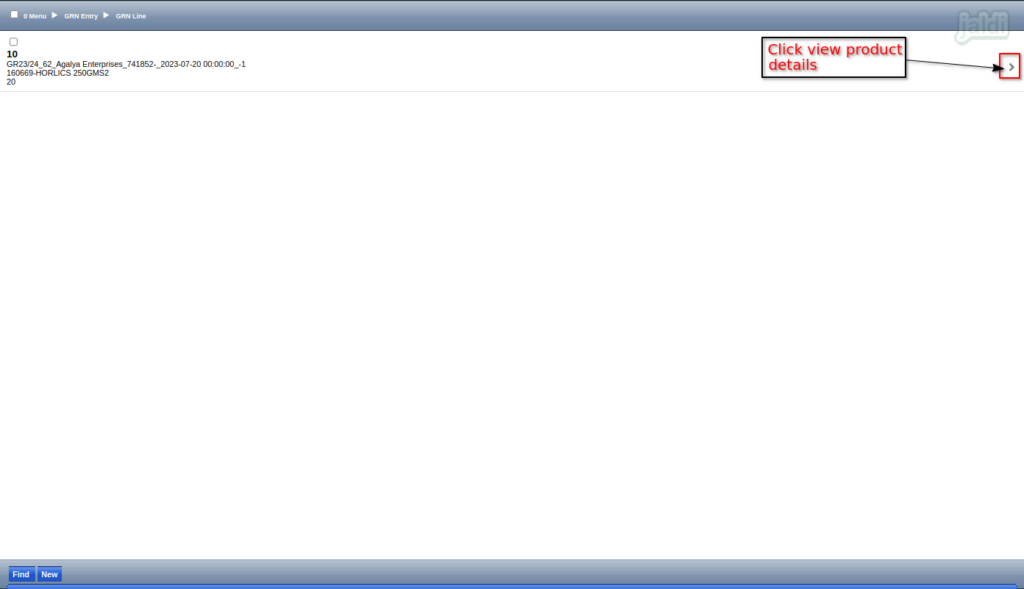
- Also there should be the arrow symbol like below shown image, click on that to view the product in detailed view.
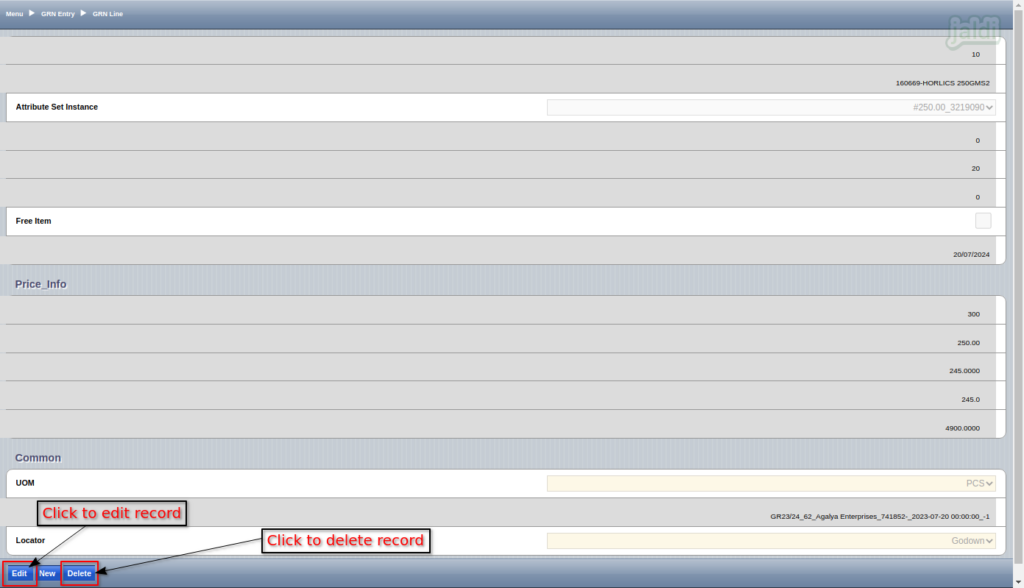
- In product detailed screen, press edit or delete to edit or delete the product details respectively.
- We cannot complete the GRN entry in HHT URL, it will be drafted only.
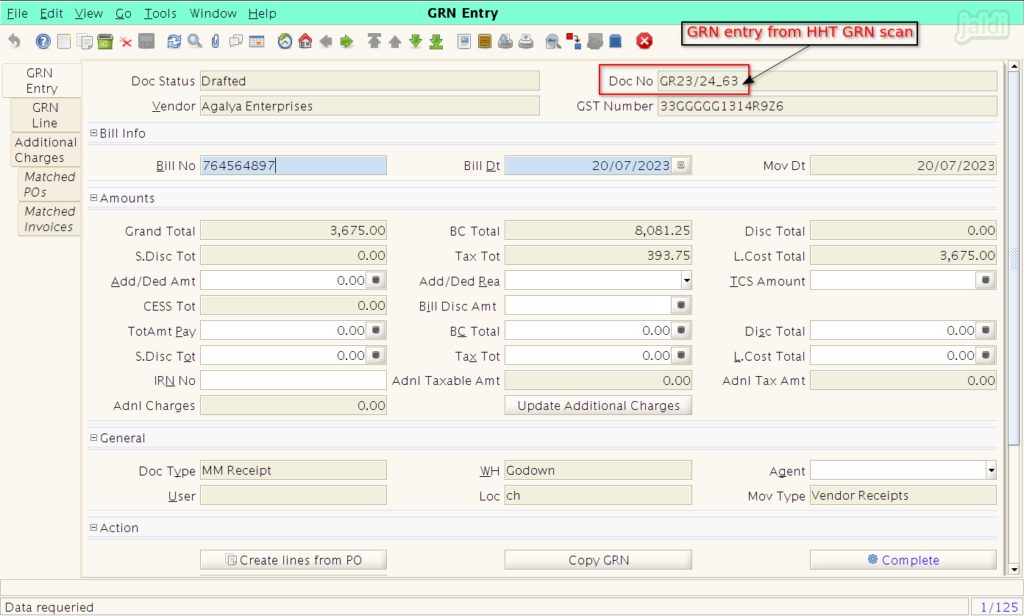
- So go to Jaldi application path Logistics Management > GRN Entry to complete the drafted GRN entry from the HHT device.
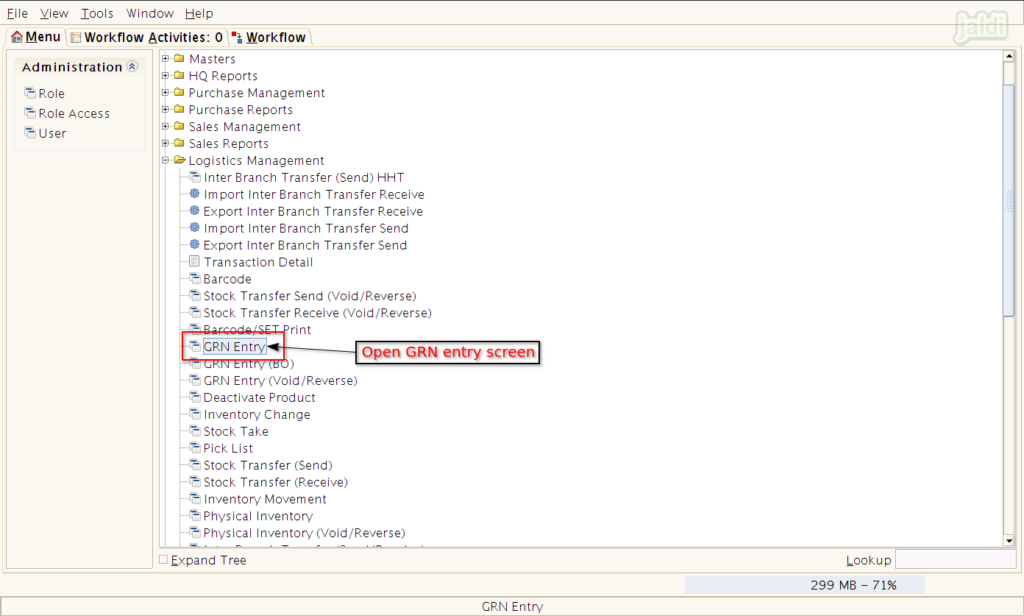
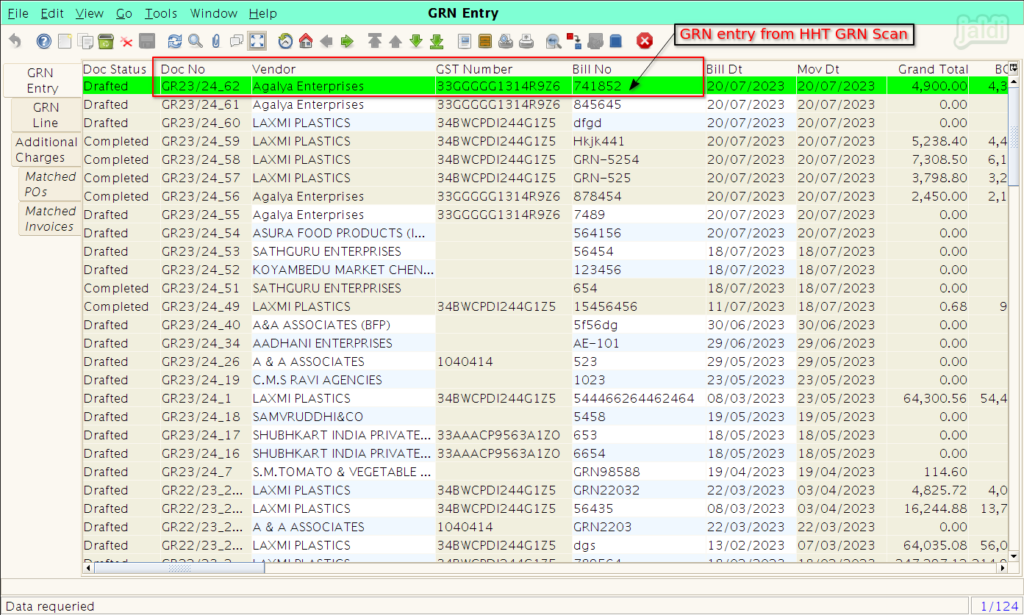
- In GRN entry list screen, we can find the Drafted GRN entry from the HHT GRN scan like below shown image.
- Open that GRN entry and complete the process further.
GRN Scan – With PO
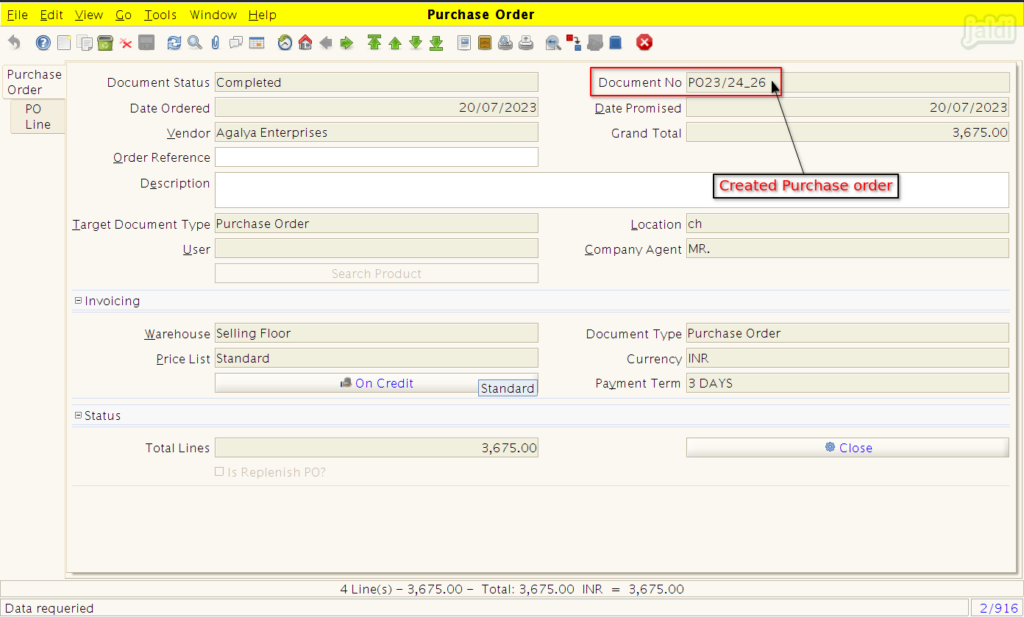
- Create a purchase order in Jaldi POS application like below shown images.
- Note down the PO “Document No”.
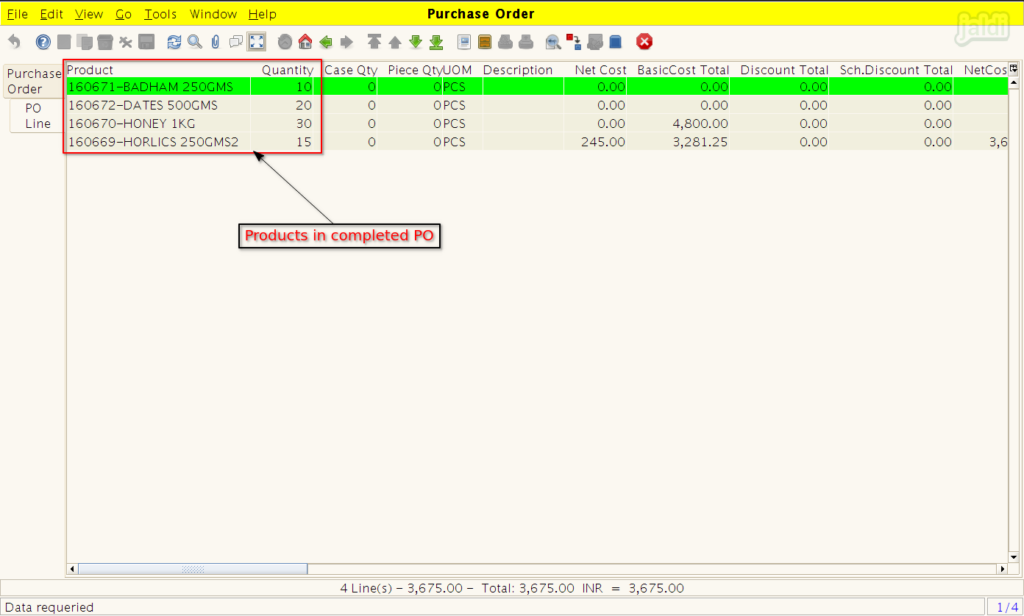
- Also note all the added PO Products under the purchase order.
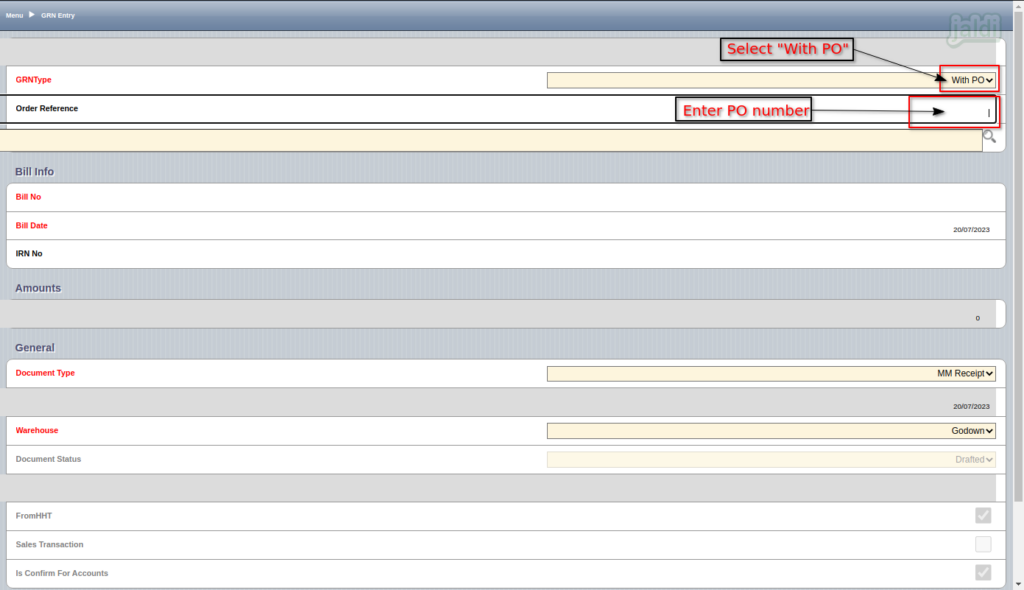
- Open GRN scan entry in HHT URL and press new and enter the following details
- GRN Type – Select “With PO”
- Order preference – Enter PO document number.
- Once order number is entered, then system will auto load the “Vendor name” like mentioned in below image.
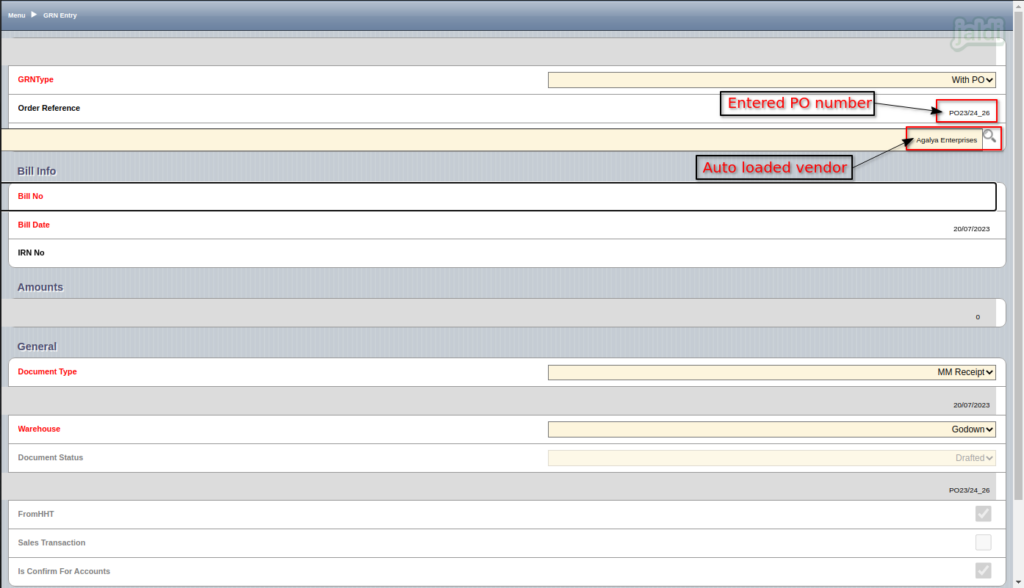
- After that enter the following details,
- Bill no – Invoice number
- Bill date – Invoice date
- Document type – MM receipt
- Warehouse – Select the location name
- Once all the required details were filled, press “Save” option to save the record.
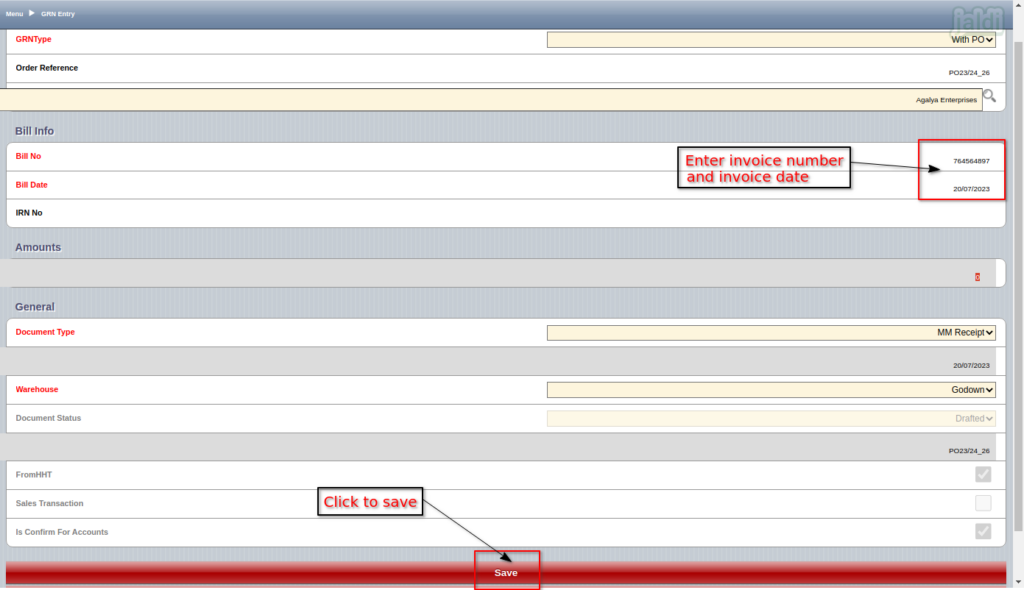
- Once the record is saved, system will show edit and delete function keys.
- To edit the saved record, press on the “Edit” option and To delete the saved record, press on the “delete” option.
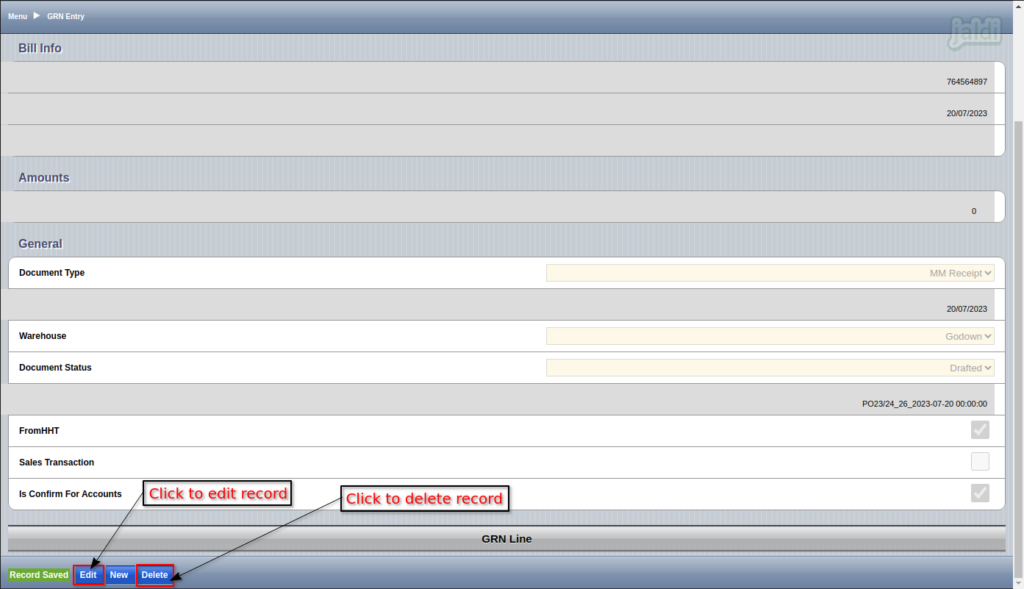
- Then Go to GRN line screen and press new to add products for GRN entries.
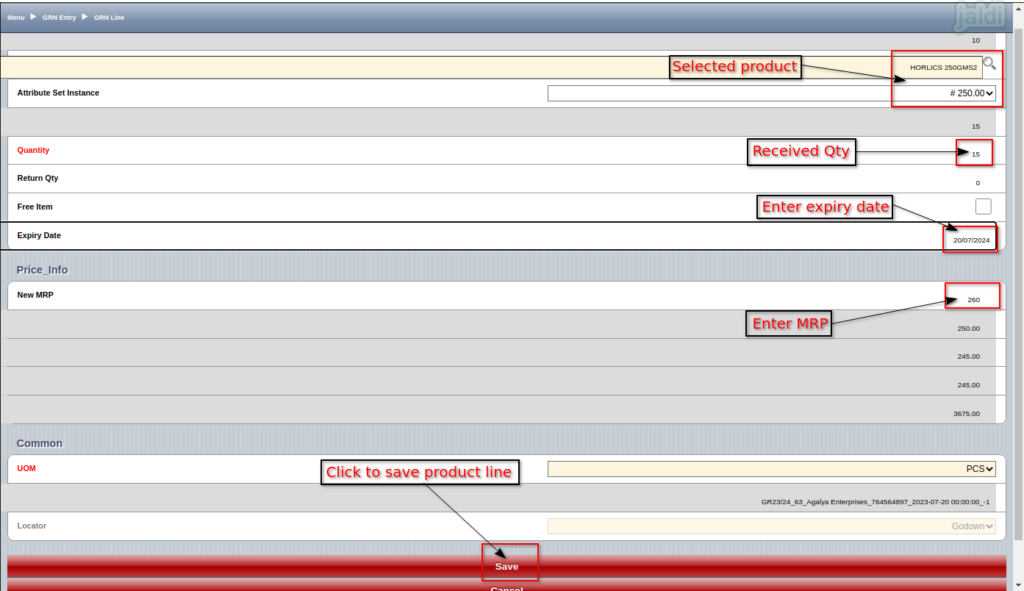
- Scan or search manually the products in product input field.
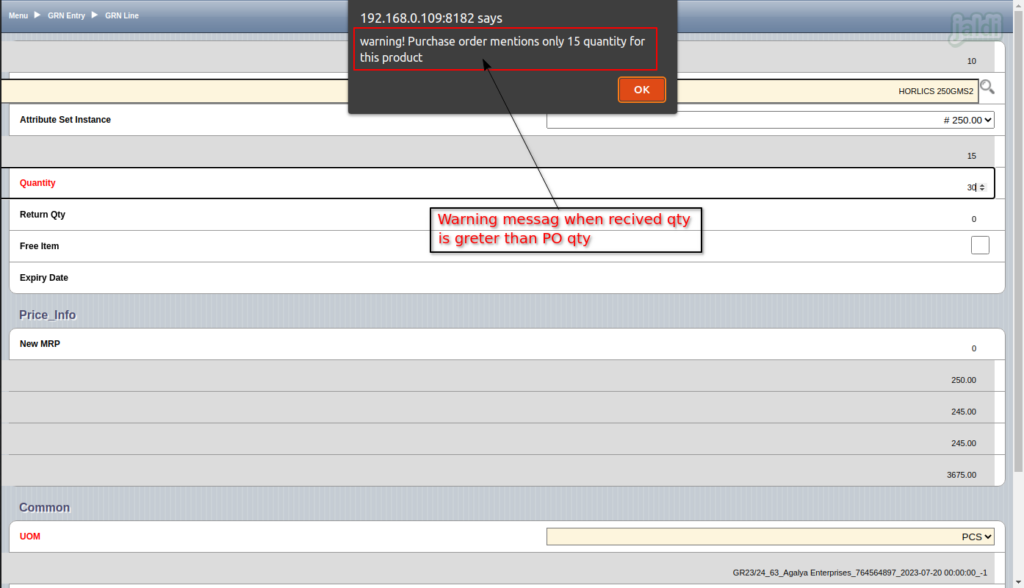
- In a Quantity field, enter the received qty against the PO.
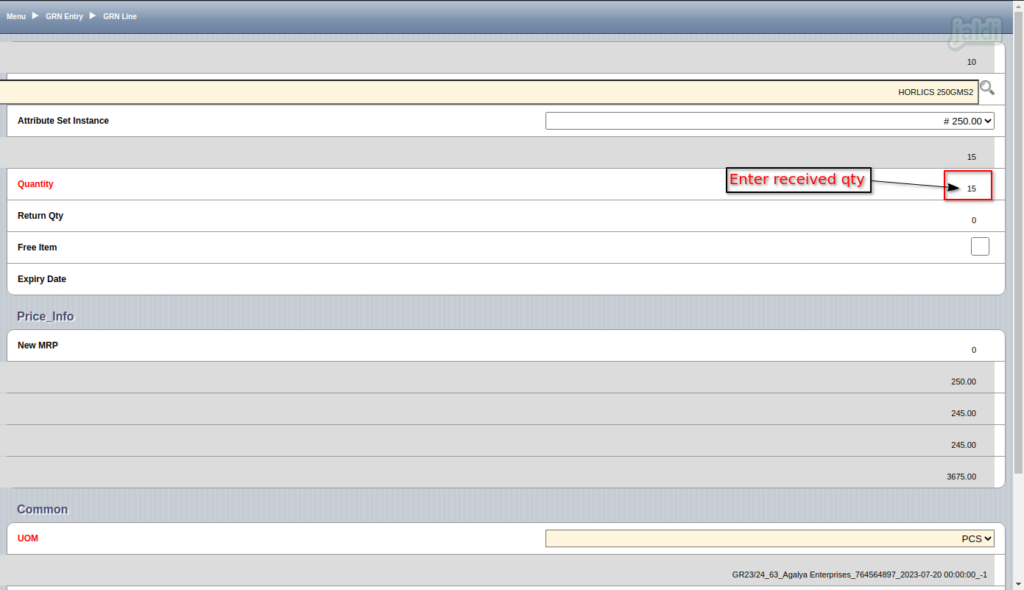
- When the received qty is more than the ordered qty, then system will show the warning popup message like below shown image.
- After entering the received qty, enter other required details like return qty, free item, new MRP, expiry date and UOM.
- Then press “Save” option to save the record.
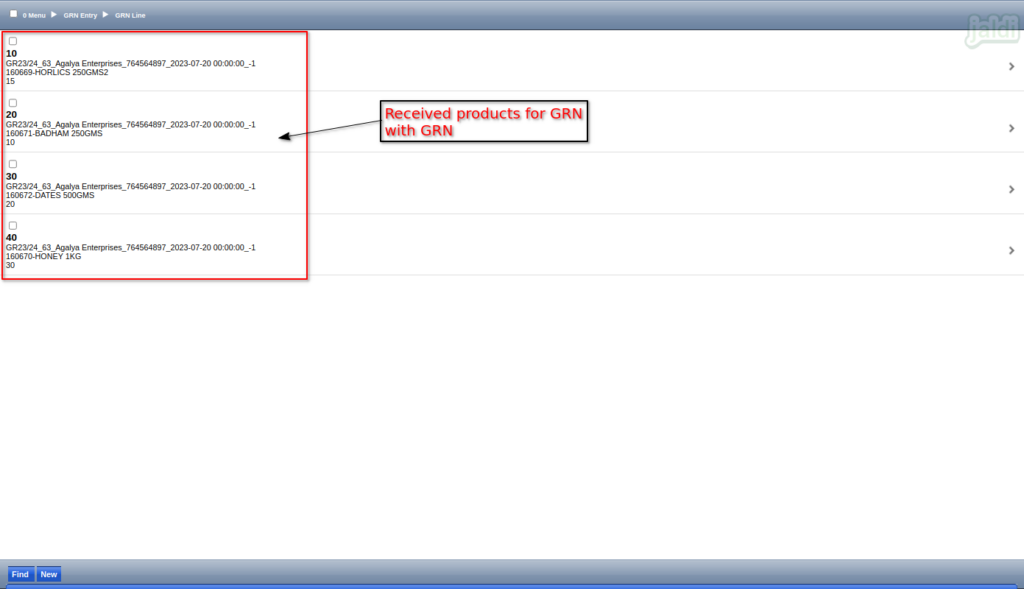
- Add all the received products in GRN scan, then system will show all the added GRN product in list like below shown image.
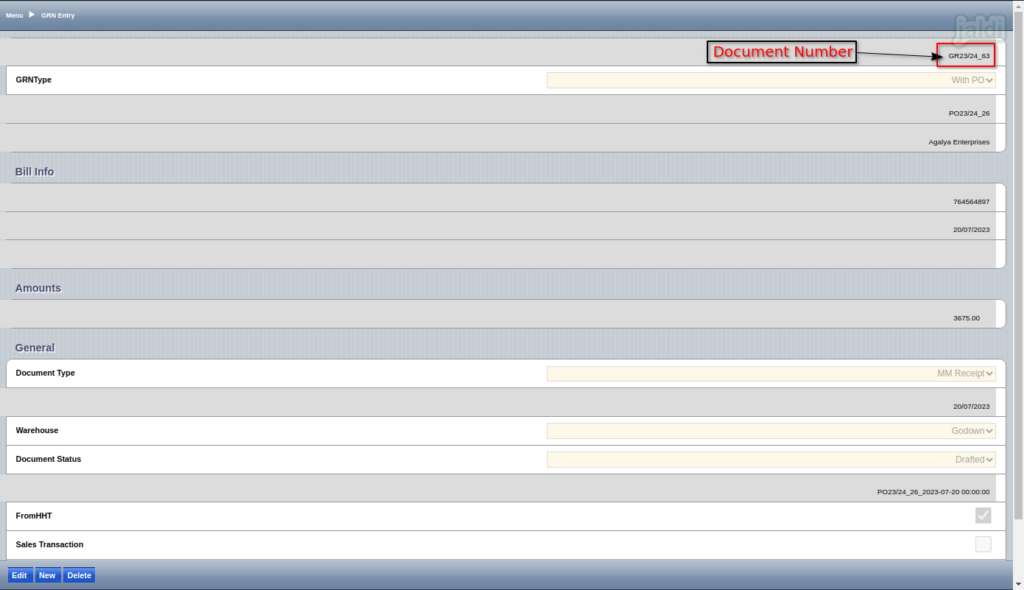
- In a GRN entry tab, note down GRN document number.
- Go to Jaldi application path Logistics Management > GRN entry screen.
- In GRN entry screen, select the specific drafted GRN entry from the HHT GRN scan and open it.
- Check the saved GRN entry details from the HHT device under GRN entry tab.
- Then go to GRN line tab and view and confirm all the received products from the HHT device.
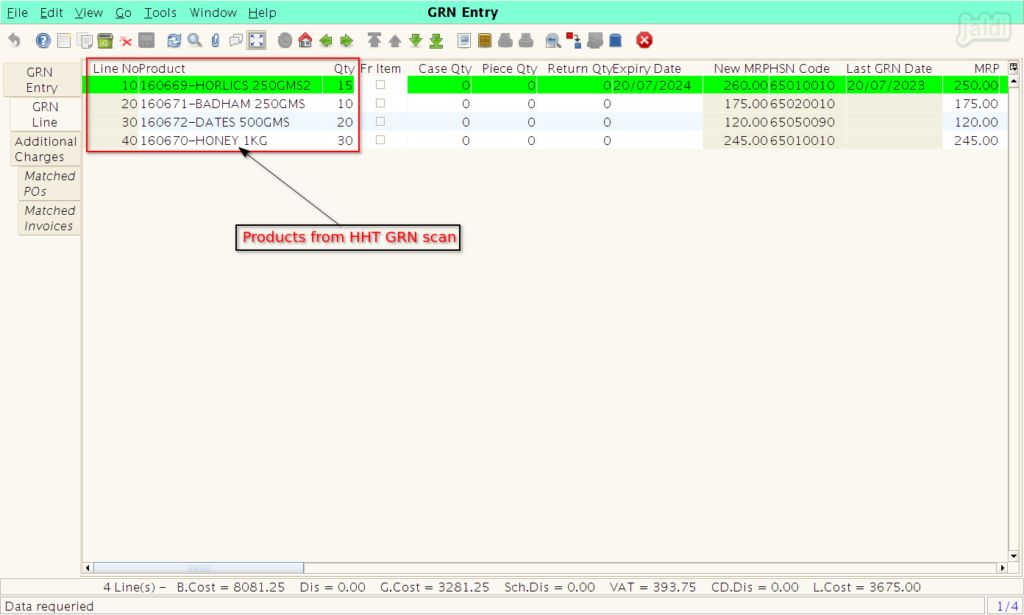
- Once all the details is confirmed, complete the GRN entry in Jaldi superstore POS. To know more about the GRN entry in Jaldi superstore POS, click on the following link – https://jaldi.store/grn-entry-in-jaldi-superstore-pos/