Inter Branch Transfer (Send/Receive) in Jaldi Lifestyle POS
Inter Branch Transfer (Send/Receive) screen is the transaction screen where we can make an entry of the stocks which is sent to other branches and also we can receive the stock which is sent from another branch.
Example
Let’s imagine the real time scenario, where one of your branch sending the 60 qty of “PL Container” products to another branch. Now follow the below mentioned steps to complete the process.
Inter Branch Transfer – Send
How to Send stock from one Branch to another ?
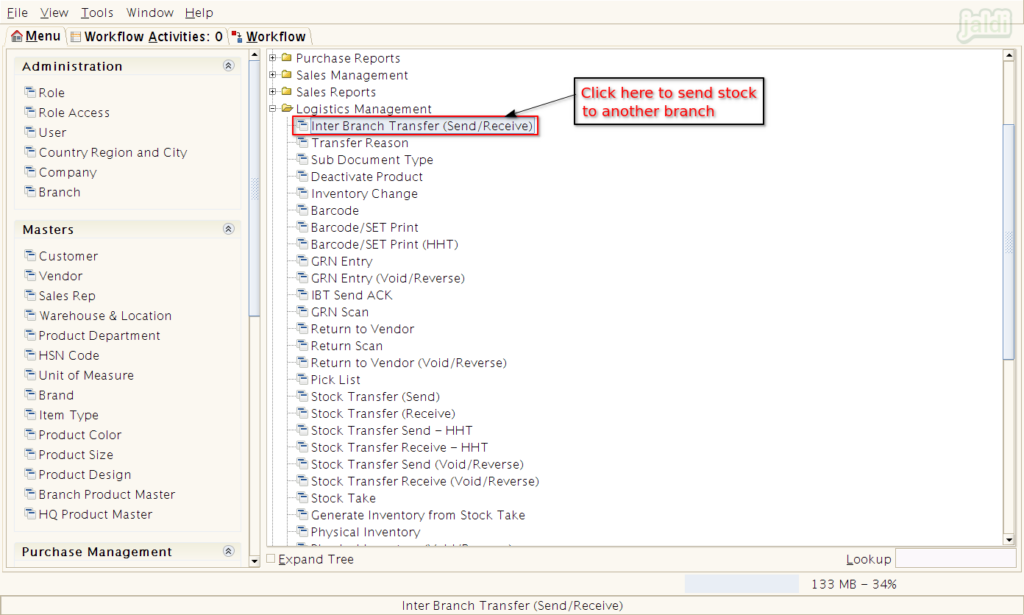
- Go to application path Logistics Management > Inter Branch Transfer (Send/Receive).
- Click on “Inter Branch Transfer (Send/Receive)” menu which marked in below image.
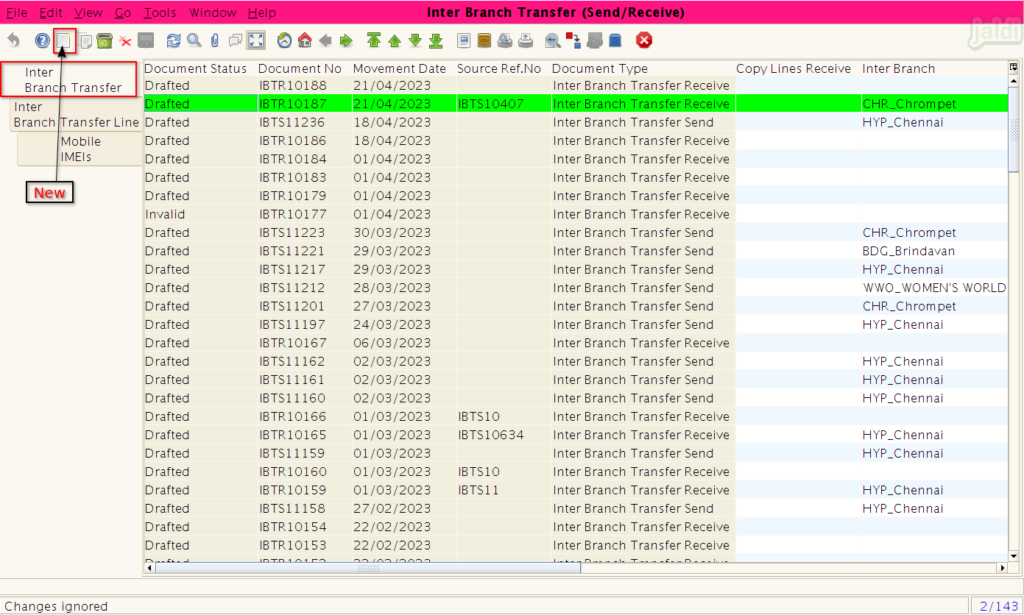
- Then system will show you the list of Inter Branch transfers, click on “New” which is marked in below image to create a new entry.
- Once “New” function key is pressed, click on “Grid Toggle” to go to detailed view from list view.
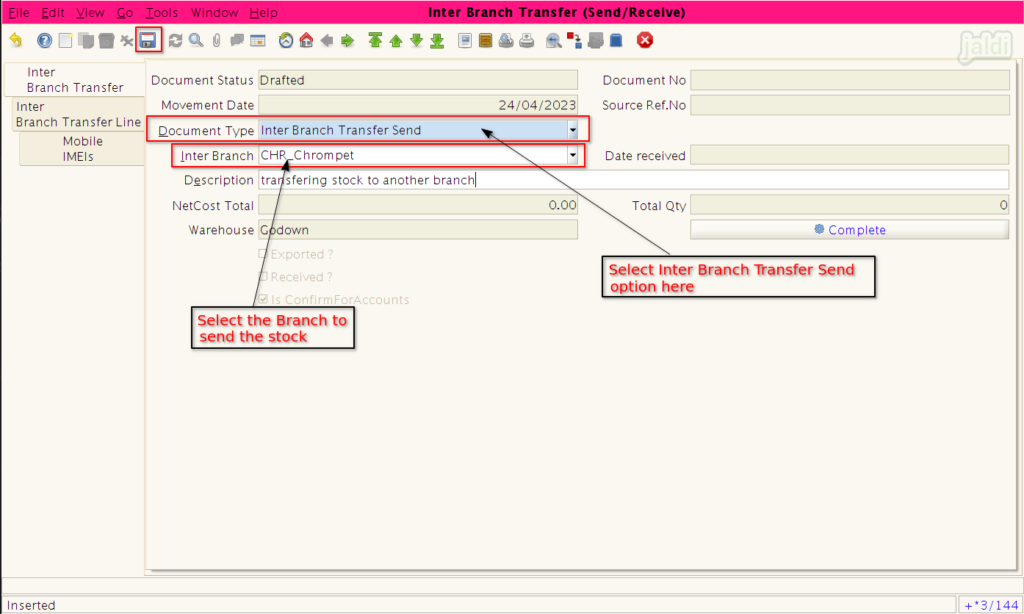
- In new entry screen, enter the required details in following fields
- Document type – Select the document type as “Inter Branch Transfer Send”.
- Inter branch – Select the required branch (branch where we need to send stock).
- Once the required details filled, press “Save” function key.
- Then move to “Inter branch Transfer Line” tab and click on “Grid Toggle” to go detailed view for to load products.
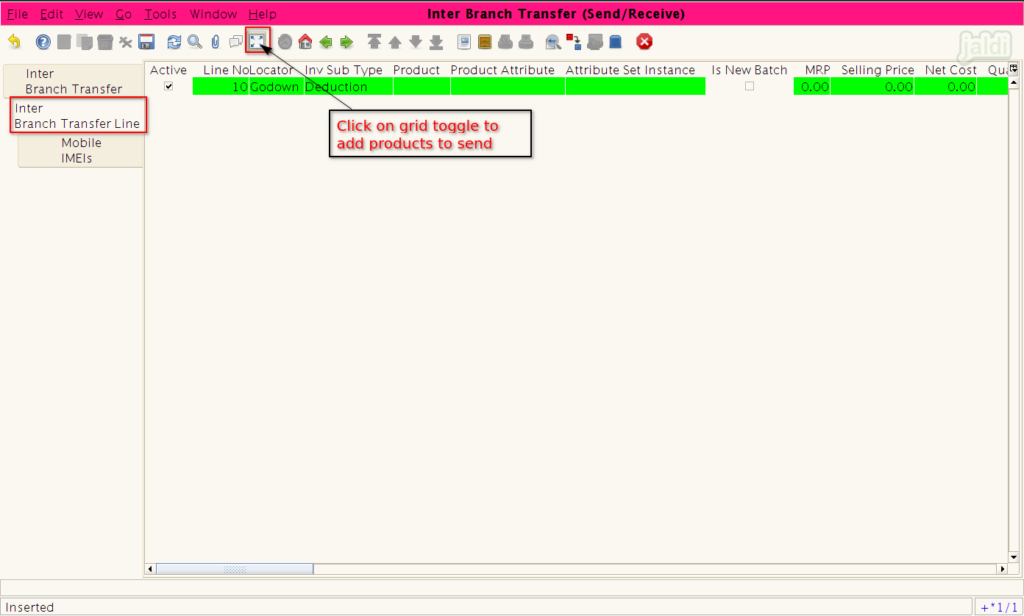
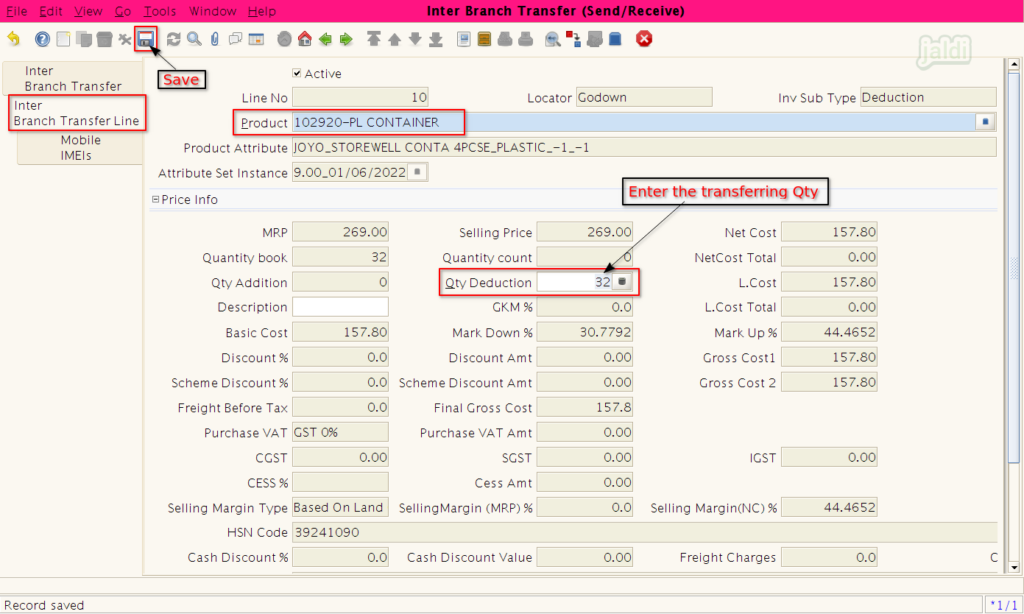
- In this screen, enter the following fields with required details,
- Product – Select the Product name
- Qty Deduction – Enter the transferring qty of selected products.
- Description – Product description (If any)
- Then click on “Save” function key to save the data.
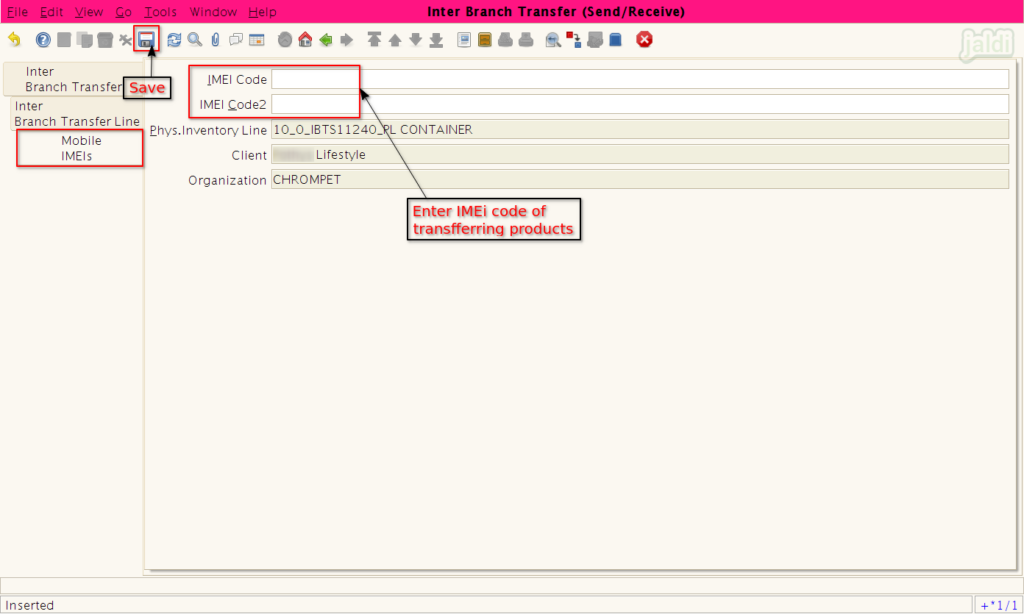
- If the transferring product is a IMEI product, then move to “Mobile IMEIs” tab and enter the IMEI codes of transferring products.
- If the transferring product is not a IMEI product, then skip this tab entry.
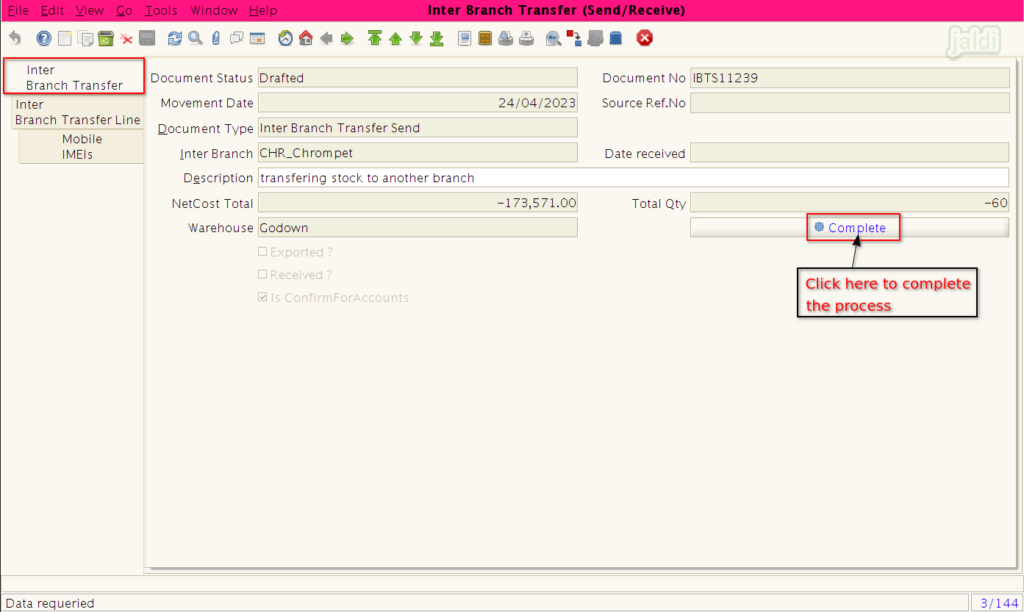
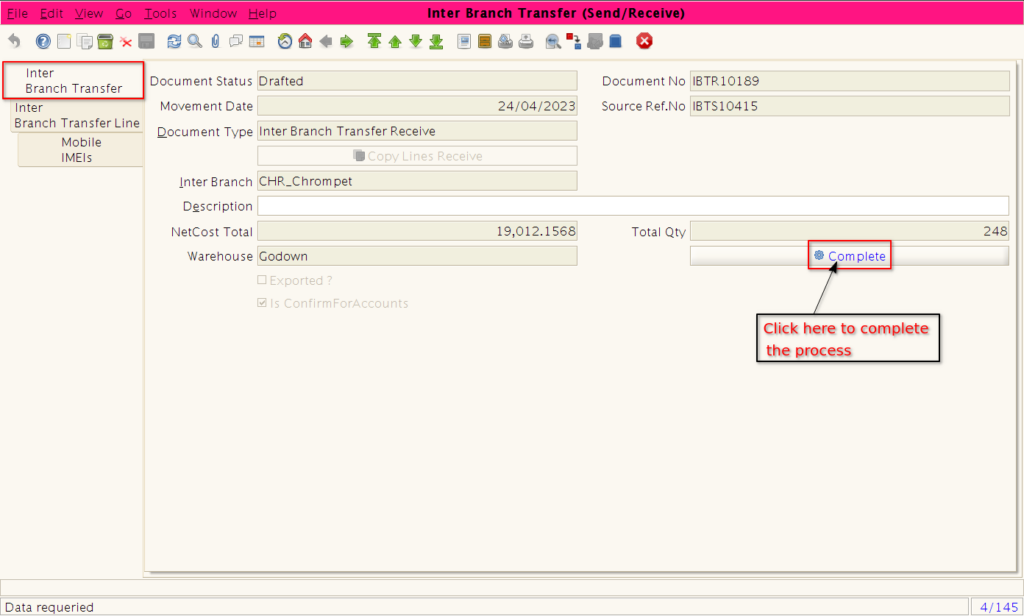
- Then move back to “Inter Branch Transfer” tab and click on “Complete” option to complete the process.
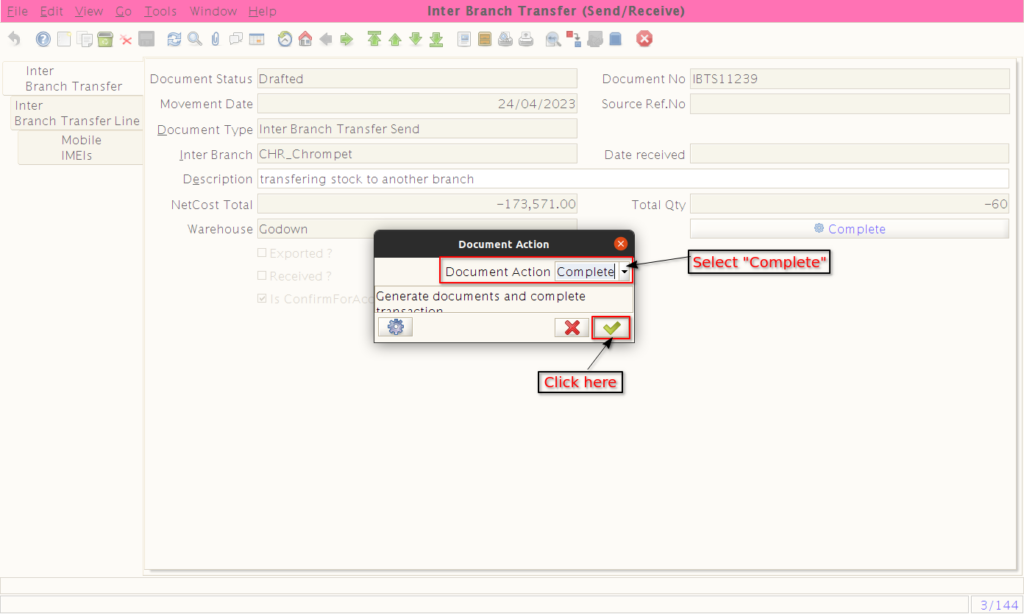
- Once the completed option is pressed, then system will show the document action popup.
- Select “completed” option as document action and click on green tick mark which is marked in below image.
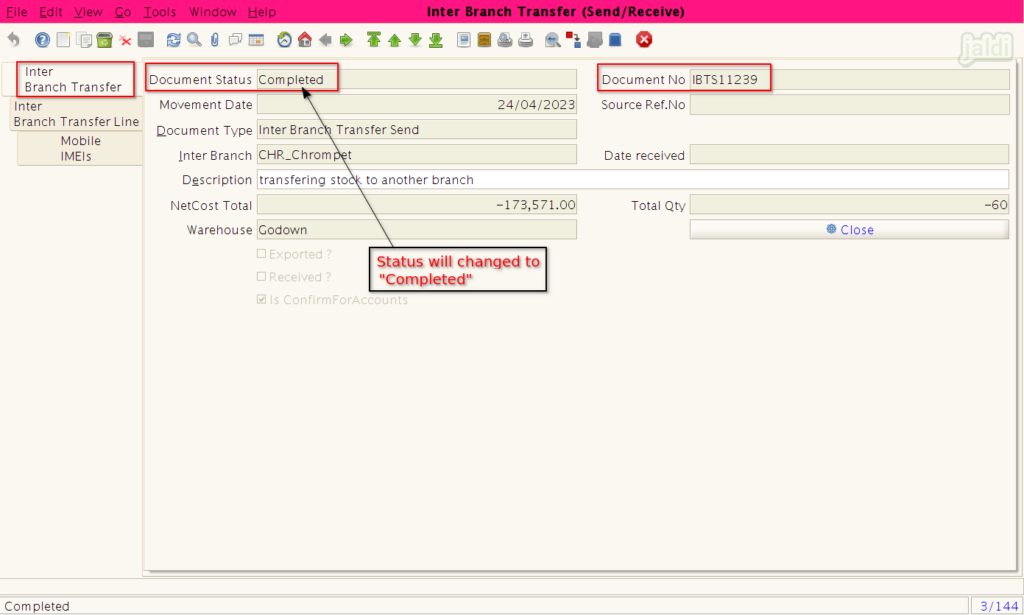
- Once the completion process is completed, then we can see the Document status as “Completed” like below shown image.
Inter Branch Transfer – Receive
How to Receive stock in one branch which is sent from another branch ?
- Go to application path Logistic Management > Inter Branch Transfer (send/receive).
- Then select document type as “Inter Branch Transfer Receive”.
- Now click on the “Copy Lines Receive” option which is marked in below.
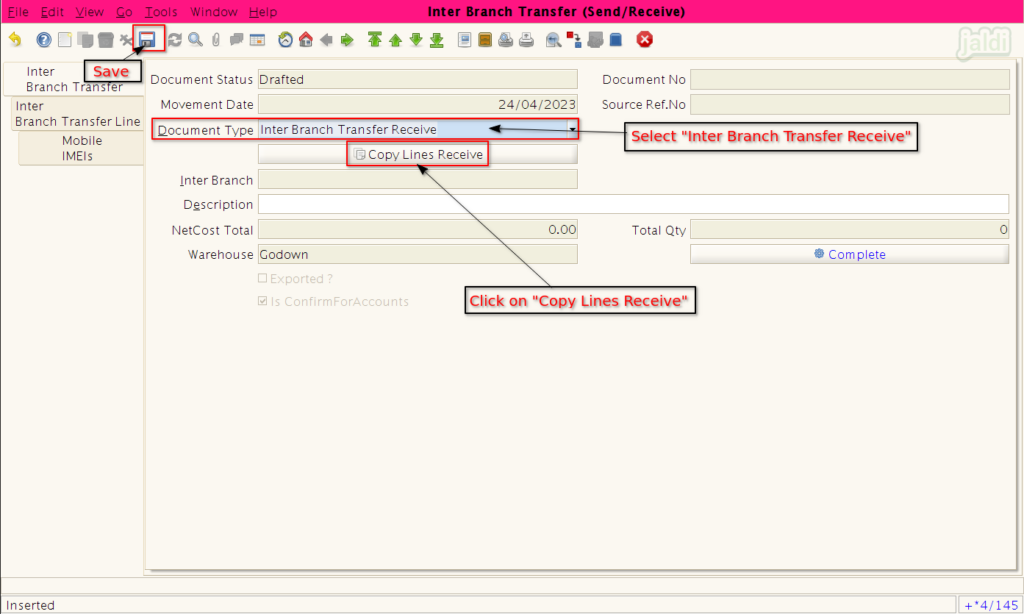
- Once the “Copy Lines Receive” option is pressed then system will show the popup like below.
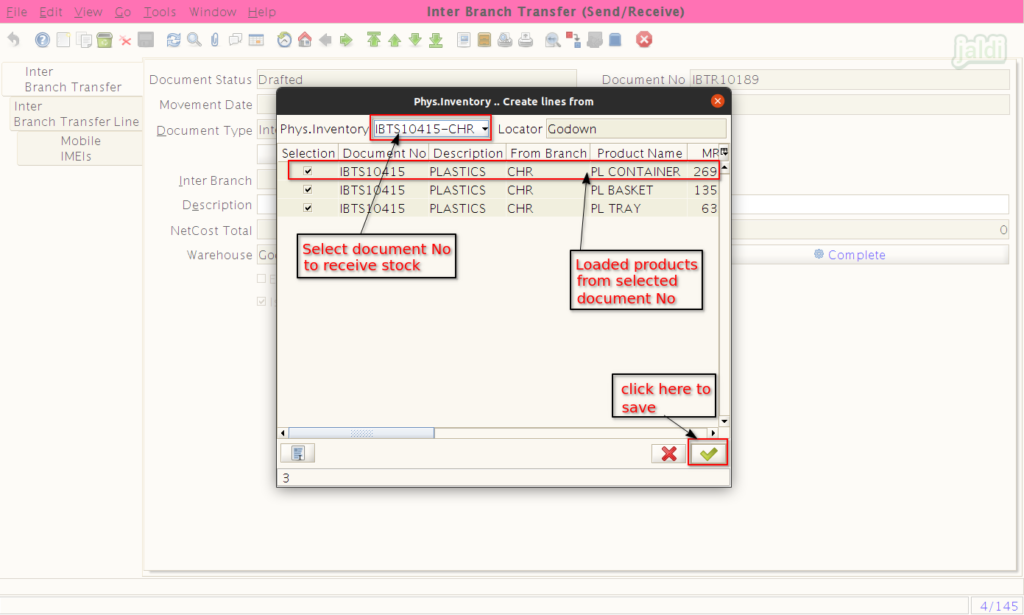
- Select the specific document number in “Phys.Inventory” drop down.
- Then system will show all the products which is send under the selected document number.
- Now click on the “green tick mark” which is shown in below image.
- Now we can see all the sent products under the “Inter Branch Transfer Line” tab and we can also edit the products detail if needed.
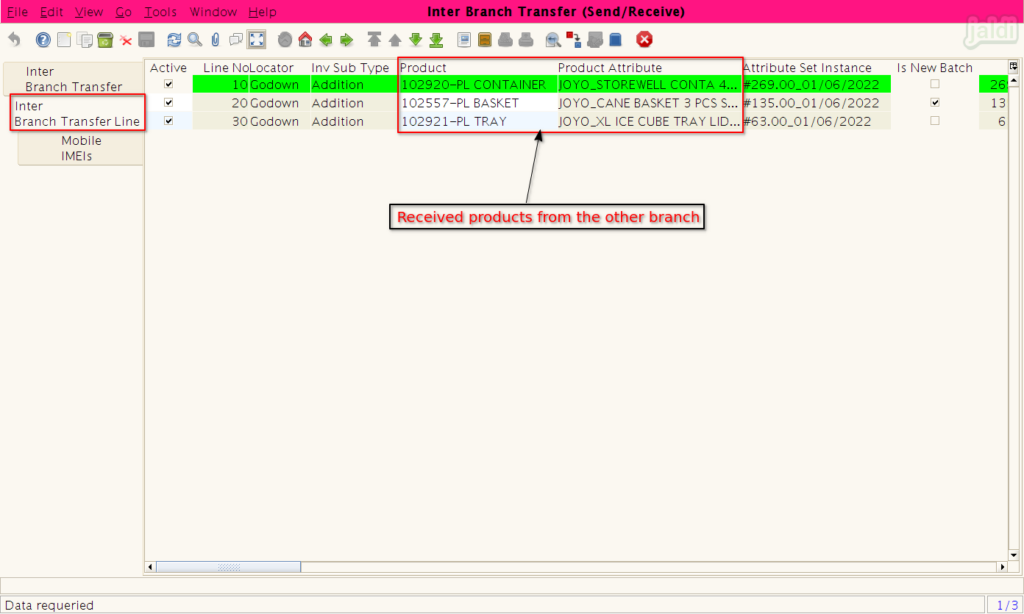
- After confirming the received products, click on “Complete” function key to complete the product receiving process.
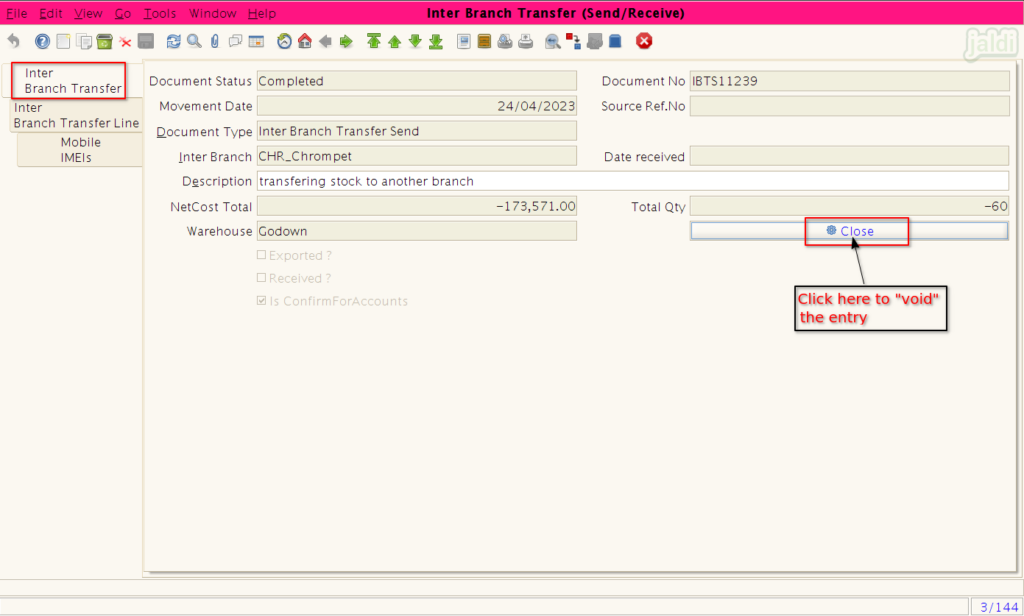
How to “Void” an Inter Branch Transfer send entry
- Go to Inter Branch Transfer send/ receive screen and select and open specific transfer send entry.
- Then click on the “Close” option which is marked in below image.
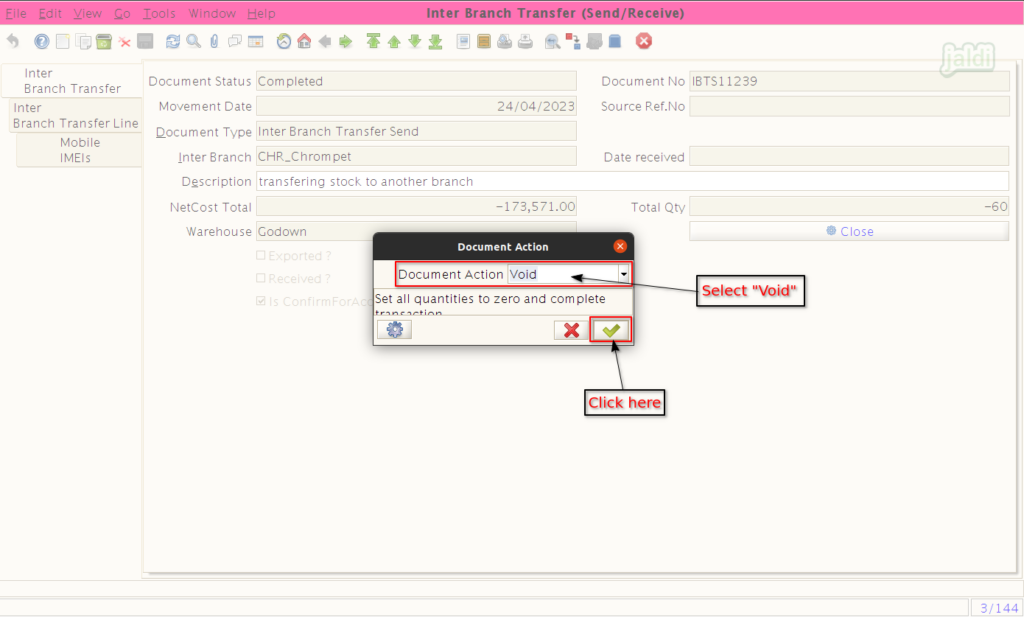
- Make sure the document action is selected as “void” in popup like below image.
- Then press on the green tick button which marked in below image.
- Once the void process is completed then the document status will be changed to “Voided”.
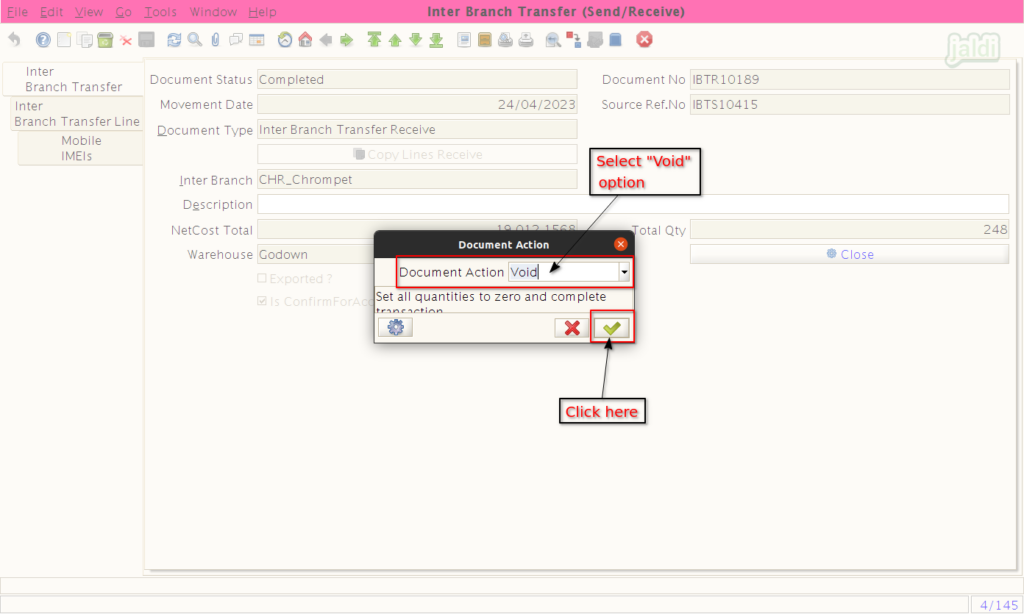
How to “Void” Inter Branch Transfer Receive entry ?
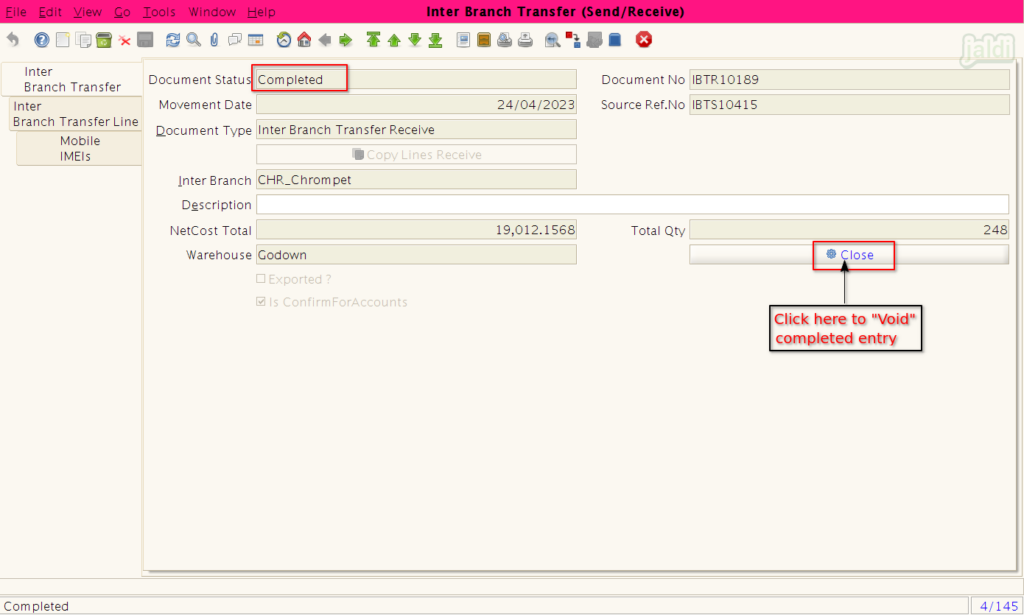
- Go to Inter Branch Transfer send/ receive screen and select and open specific transfer receive entry.
- Then click on the “Close” option which is marked in below image.
- Make sure the document action is selected as “void” in popup like below image.
- Then press on the green tick button which marked in below image.
- Once the void process is completed then the document status will be changed to “Voided”.
- Only completed inter branch transfer entries can be voided.
- We cannot edit the completed inter branch transfer entries.