Inter branch transfer using HHT in Jaldi lifestyle POS
Inter Branch Transfer (Send) HHT is the feature which is used for user to send the stock to from one branch to another branch. Using this screen, we can only send the stock from one branch to another branch.
Let’s imagine a scenario, where you wants to send specific product stock to one of your own branch store due to nil stock of that specific product in that branch. Follow the below steps in HHT Web Mobile interface and complete the Inter Branch Transfer (Send) HHT process.
How to do Inter branch transfer (Send) entry using HHT device ?
- Open HHT Web mobile interface URL in HHT device.
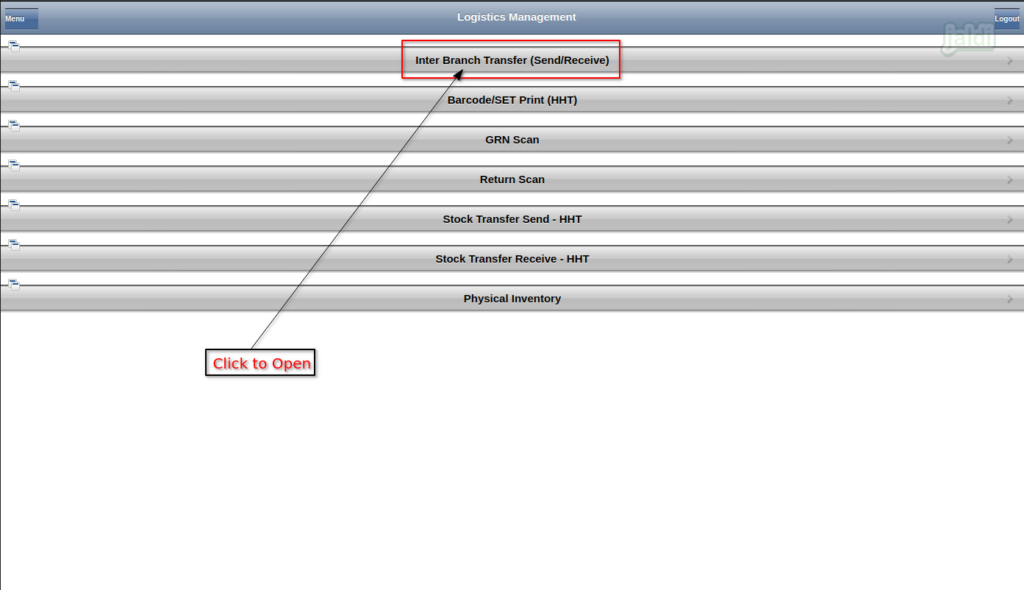
- Login the URL and go to the path Logistics Management > Inter Branch Transfer (Send) HHT.
- Click on Inter branch transfer (Send) HHT menu to open.
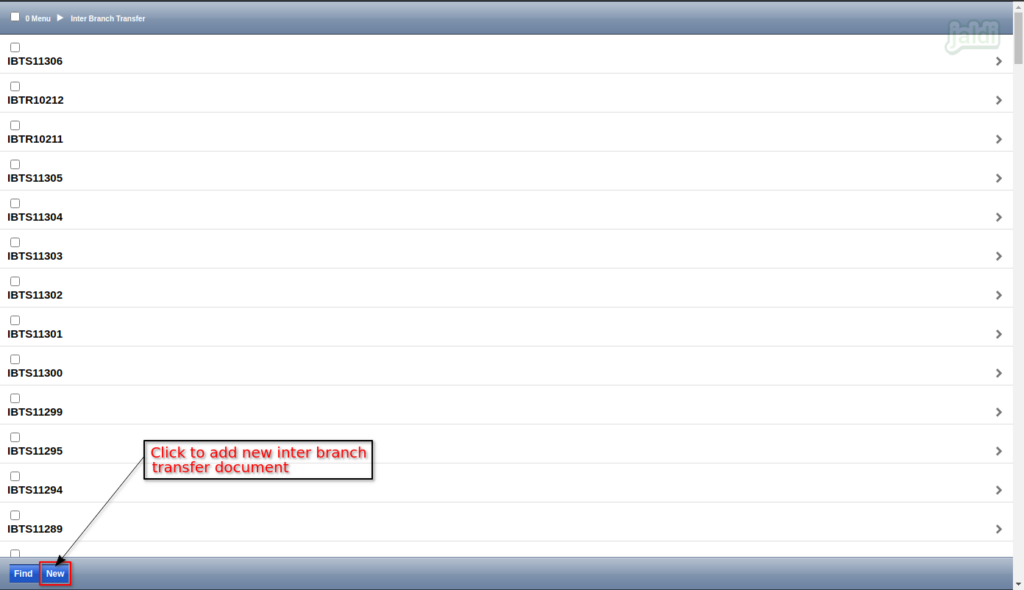
- In next screen, press “New” function key to create a new inter branch stock transfer document entry.
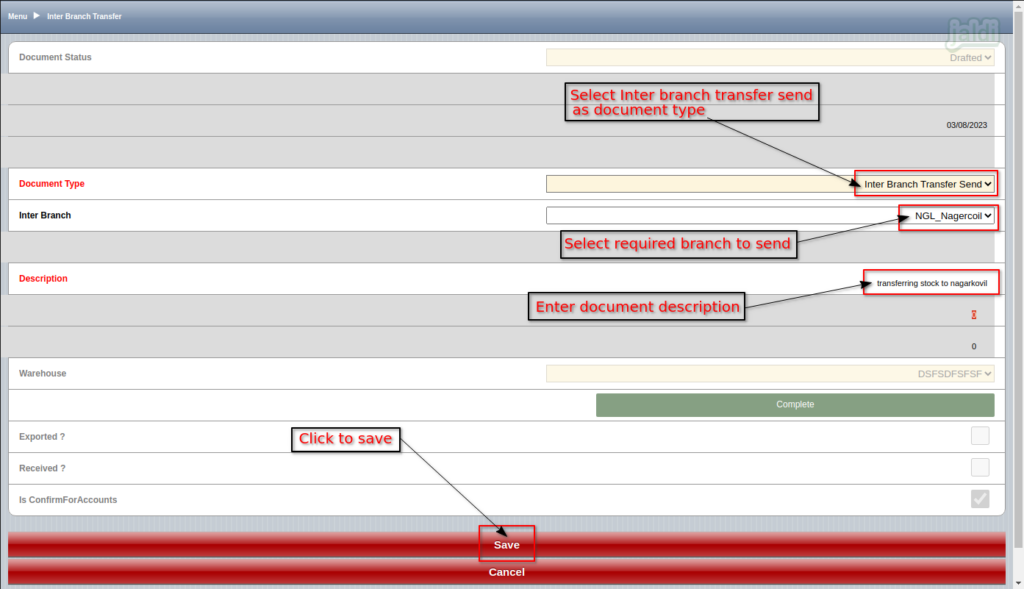
- Under “Inter branch transfer” tab screen, enter the following input data
- Document type – Select “Inter branch Transfer Send”
- Inter Branch – Select the “To branch” to send the stock.
- Description – Enter document description
- Once the required input data is updated, then press “Save” to save the data.
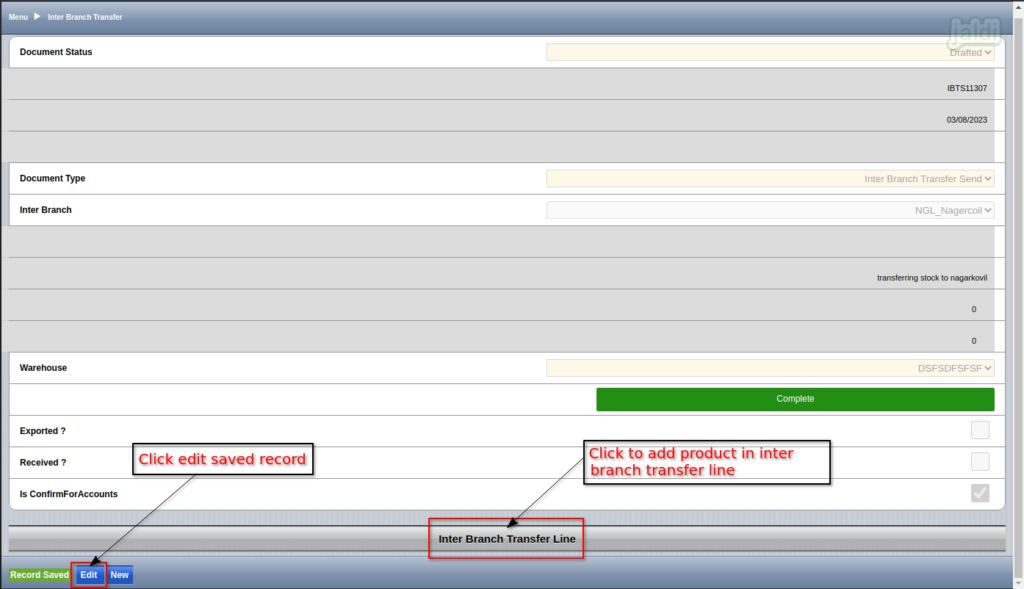
- Once the record is saved, system will show the function keys like “Edit and New”.
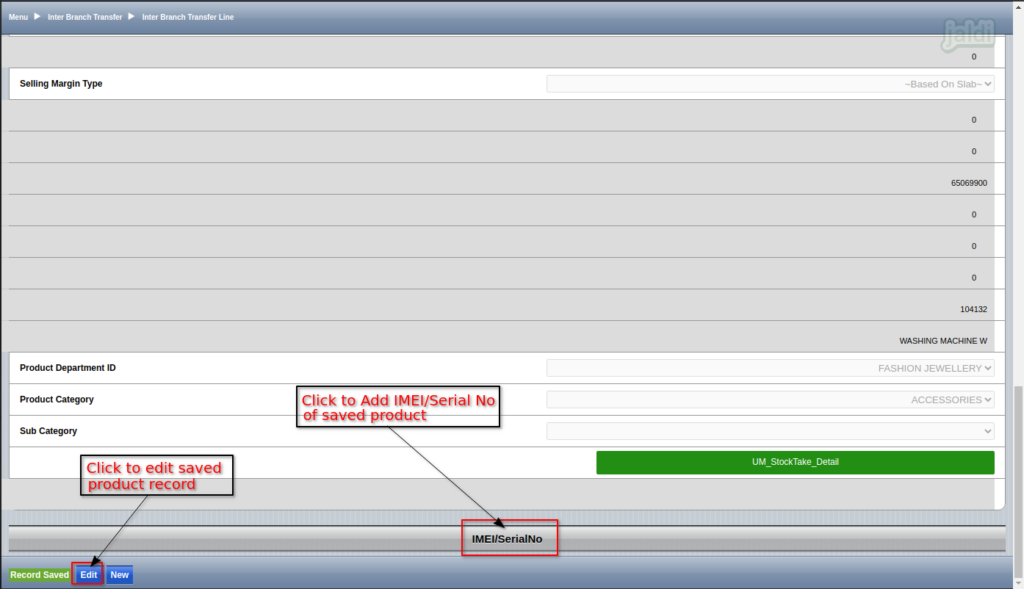
- Press “Edit” function key to edit the saved record.
- Press “New” function key to create a new document entry.
- After saving the inter branch transfer tab screen, Press “Inter Branch Transfer Line” function key to add the transferring products to the document.
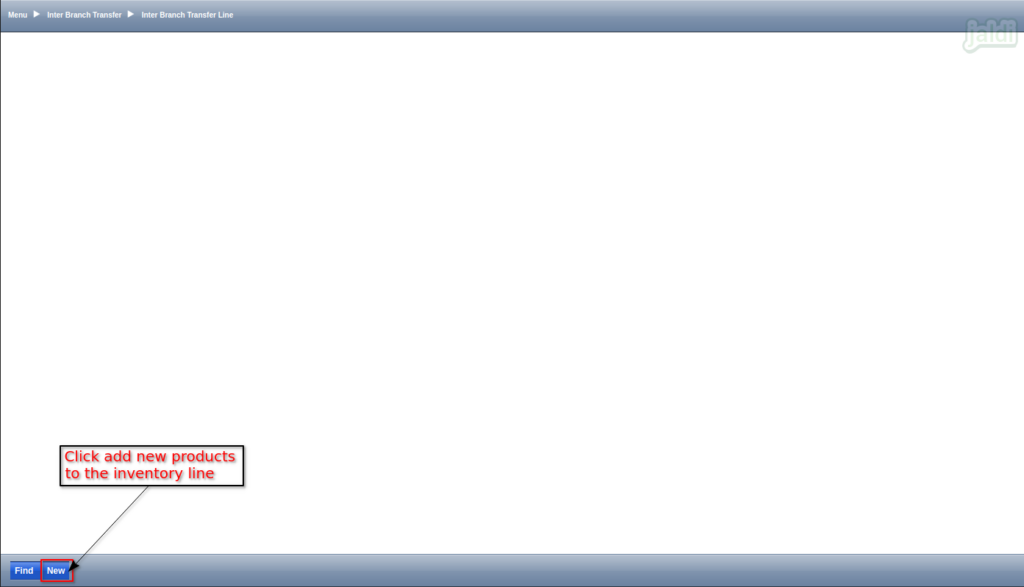
- In next screen, press “New” function key to add new product to the line.
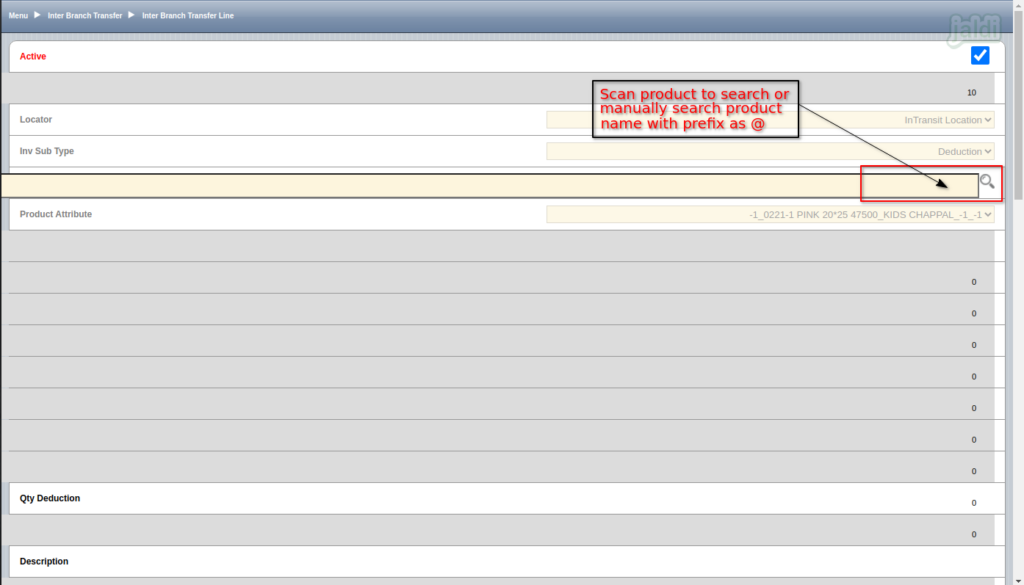
- To load the required product details, scan the product’s EANCODE or barcode on the below marked place in the image.
- We can also load the products by manually searching the product name. Search the product name with the prefix as @.
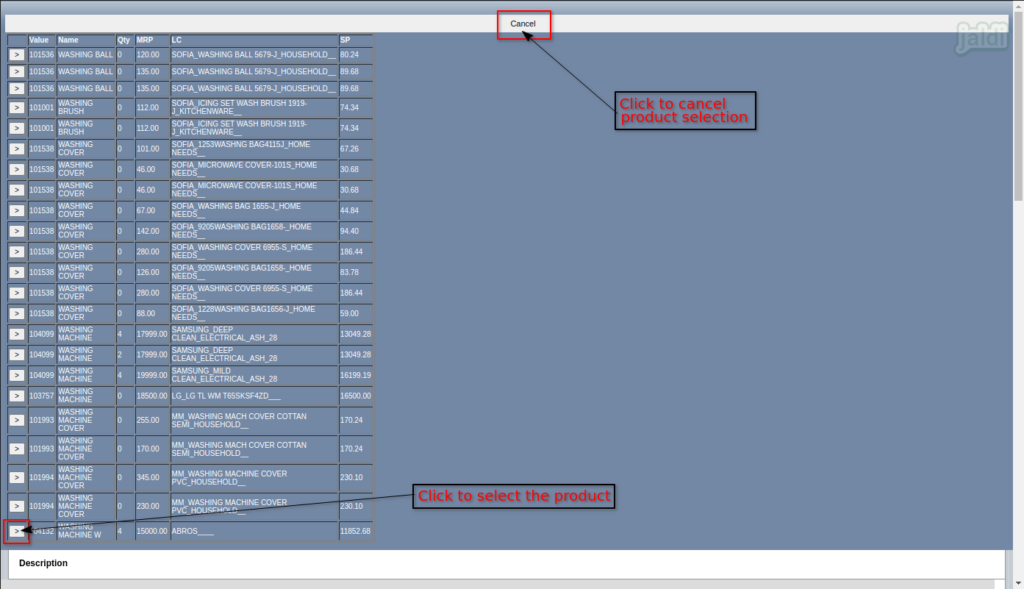
- Once the product is searched with name, the list of value based on the search will be displayed in screen like below shown image.
- Click the arrow symbol “>” to load the specific product.
- Click to “Cancel” to cancel the product selection process.
- Once the required products is selected by scanning or by manual search, the MRP batch value also will be auto loaded with the selected product.
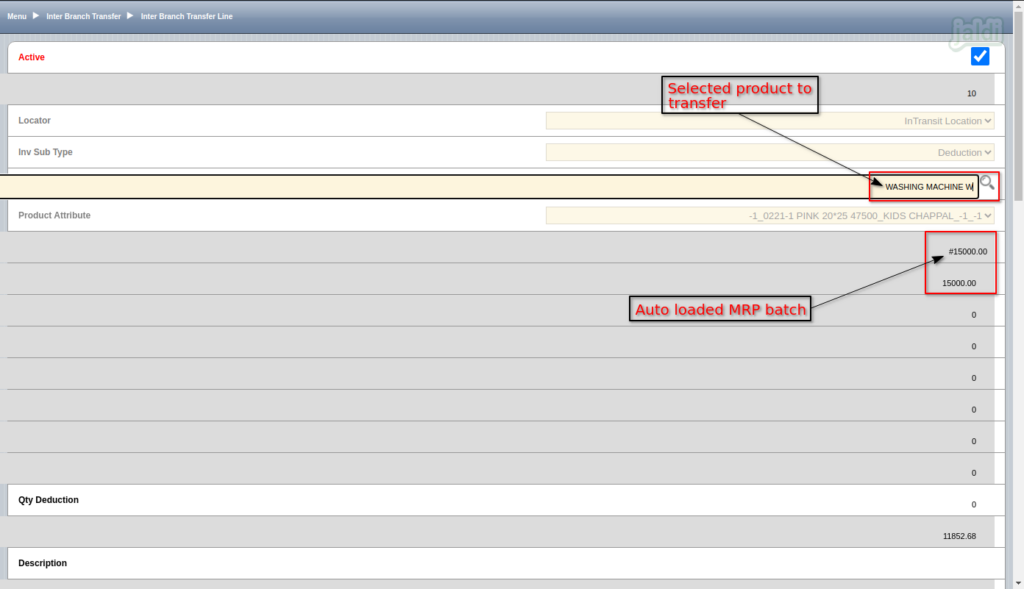
- Once the product is selected, enter the following input data
- Qty deduction – Enter Qty to transfer
- Description – Enter product description
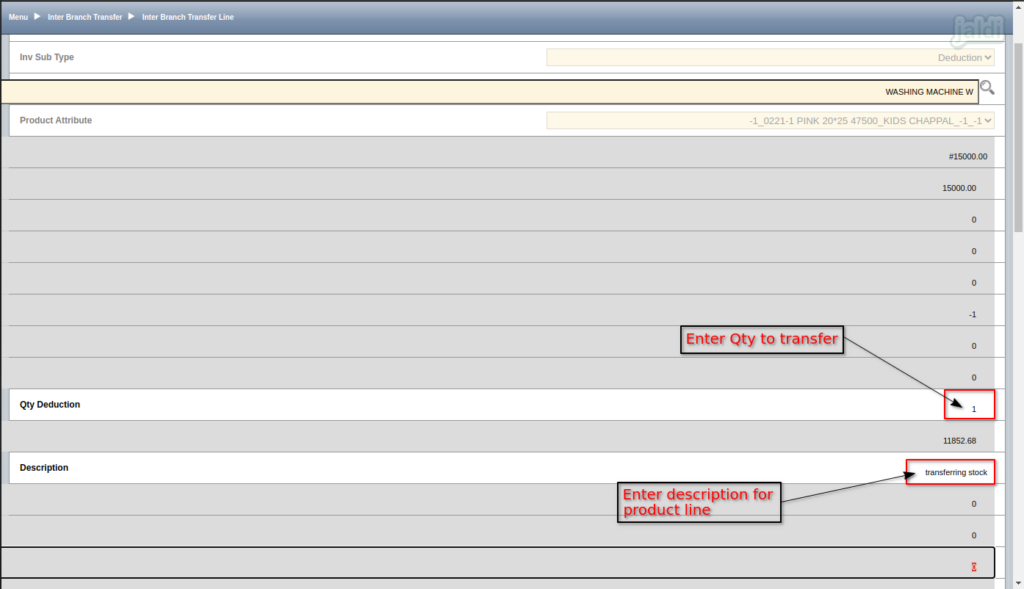
- After entering the required input data of selected product, then drag down the screen to below.
- Then press “Save” function key to save the product line.
- User can add multiple products like this under “Inter branch transfer line”.
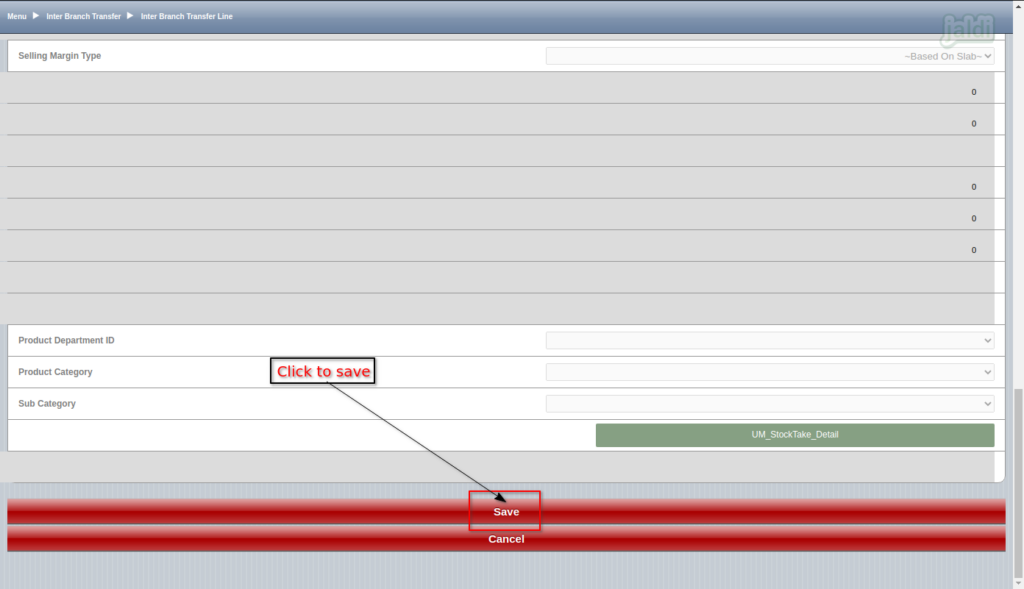
- If the selected product is not serial number or IMEI managed product, then the product line entry will be completed with the above steps.
- If the selected product is a serial number or IMEI enabled product then we have to enter IMEI and serial number of selected product for each transfer qty.
- To add IMEI and Serial number, press “IMEI/Serial No” function key which is marked in below image.
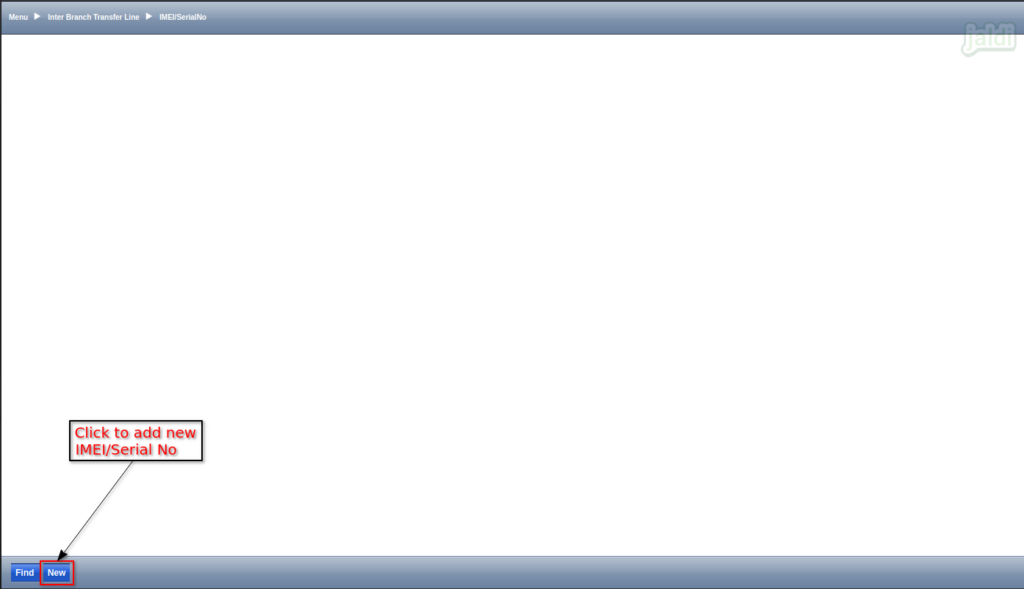
- In next screen, Press “New” to add new IMEI and serial number to the respective products.
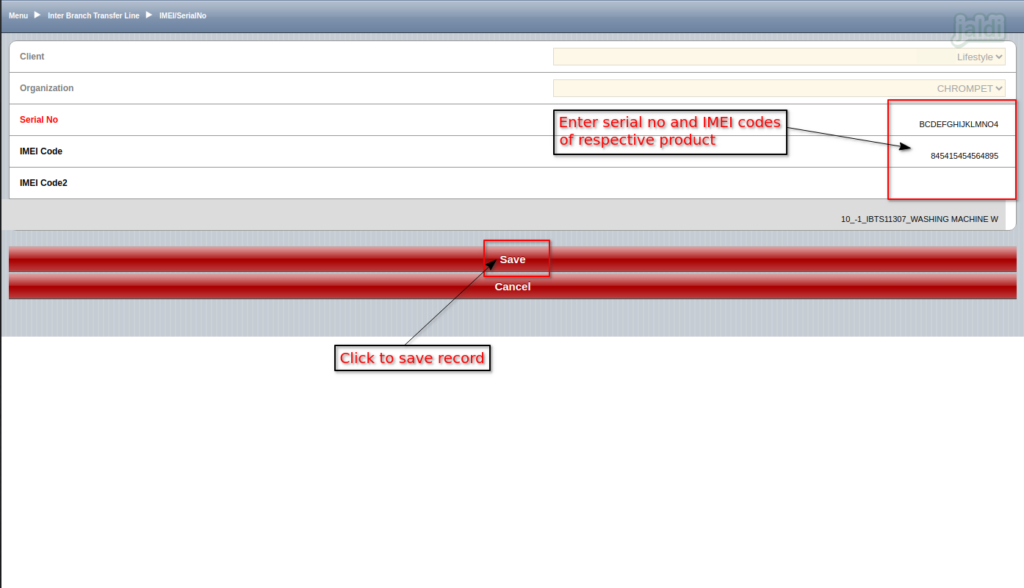
- In “IMEI/SerialNo” tab screen, Enter “Serial No, IMEI code and IMEI code 2” of the respective product.
- User can add multiple IMEI and Serial number for single product (equal to transferred Qty).
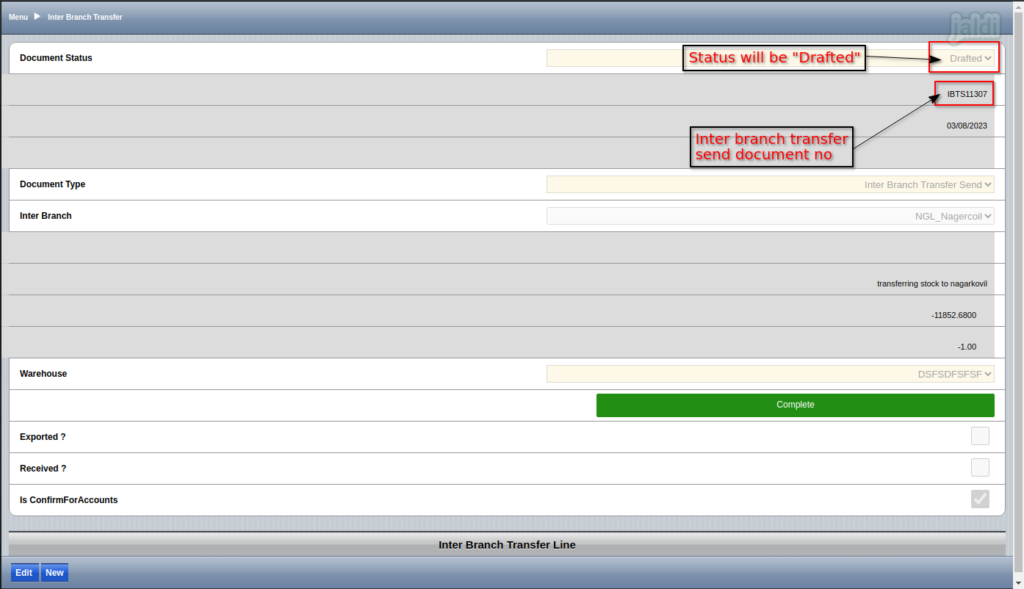
- Now go back to “Inter branch transfer” tab screen and note down the “Document No” which is marked in below image.
- The document status will be “Drafted” until the document is confirmed and completed in Jaldi Lifestyle POS.
How to complete “Drafted inter branch transfer” document entry in Jaldi lifestyle POS
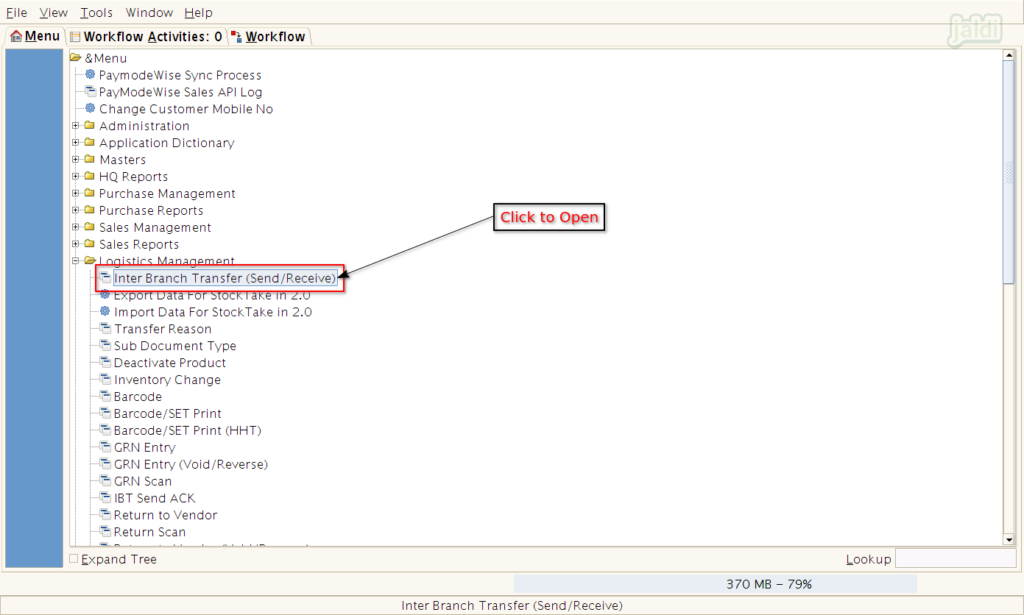
- To complete the drafted entry from HHT device, go to application path Logistics Management > Inter Branch Transfer (Send/Receive).
- Click on that menu “Inter Branch Transfer (Send/receive)” to open.
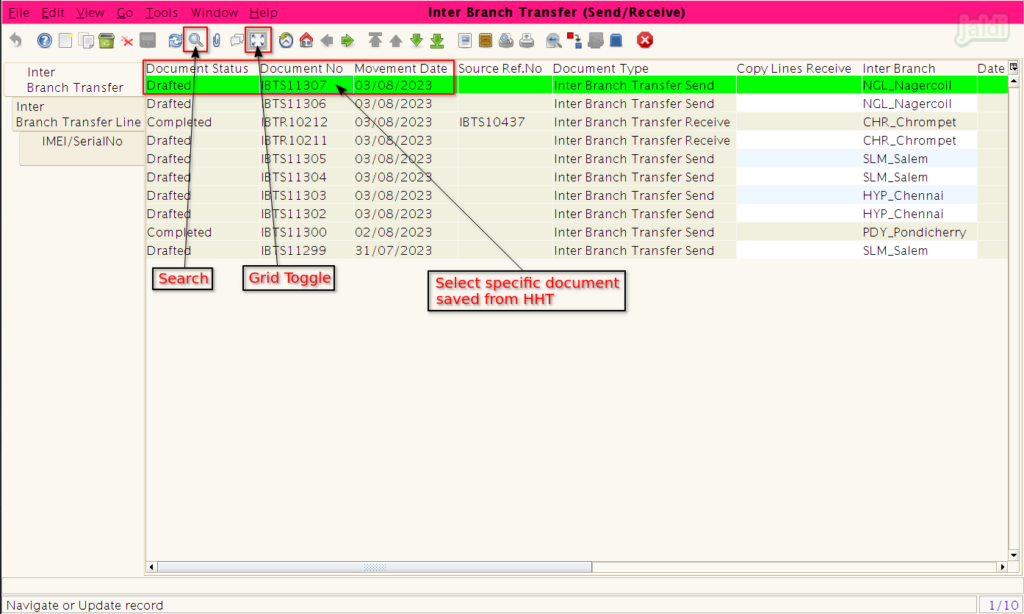
- The list of drafted and completed IBT entries will shown like below shown images.
- To find the specific document number, press “Search” and search the specific document.
- After selecting the specific document, press “Grid toggle” to open detailed view of the entry from the list view.
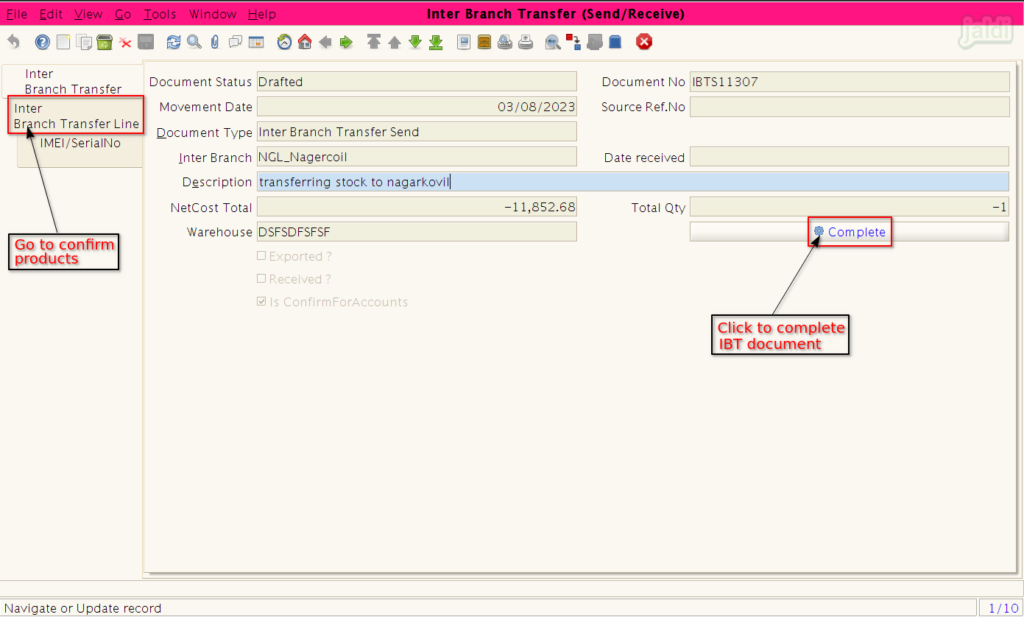
- In detailed view, under “Inter branch transfer” tab, check and confirm the document details.
- Also under “Inter branch transfer line” tab, check and confirm the saved product to transfer.
- Once the details are confirmed, press “Complete” to complete the document entry.
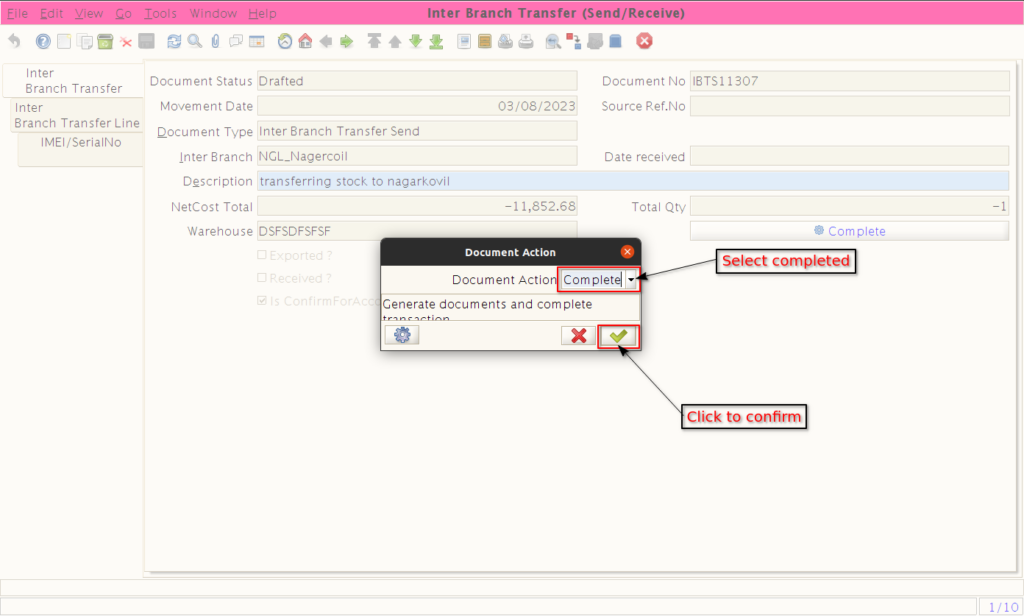
- In document action popup screen, make sure “Completed” is selected as document action.
- Press “green tick mark” to confirm and proceed to complete inter branch transfer send document entry.
- To know how to receive the send stock in “To branch”, click and go through the following link https://jaldi.store/inter-branch-transfer/.