Pay mode in Jaldi Superstore POS
Pay-mode master used for user to add new paying modes for sale as well as managing existing available paying modes for billing purpose.
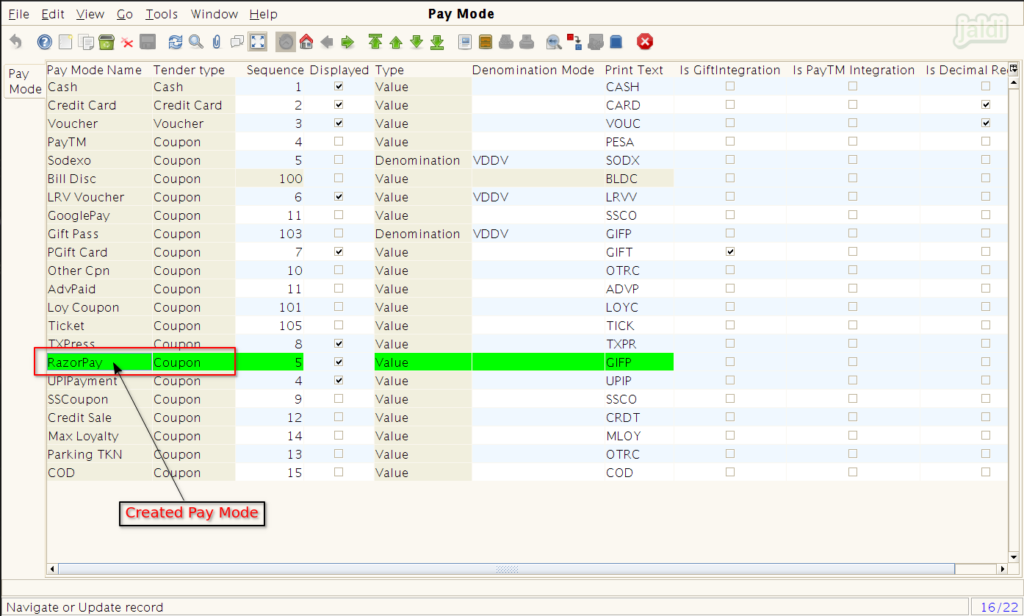
Example, take a pay type “RazorPay”, read the following instruction to add razorpay in pay mode master.
Pay-mode creation
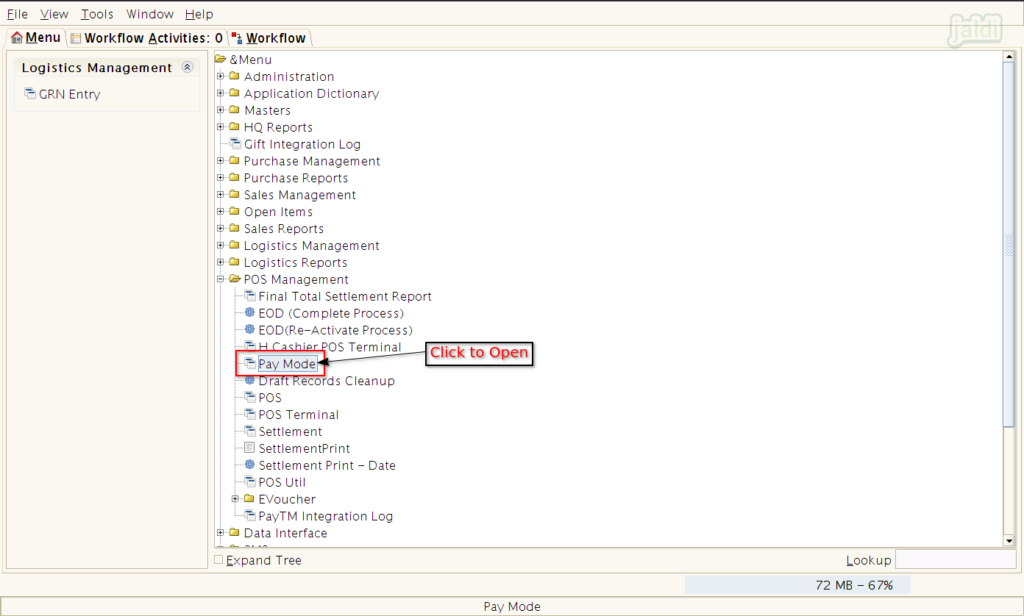
- Select pay-mode in menu POS management > pay-mode.
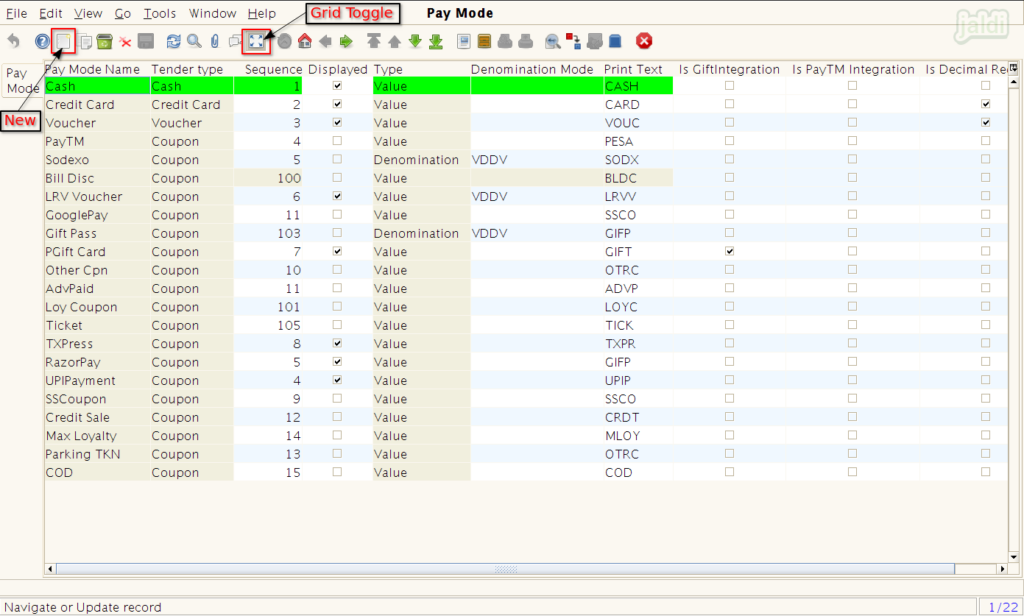
- Click to “new” & ‘grid-toggle’ options to open add screen.
- Update pay mode name & tender type and save existing screen.
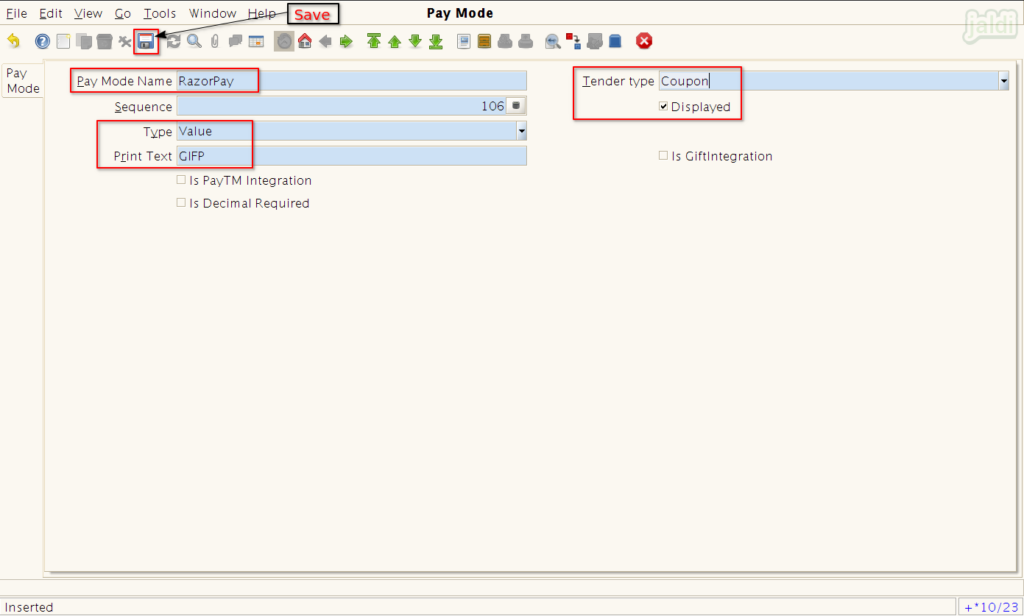
- Once the pay mode is saved, then it will be added to the Pay Mode list like below shown RazorPay Pay mode.
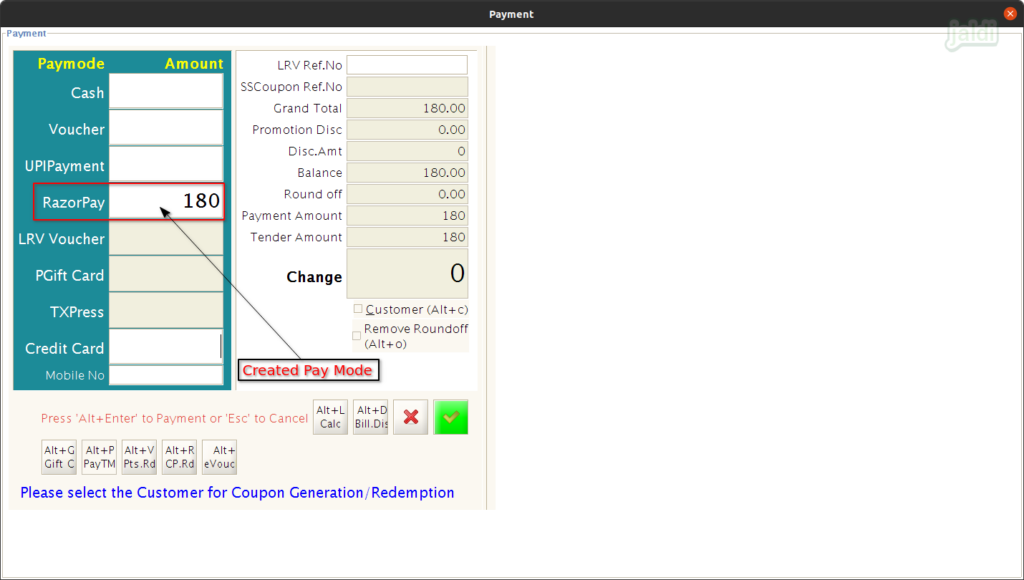
- The created Pay mode (RazorPay) will be displayed in POS payment screen to receive the payment from the customer for the sales bills.
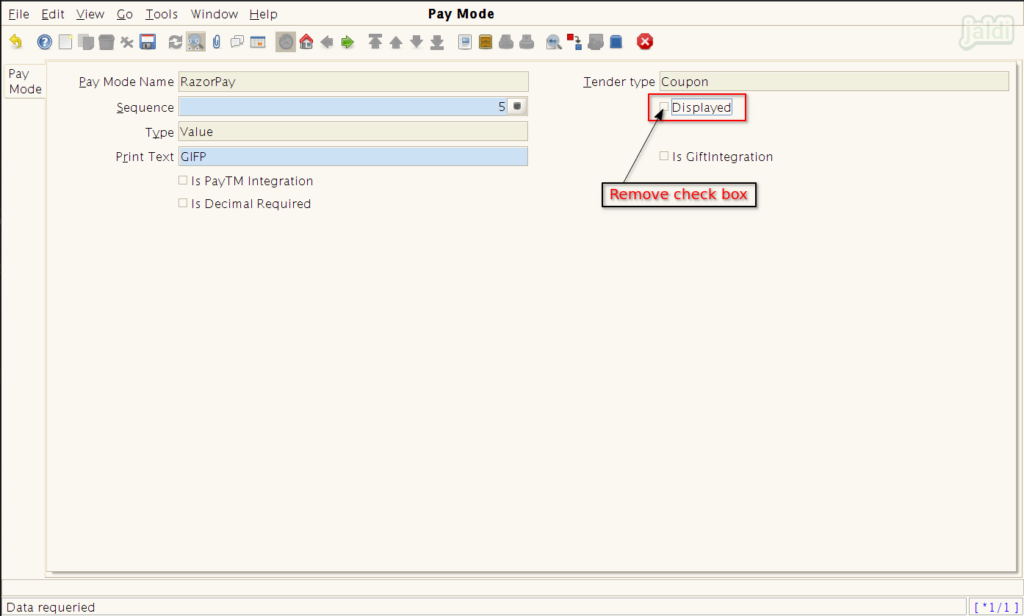
How to Edit and Deactivate created Pay Mode ?
- Follow the mentioned instructions in pictures to edit and deactivate
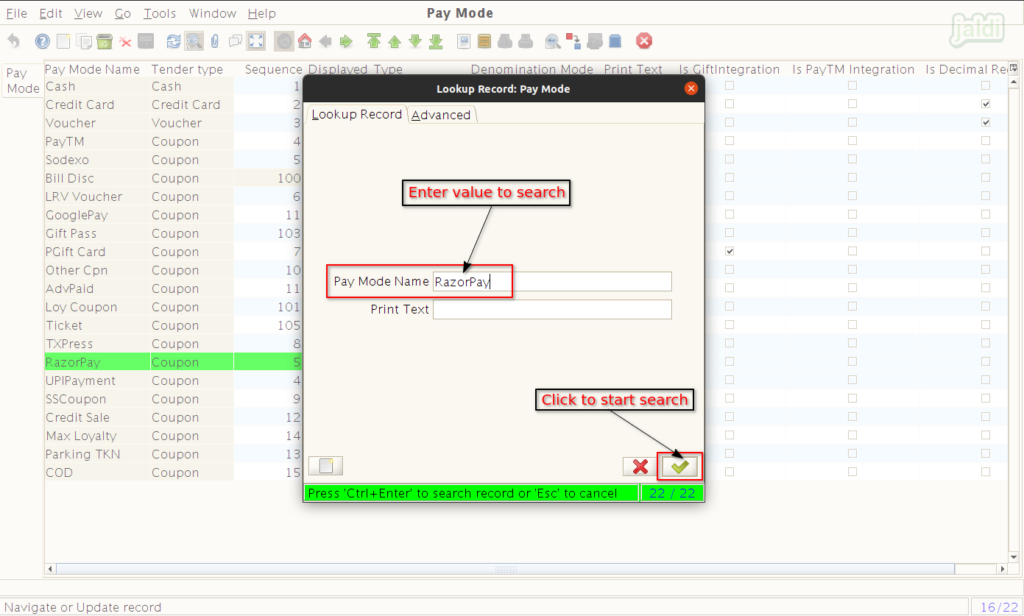
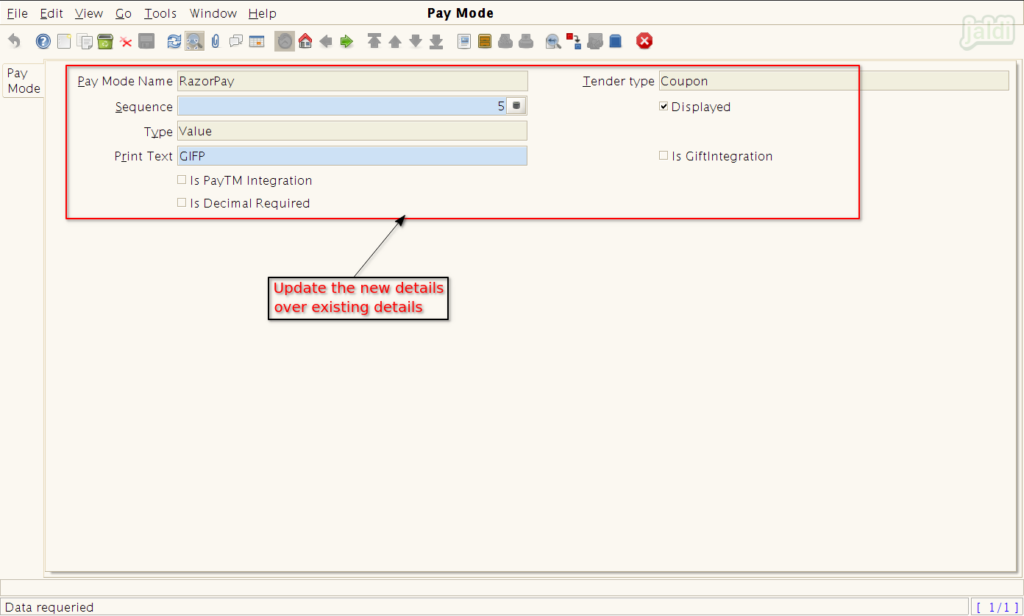
- To edit a pay mode,
- To deactivate a pay-mode,