Promotion Setup in Jaldi Lifestyle POS
Promotion setup is the screen where you can create a promotion or offer for a bulk products and also for specific product. There is two type of promotion mode type in this screen,
- Promotion Price – Keeping discount percentage or amount for the products.
- Free Item – Mapping specific item as free against products.
Check the following steps to get to know how to create and manage both type of promotion mode in Jaldi Lifestyle POS.
How to Create Promotion Price Offer ?
Lets consider the scenario where your sales management team wants to create a “20 percentage” offer for all the available products under the “Panasonic” brand. Lets see how it should be created in Promotion setup screen.
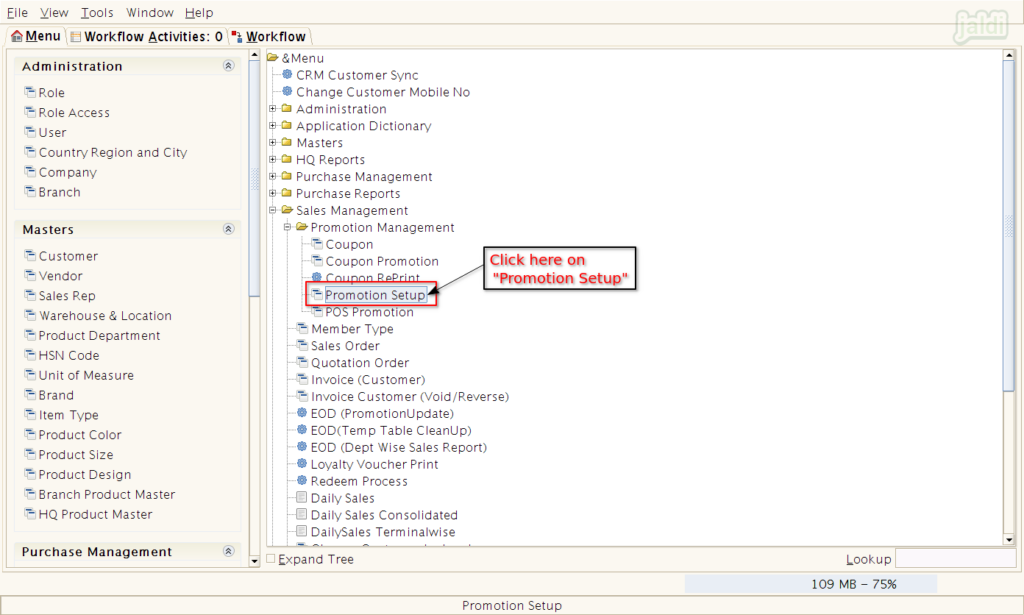
- Go to application path, Sales Management > Promotion Management > Promotion Setup.
- Click on the “Promotion Setup” menu which is marked in below image.
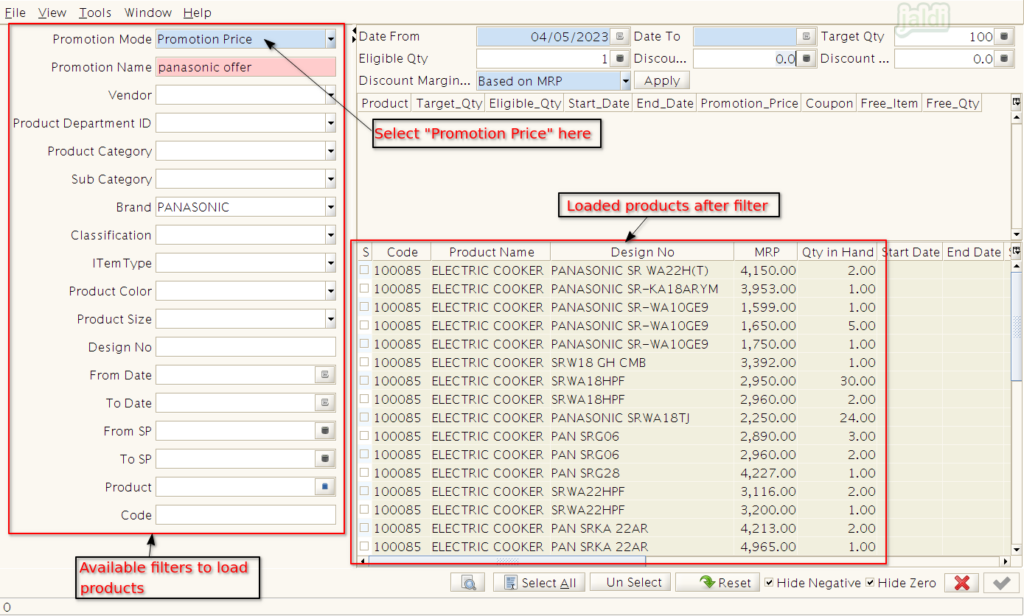
- In Promotion setup screen, Enter the following mandatory fields
- Promotion Mode – Select “Promotion Price”.
- Promotion name – Enter the Name of the promotion you are creating.
- You can find the multiple filters in left side of the screen, use those filters to load the specific set of products in bulk.
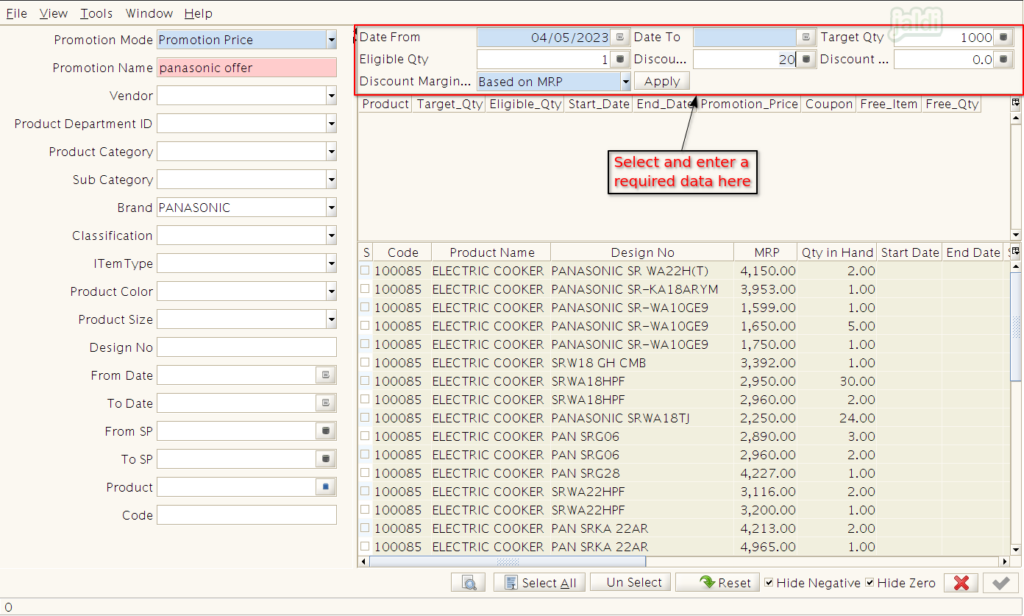
- Then enter the following details about the promotion,
- Date From – Starting date of the promotion
- Date To – Last Date of Promotion
- Target Qty – Target qty to sale in this promotion time period.
- Eligible qty – At which qty the promotions should be applied.
- Discount Percentage – Enter the promotion percentage (Ex-20%) or
- Discount Amount – Enter Discount in amount
- Discount Margin – Select any one of the following option
- Based on MRP – Discount value will be applied on MRP
- Based on Selling Price – Discount value will be applied on Selling Price
- Then select the specific required products or click on “Select All” to select all the loaded products.
- You can also hide negative stock and zero stock items from the loaded items using the check box “Hide Negative and Hide Zero” respectively.
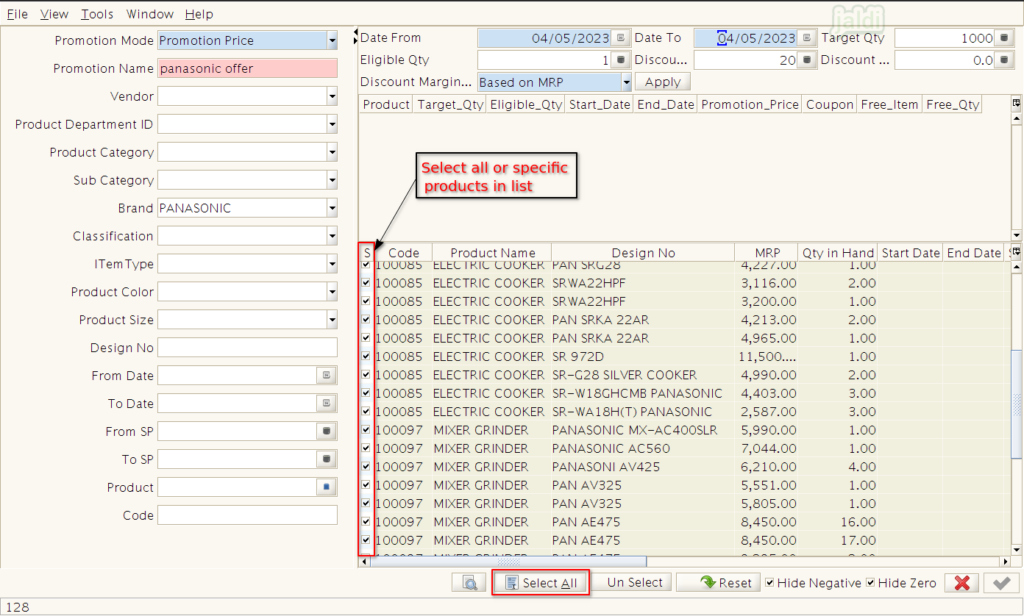
- Once the required products has been selected, Then click on the “Apply” option which is marked in below image.
- Then all the selected products will change in to “Blue colour” that indicated that entered promotion details are applied on the selected products.
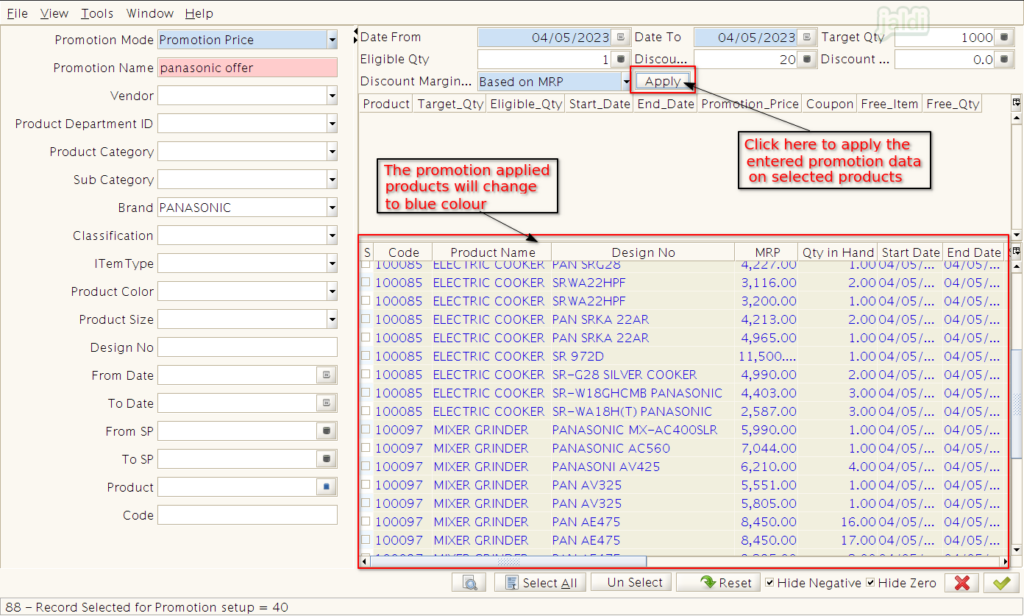
- After that, click on the “Apply (green tick mark)” which is marked in below image to complete the promotion creation.
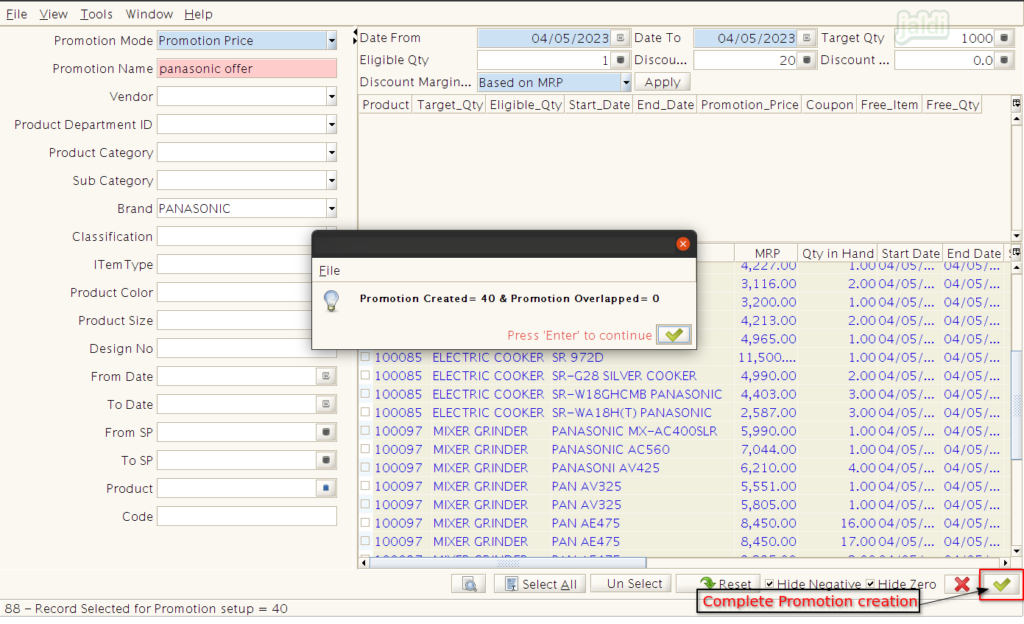
Created Promotion Price at POS
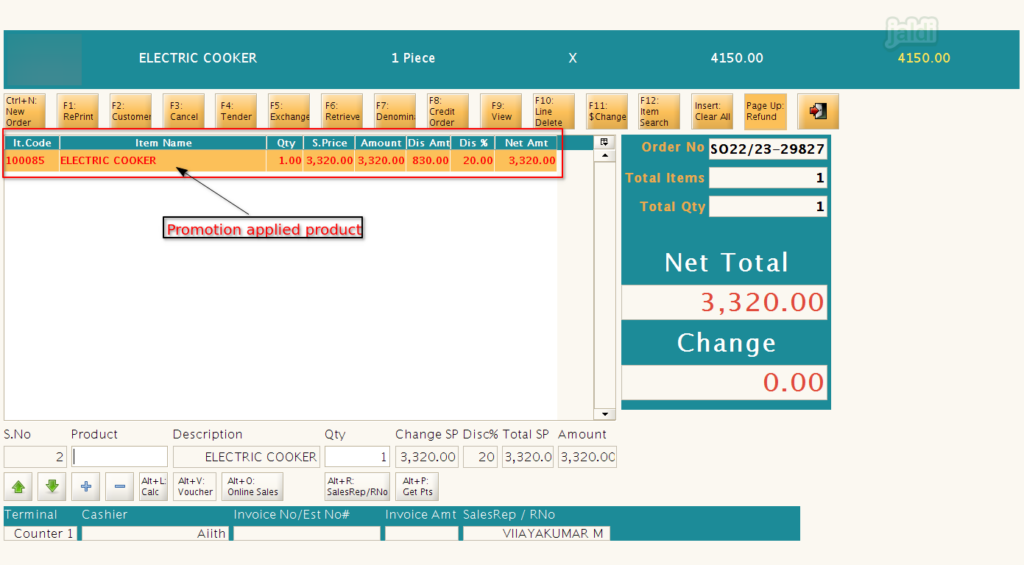
- Once the promotion price offer is created, Go to POS screen to start the billing process.
- When the promotion created products are loaded in POS screen, you can see them in red colour with promotional price like below captured image.
How to Create Free Item promotion ?
Lets imagine the real time scenario, where your sales team wants to give a Rs.1000 shoe as free when the Rs. 9800 shoe is sold. Lets see how it should be created in Promotion setup screen.
- Go to promotion setup screen, Enter the following details
- Promotion Mode – Select “Free Item”
- Promotion Name – Enter the “Promotion Name”
- Then same like above mentioned, use filters to load specific sets of products.
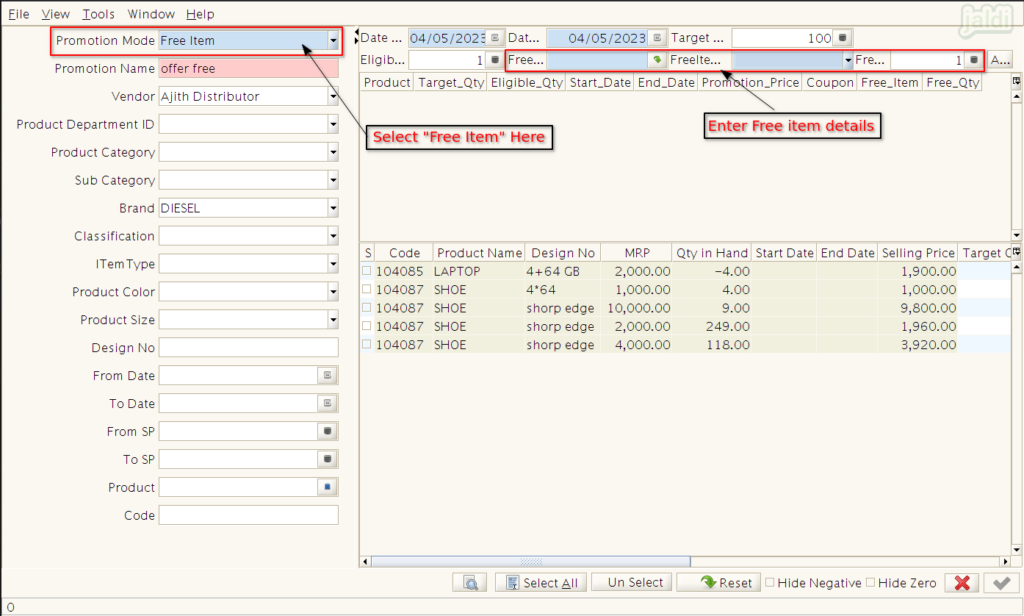
- Then enter the following details about the promotion,
- Date From – Starting date of the promotion
- Date To – Last Date of Promotion
- Target Qty – Target qty to sale in this promotion time period.
- Eligible qty – At which qty the promotions should be applied.
- Free Item – Select the item to give as free.
- Free Item Batch Price – Select the batch price of free item
- Free Qty – Enter the number qty you want to give as free.
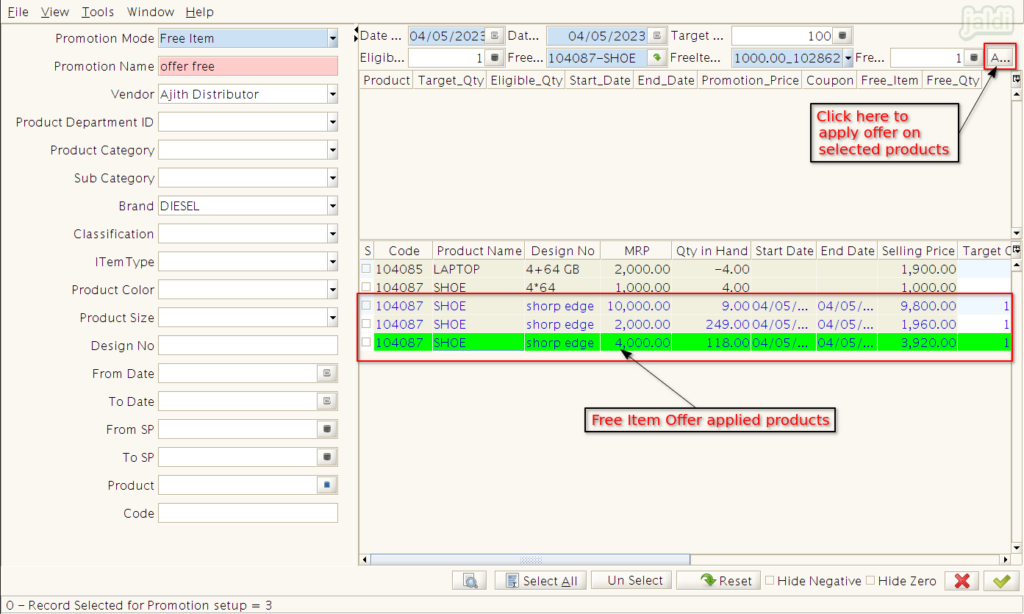
- Then select specific products or select all the products to apply the promotion.
- Click on Apply to apply and then complete the Free Item promotion creating process.
Free Item offer at POS
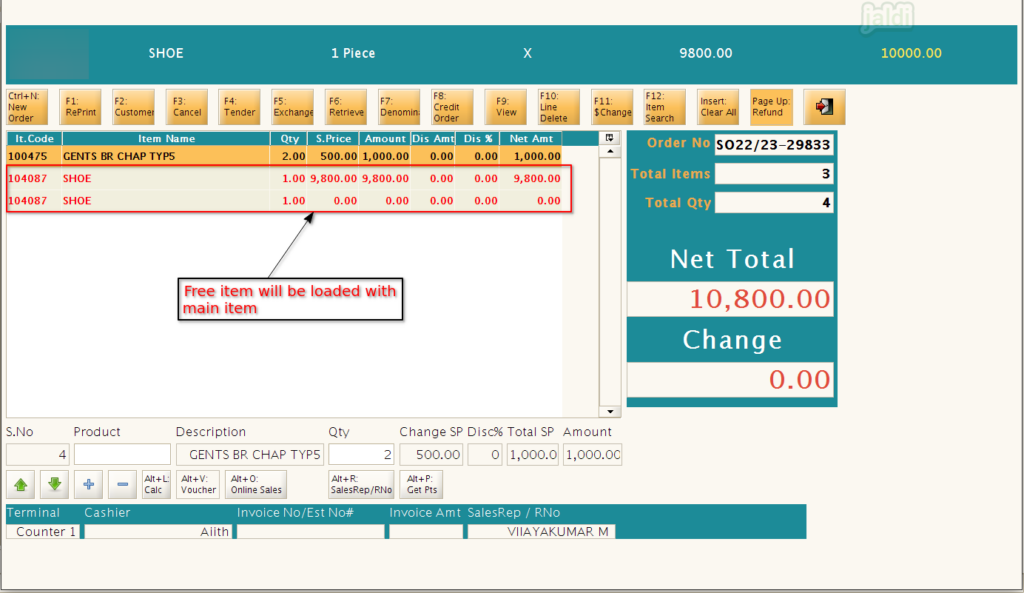
- When the Free item mapped products are loaded in the POS screen, then the mapped Free item will be load along with the main product.
- Both main and Free items will be in red colour like below shown image.
