Return to vendor in Jaldi Lifestyle POS
Return to vendor or purchase return is nothing but the debit note which is raised to vendor by the purchase management team due to any reasons like damage, expiry or etc.
When vendor is accepting the return then only we have to do “return to vendor” entry, If vendor is not accepting the returning goods, we have to adjust the stock in “Stock adjustment” screen.
Lets consider a real time scenario, where GRN made for the 100 quantity of shoe from the vendor “Ajith distributor”. After receiving the stock in GRN entry, your team found that 10 shoes are damaged. You have informed your vendor and your vendor asking for debit note (Return print document) for to take the goods in return. Once return made then only the supplier outstanding will be correctly updated. Find the following steps to complete the “return to vendor” entry in Jaldi Lifestyle POS application.
How to do Return to Vendor entry or purchase return ?
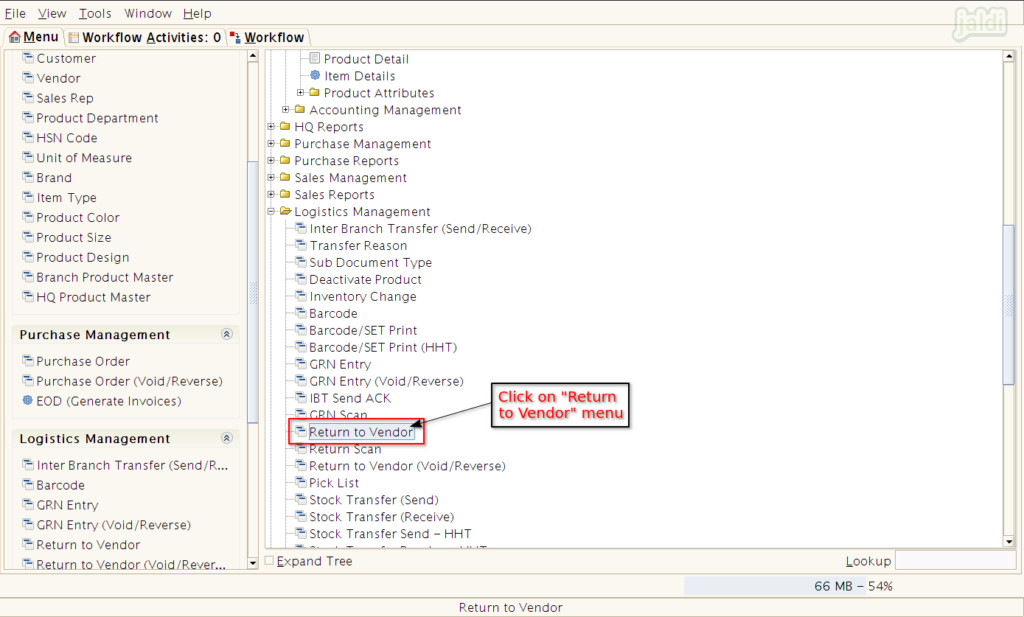
- Go to application path, Logistics Management > Return to Vendor.
- Click on “Return to Vendor” menu to create a new purchase return.
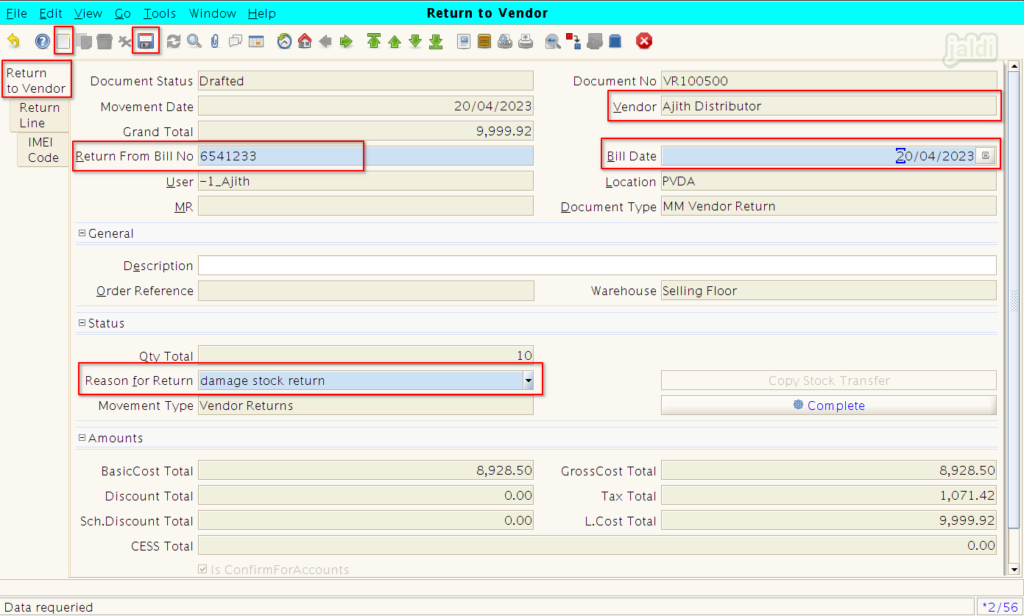
- In Return to Vendor screen, Under “Return to Vendor” tab, Press “New” function button.
- Then enter required details in following fields,
- Vendor – Select specific vendor to return goods.
- Return From Bill No – Enter the GRN number where the goods are received.
- Bill Date – Select the return date.
- Reason for Return – Select the reason to returning the goods.
- Then click on “Save” function button. Once saved, move to “Return Line” tab.
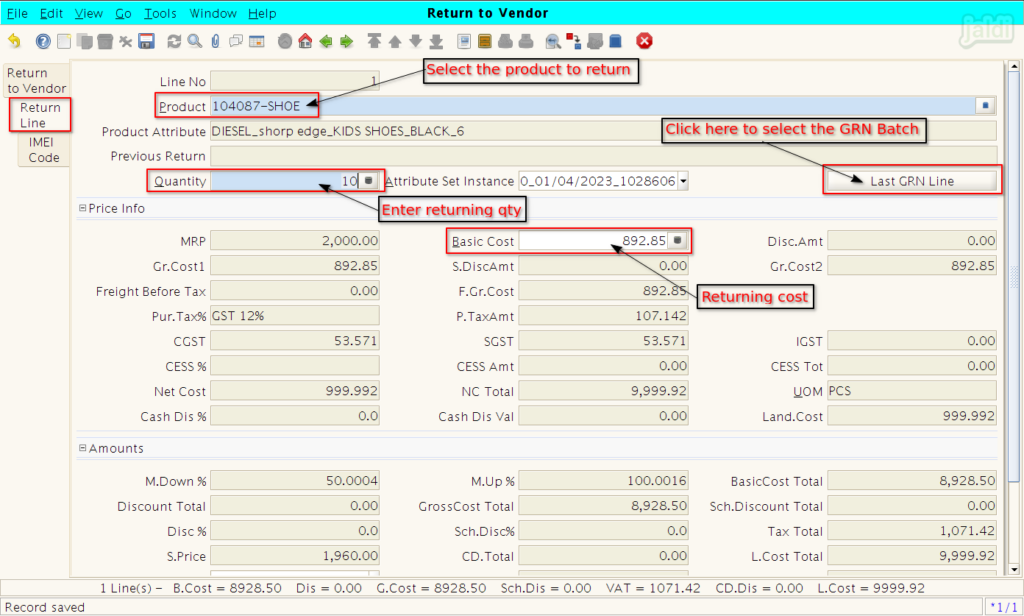
- Under Return Line tab, enter the details in following fields,
- Product – Select the product name
- Quantity – Enter return qty.
- Then click on “Last GRN Line” option which is marked in below image.
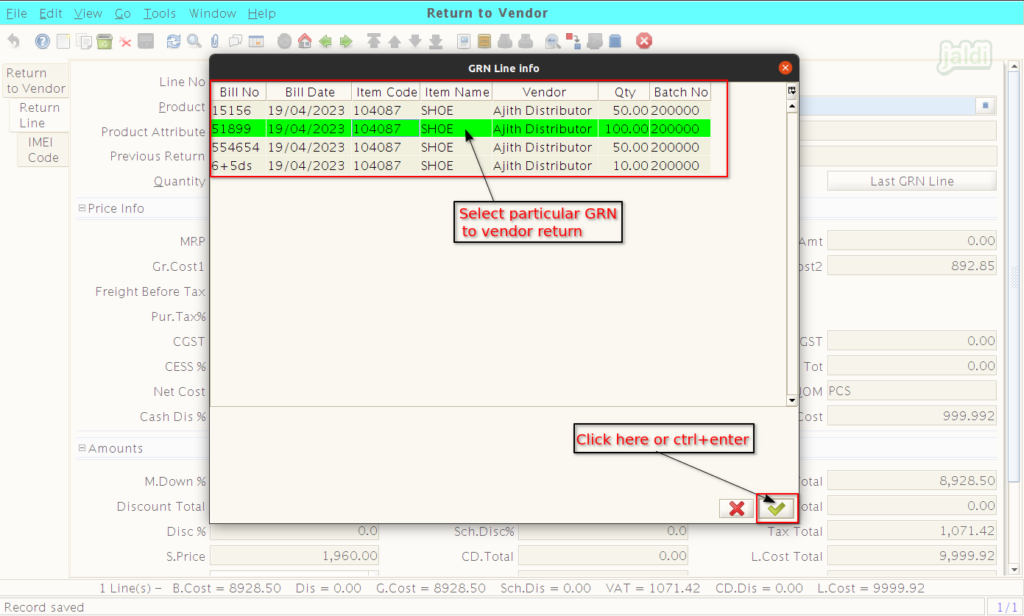
- Once we click on “Last GRN Line” option, system will show the GRN bill no where the selected products is received.
- Select the correct Bill no and click on “Green tick” which is marked in below image or press ctrl+enter to load item details in Return Line.
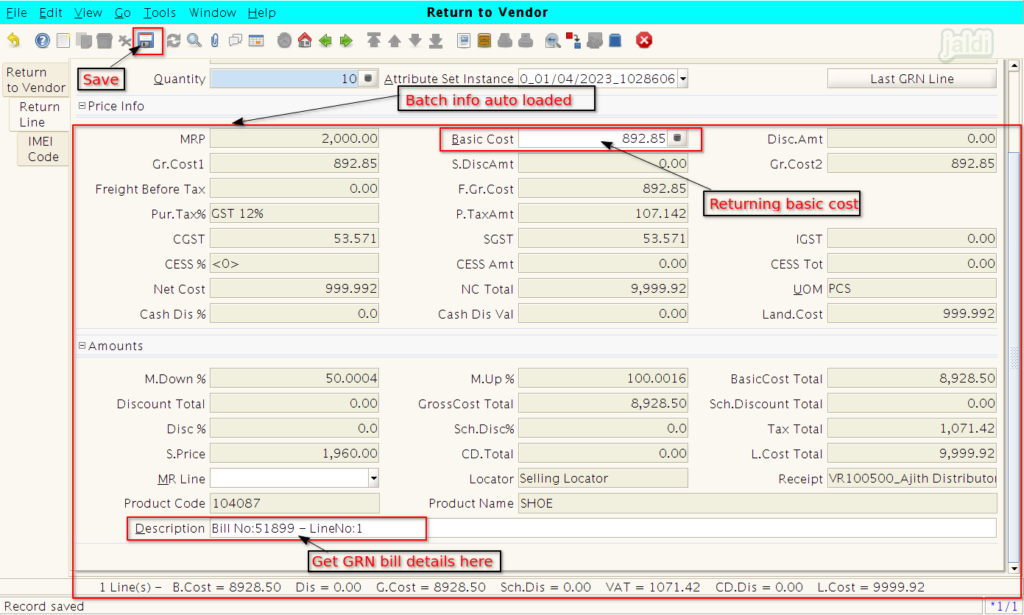
- Now in return line, the products price details will auto loaded from the GRN entry.
- We can find the GRN Bill No and Line No of selected returning product.
- Enter Basic cost (if there any changes) and then click “Save” function key.
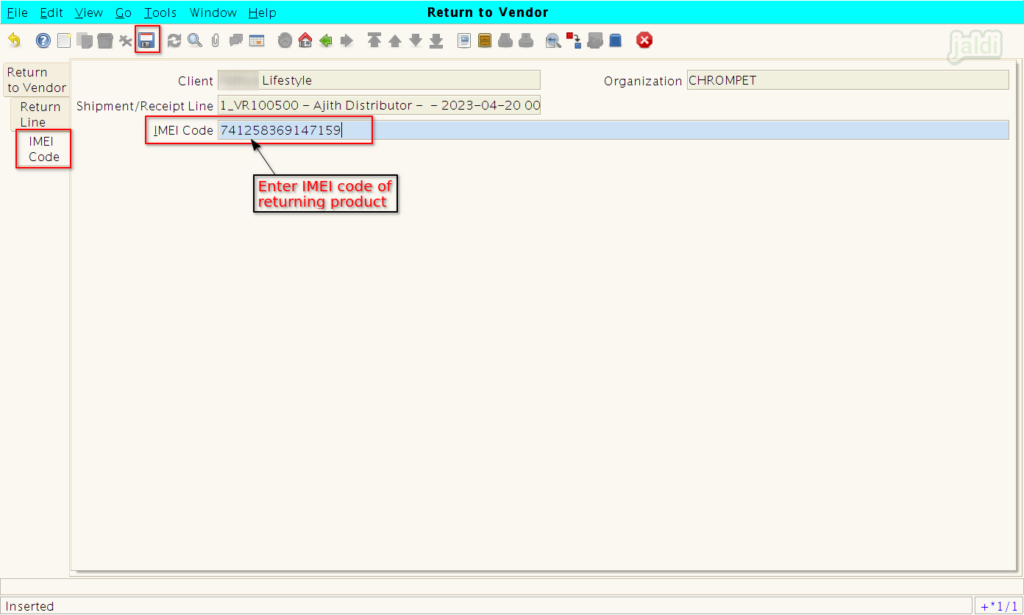
- If the returning product is IMEI product, then move to “IMEI Code” tab.
- Enter IMEI Code of returning product and then press “Save”.
- If returning product is not IMEI Product skip this tab.
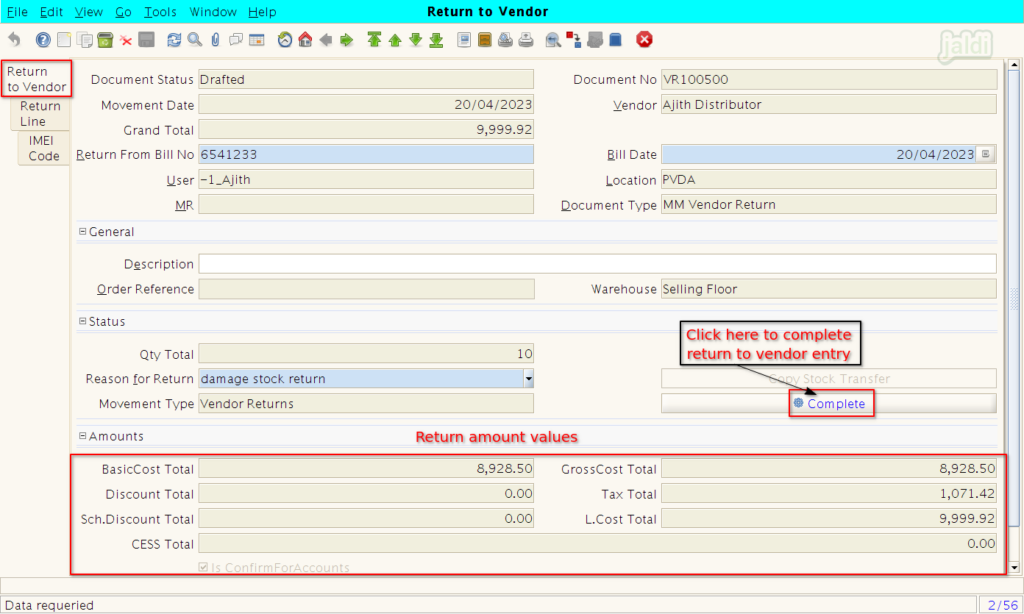
- Once each tab is filled with required data and saved, move to “Return to Vendor” tab.
- Now click on “Complete” option to complete the “Return to Vendor” entry.
How to Void completed Return to Vendor entry ?
- Only completed vendor return entry can be voided or reversed.
- We cannot edit the completed “Return to Vendor” entry.
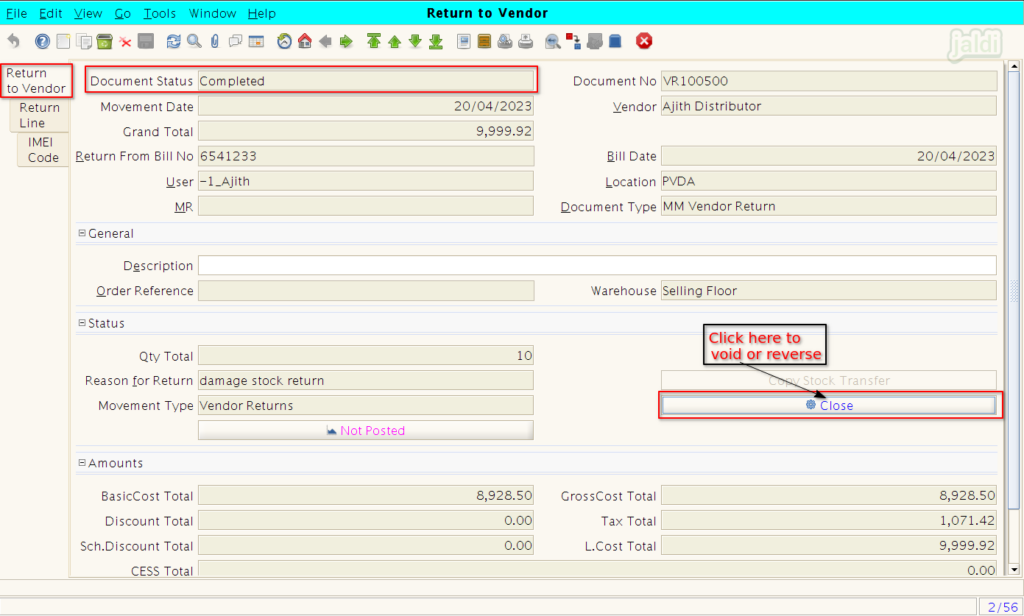
- Go to “Return to Vendor” screen and open specific completed entry.
- We can see the Document status as “Completed” like below shown image.
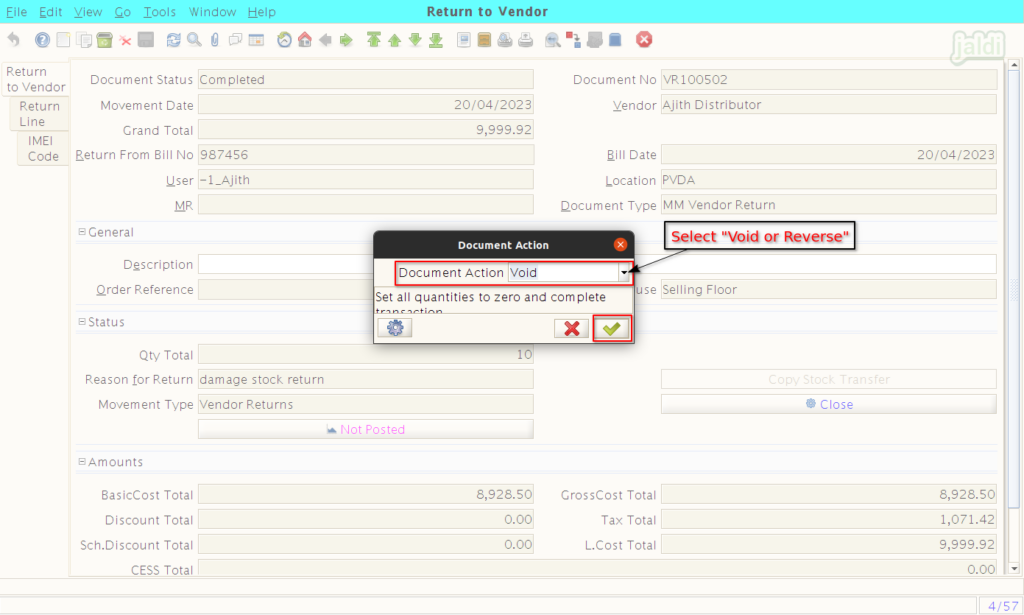
- Click on the “Close” option, now system will show the “Document Action” popup.
- In Document Action popup, we can see both Void and Reverse.
- Select “Void” as Document Action.
- Then click on “green tick mark”.
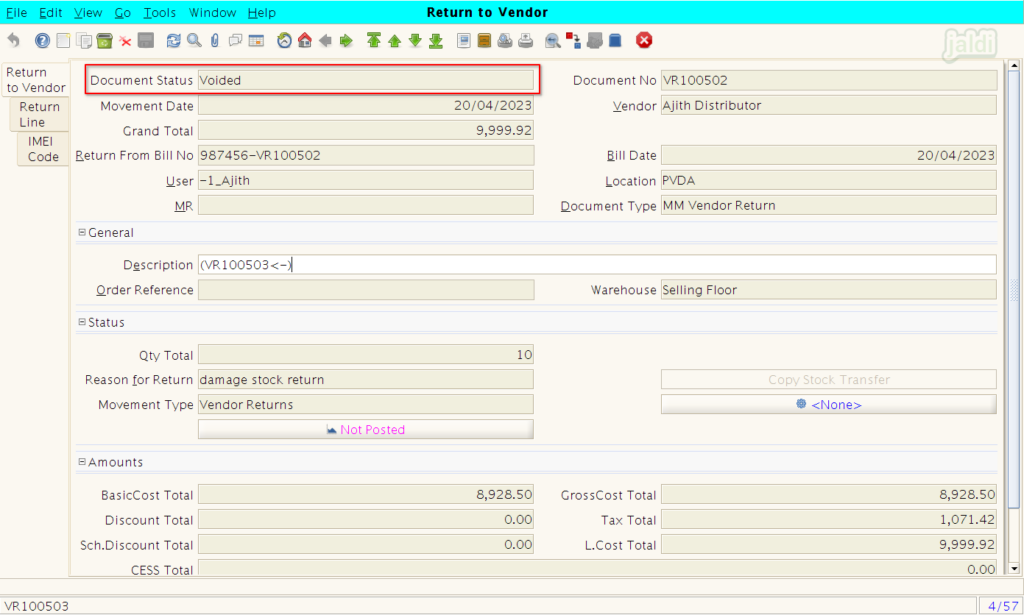
- Once void update is completed, we can see the Document status as “Voided”.
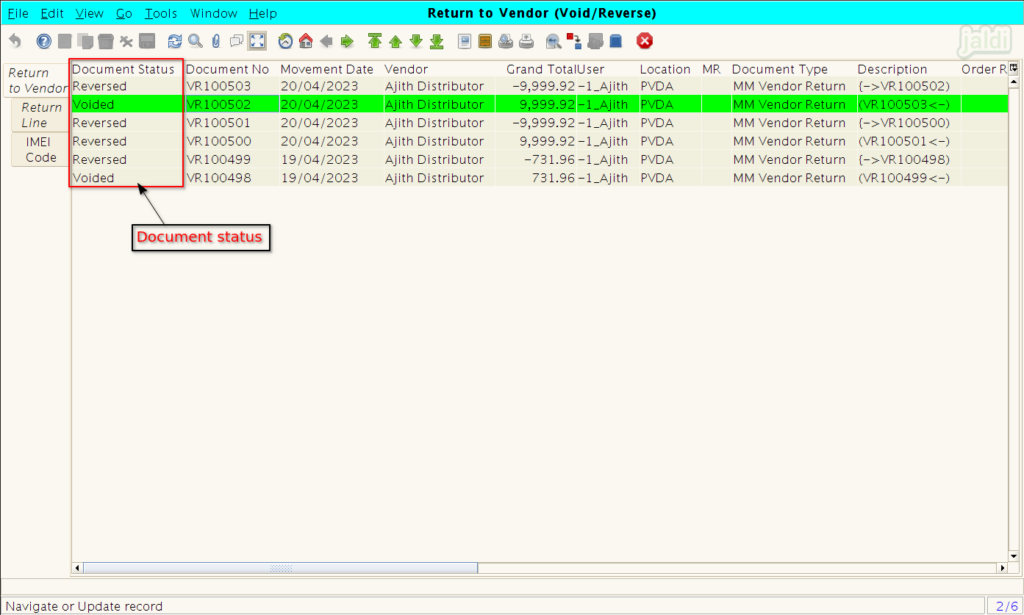
- To see all the voided and reversed return entries, go to the path Logistics Management > Return to Vendor (Void/Reverse).
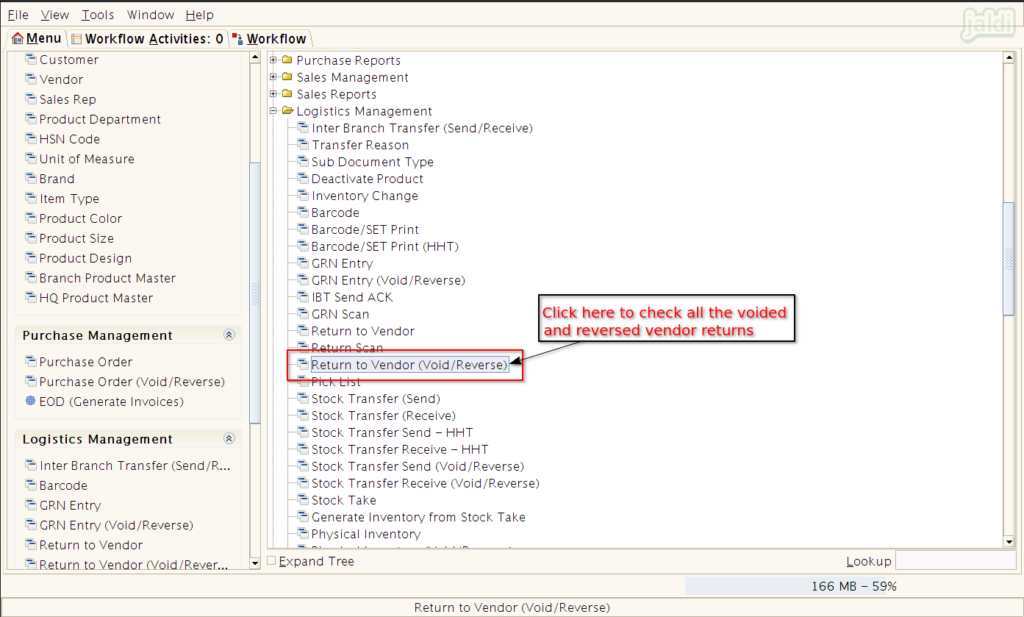
- As shown in below image, we can see all the voided and reversed “return to vendor” entries.
