Return to vendor in Jaldi Superstore POS
Return to vendor is the menu which is used to update the details of the goods return to the vendor or supplier due to damage, expiry or any other valid reasons. This process is also called as purchase return.
Let’s think of a situation in which the GRN group did GRN for 20 quantities of “Hamam 100gms” soap that were purchased from “Ajith Enterprises” in real time. Six soaps were broken, as discovered by your team upon receiving the stock in the GRN entry. You have notified your supplier, and in order to accept the items back, your vendor has requested a return document. Check following instructions to learn how to make supplier return in application.
How to create “Return to Vendor” entry or purchase return ?
- Open “Return to Vendor” to create new document.
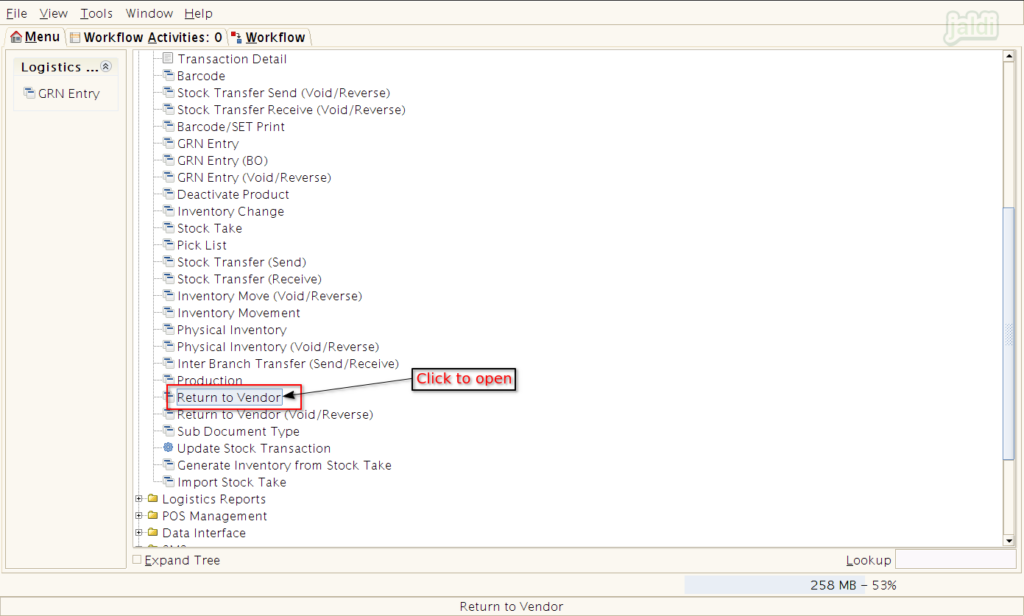
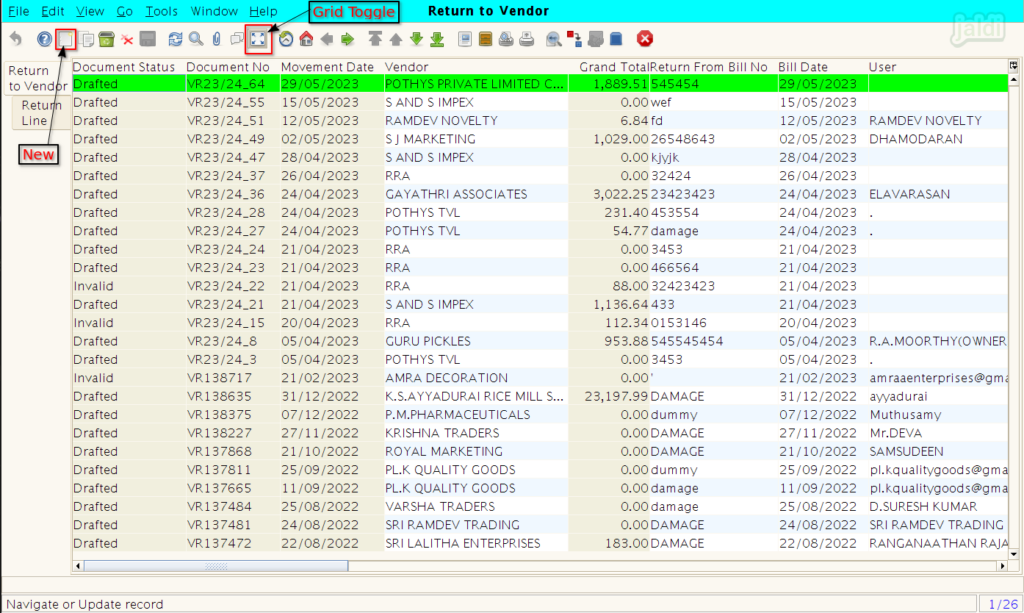
- Click ‘new’ to create new document & utilise “Grid Toggle” function key to go from list view to detailed view.
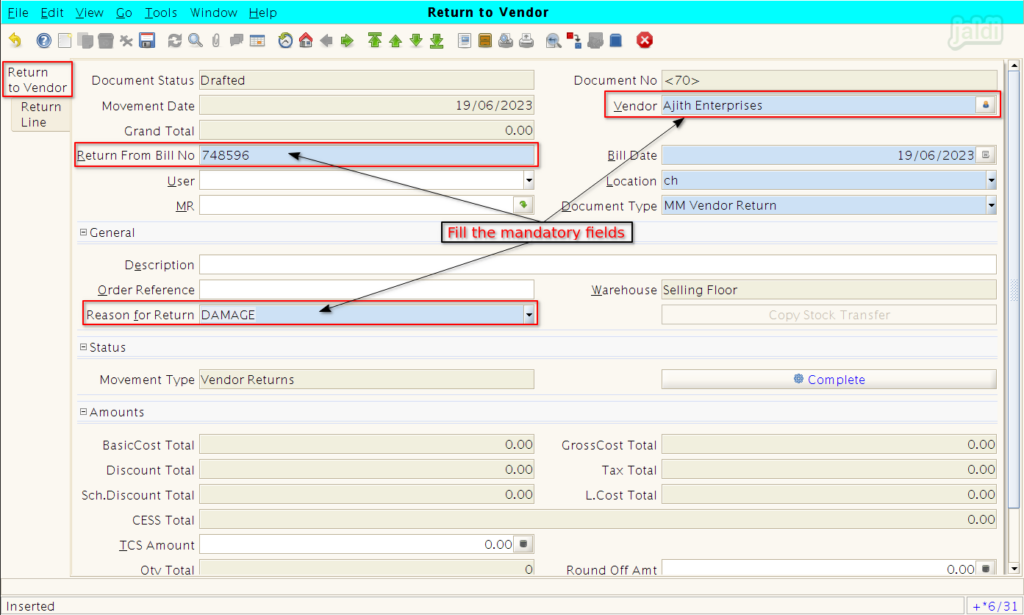
- Under “Return to Vendor” tab, enter the following mandatory fields,
- Vendor – Select Vendor name
- Return from bill no – Enter return from bill no
- Reason for return – Select the respective return reason
- Now press ‘save’ option to save the details under current tab.
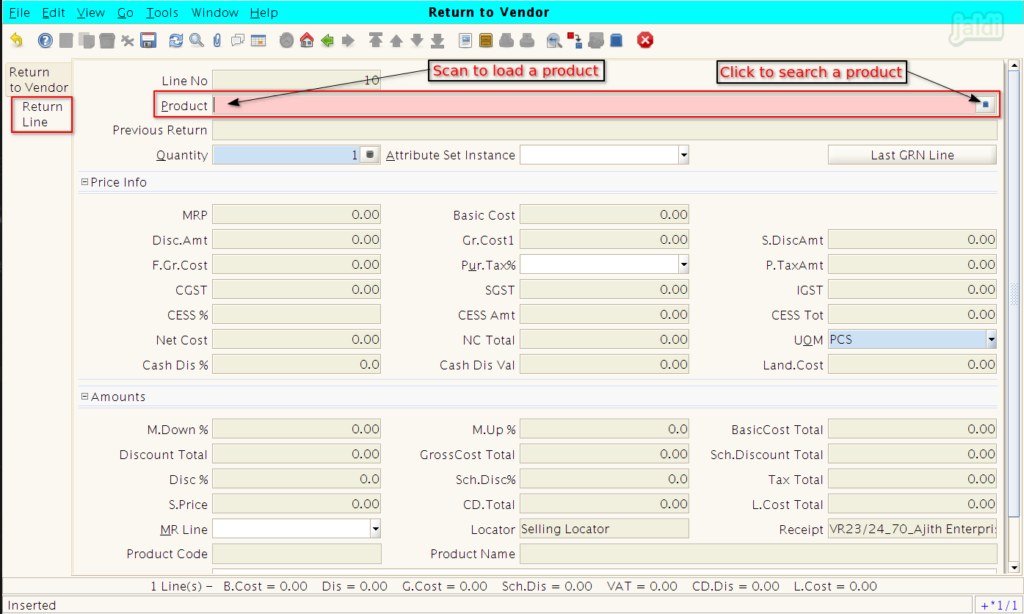
- Now move to “Return to vendor” tab and scan the returning goods in product field.
- Or click on search function to start searching the product by other details.
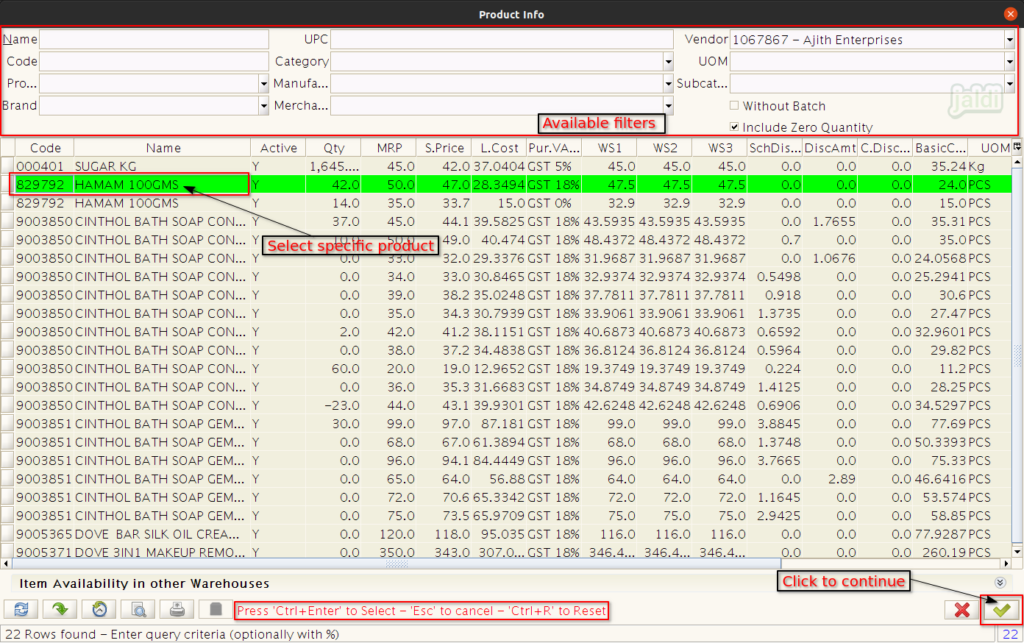
- To search a product, we can find many available filters in product info screen which are marked in below image.
- After filtering the products, select specific product to load and click on tick mark which is marked in below or press “Ctrl+Enter” to select.
- Once the product is selected and loaded, Enter the return quantity in “Quantity” field and save.
- After that you can see the cost details of a selected products.
- Do the same steps for all other returning products each products gets saved separately.
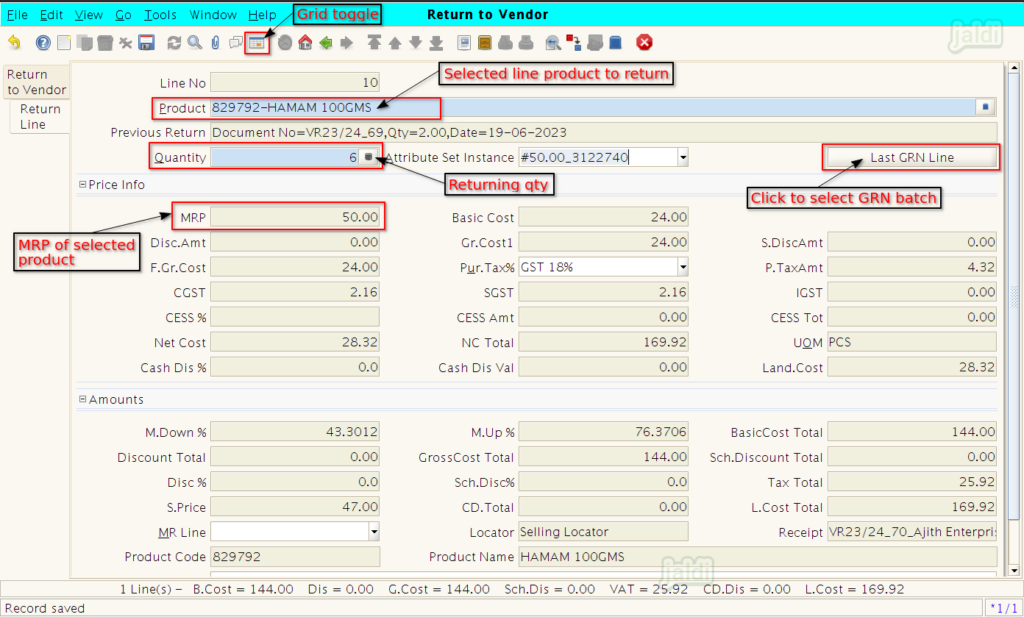
- You can also select specific GRN batch product for vendor return by using the function option called “Last GRN Line”.
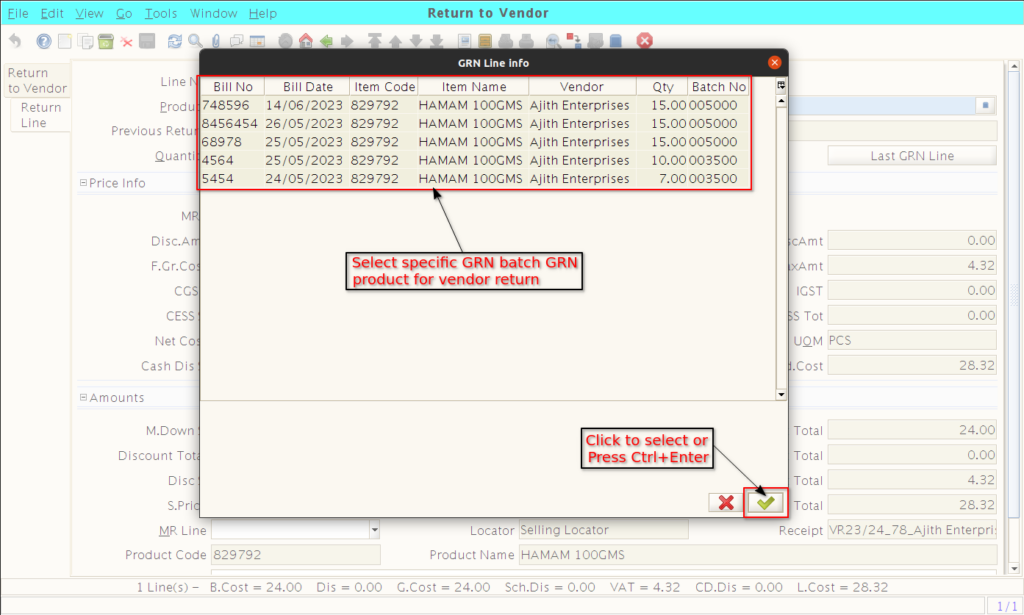
- Once the product details were filled in return line screen click on “Save”.
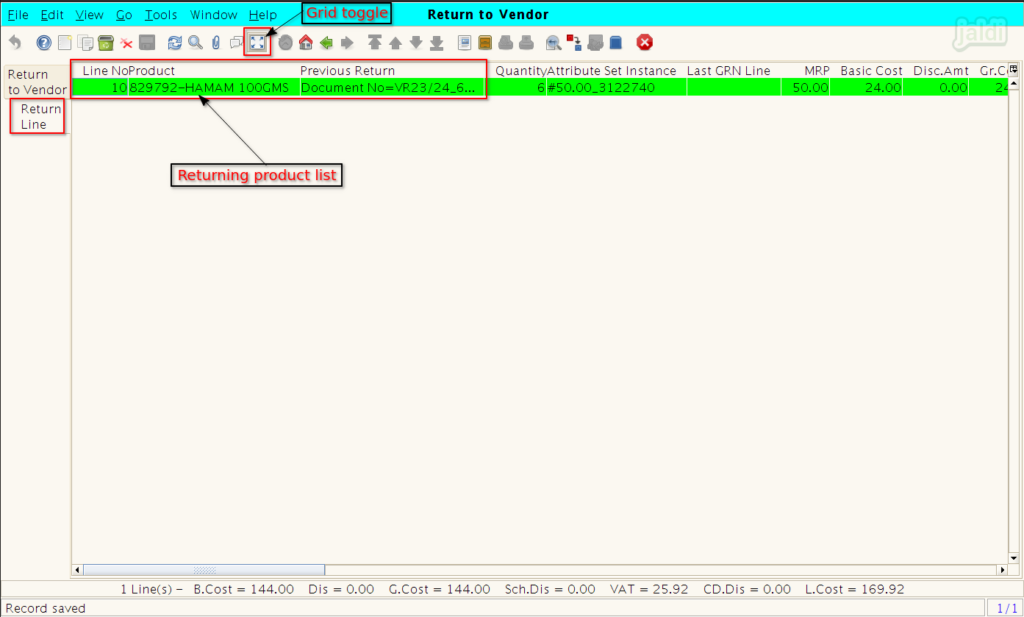
- Click on “Grid toggle” to see all the saved products in list view like in below image.
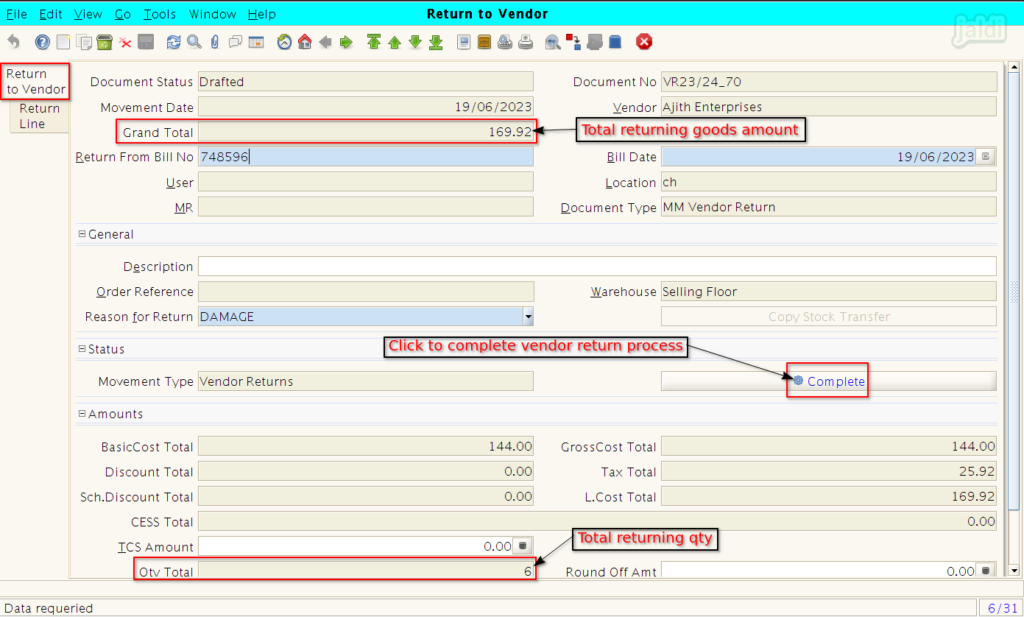
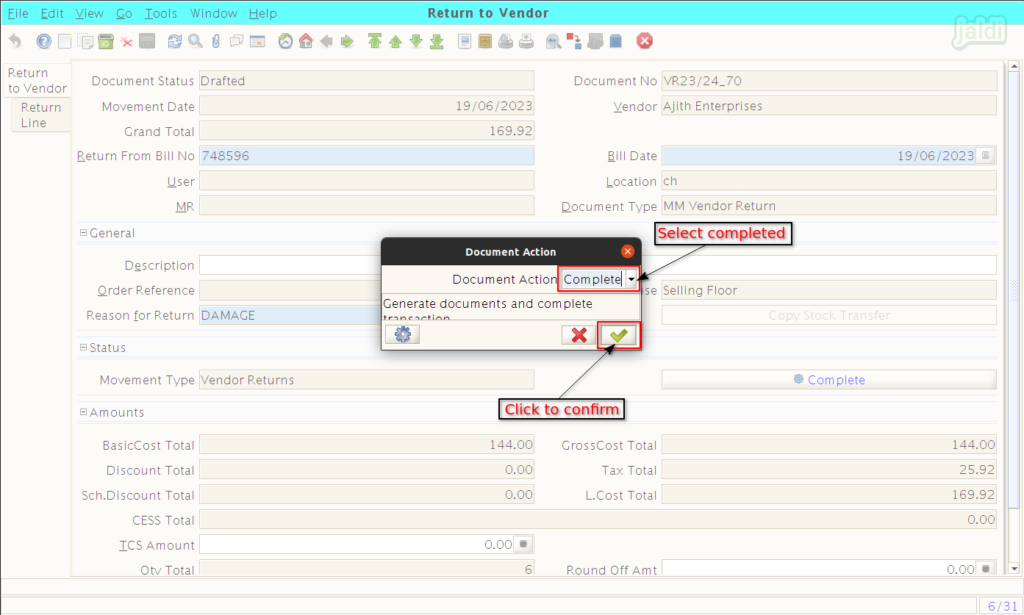
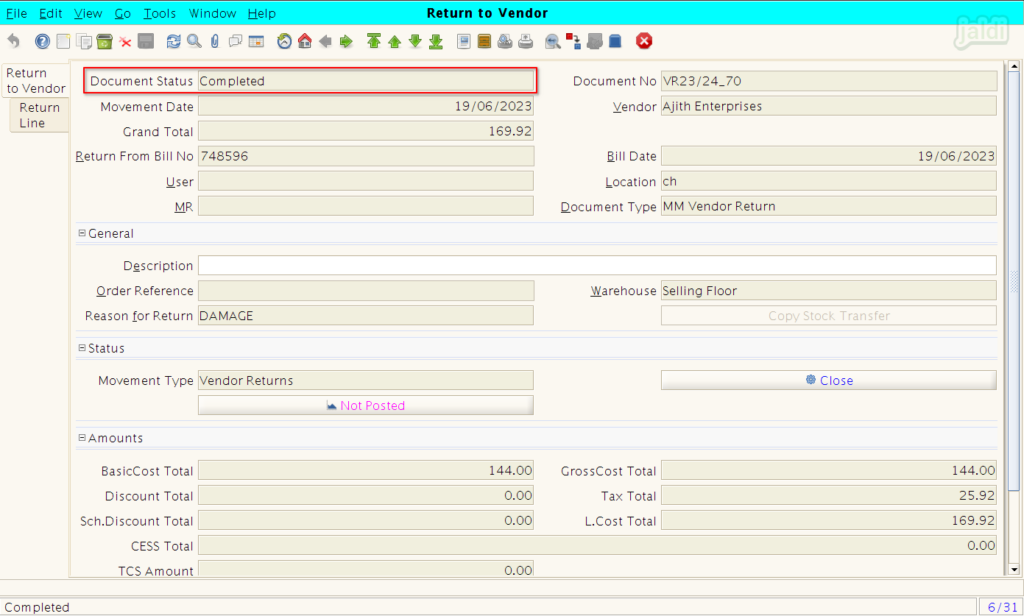
- Then move back to “Return to Vendor” tab and click on “Complete” function key.
- Before completing the process, you can check the Qty total and Grand total amount in this screen.
How to Void or Reverse the completed “Return to Vendor” transaction ?
- It is not possible to delete the completed document.
- But user could void/reverse the document in vendor return module.
- Select required vendor return entry document like below shown image.
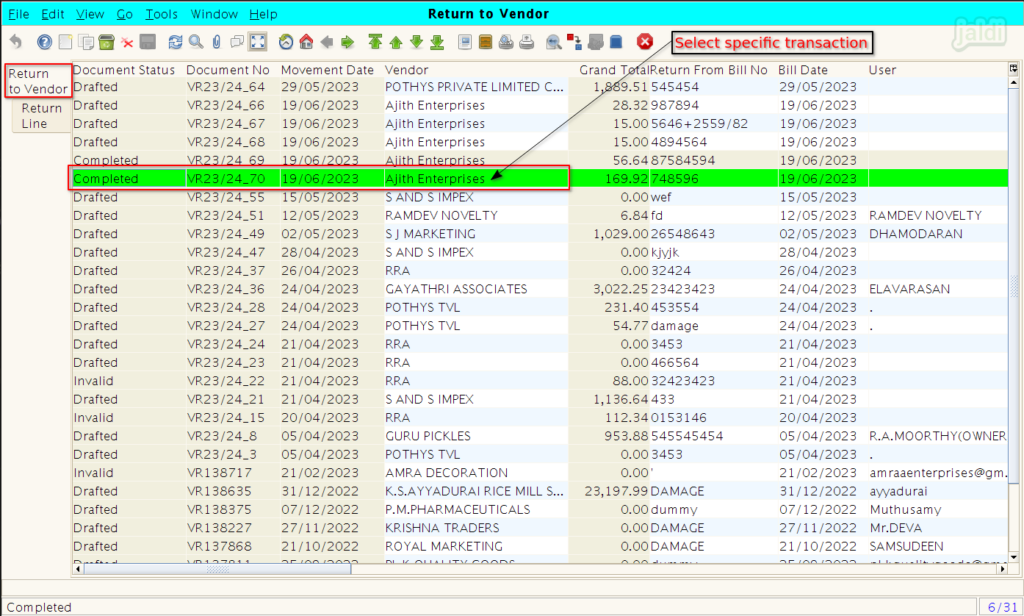
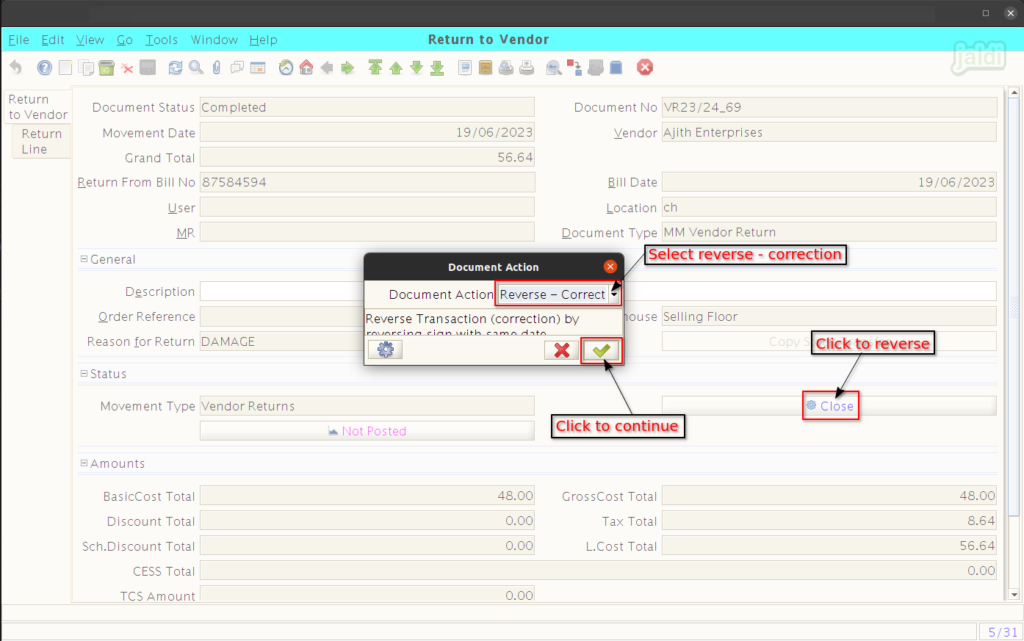
- Then click on “Close” option to void or reverse the transaction entry.
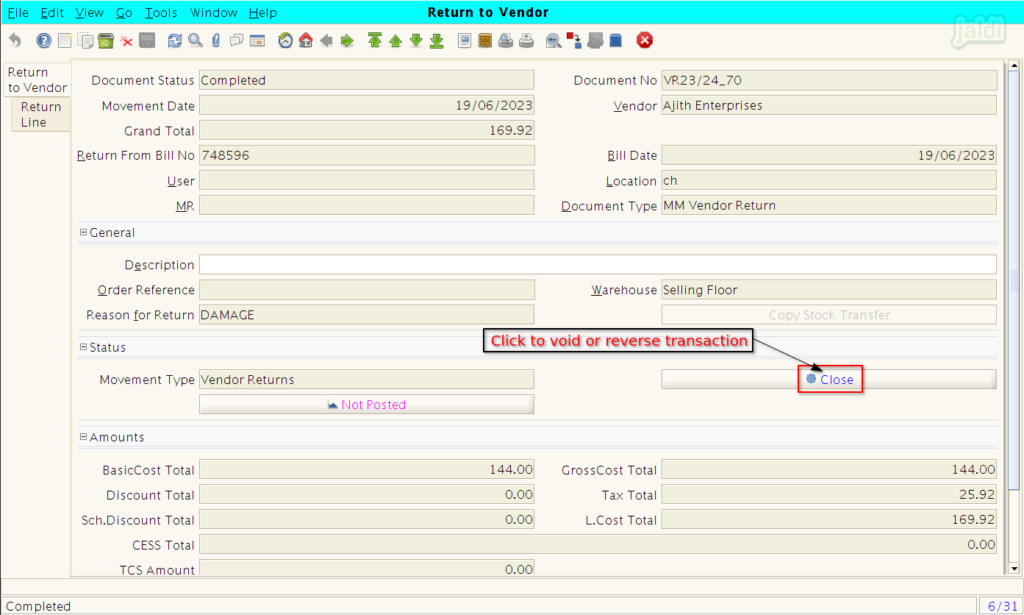
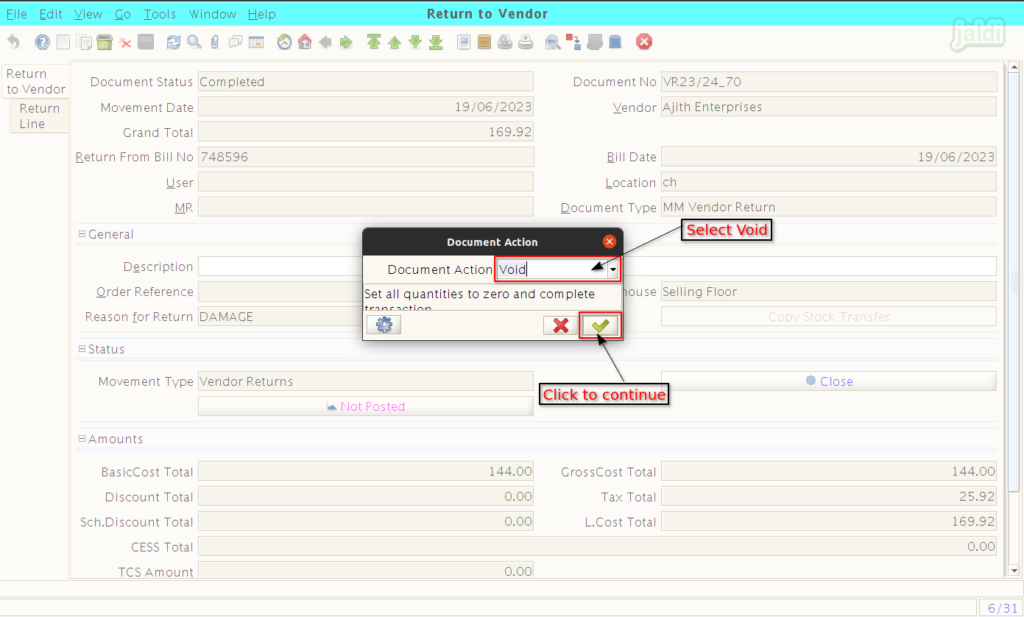
- To void the completed return to vendor transaction entry select document status as “Void” and click “green tick mark” to continue the process.
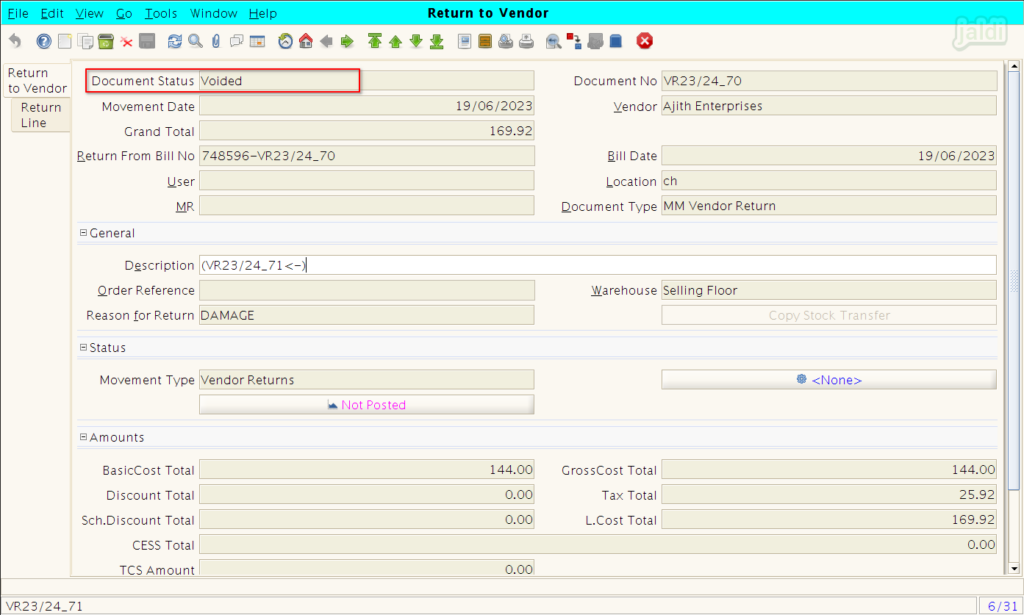
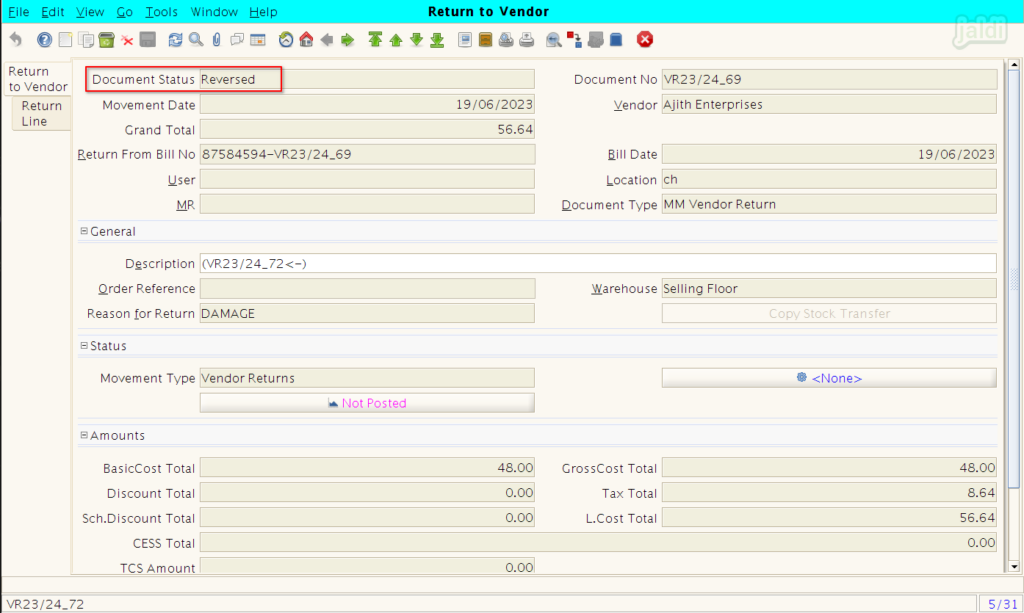
- Status will be changed as voided after the void process is finished.
- To Reverse the transaction entry, user should select action as “Reverse – Correction”.
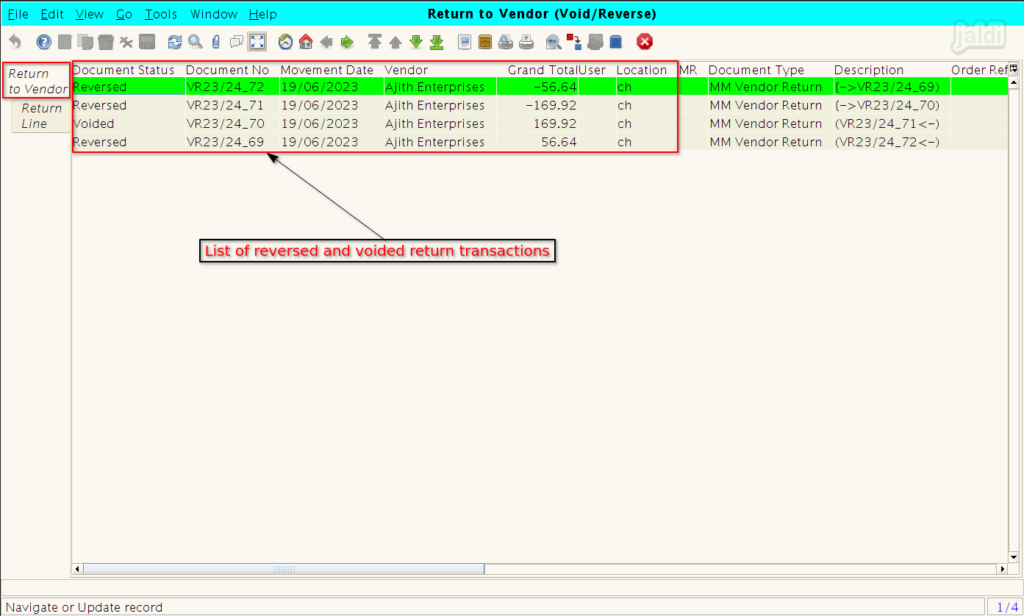
- To view every void/reverse documents, click the menu mentioned in below pictures.
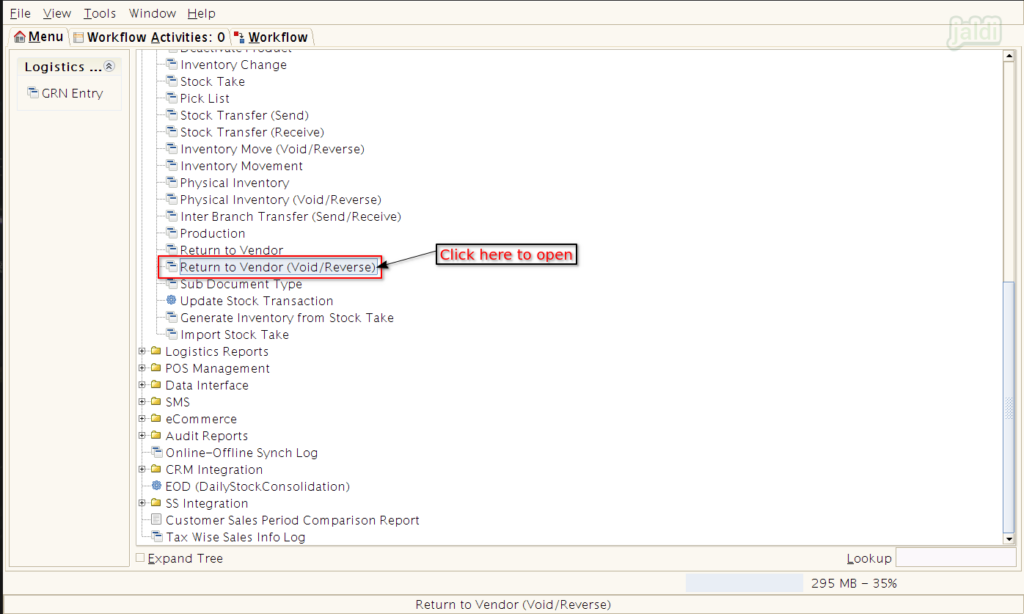
- In “Return to Vendor (Void/Reverse)” screen, user could view every void/reverse doc details.
