Security management in Jaldi Lifestyle POS
Security is the menu which will help you to create a multiple roles and it’s users for you and your employees for better security or user management in Jaldi lifestyle POS. The following menu will be comes under the security management,
- Role – To create an Employee group (Ex:- Admin, Managers, GRN users, cashiers, etc)
- Role Access – Mapping accessible menu to each role.
- User – To create a user login credentials for each employees.
Lets consider a real time scenario where you want to create an employee role “GRN user” in role master and wanted to give only the menu which is comes under purchase and logistics management and also wanted to create a user “Ab” under the role of GRN user. Find the following steps to know more about roles and users management.
How to create a new role for user ?
- Go to Application path Administration > Security > Role.
- Click on the “Role” menu to open role management screen.
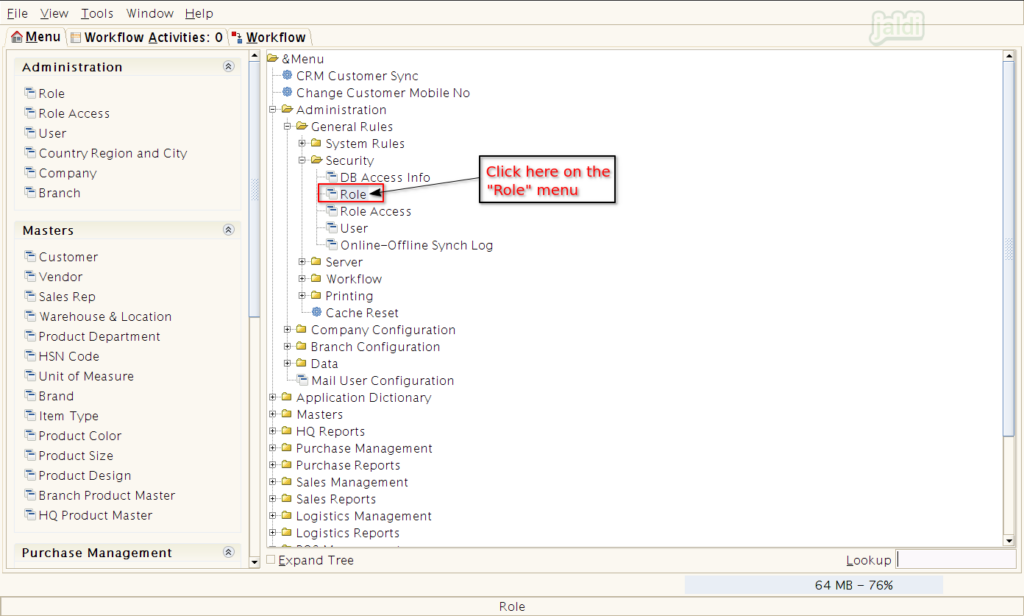
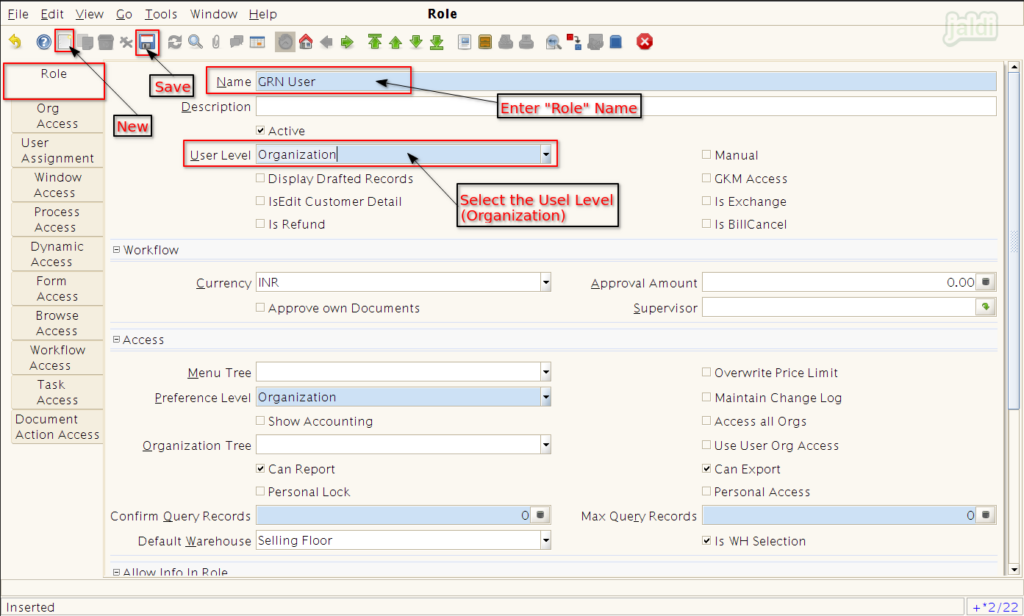
- In Role screen, Click on “New” and then enter the following required details,
- Name – Enter Role name (Ex:- GRN user)
- User Level – Select Organization.
- Other details are optional to change or enter.
- Then click “Save” option to save the current role tab.
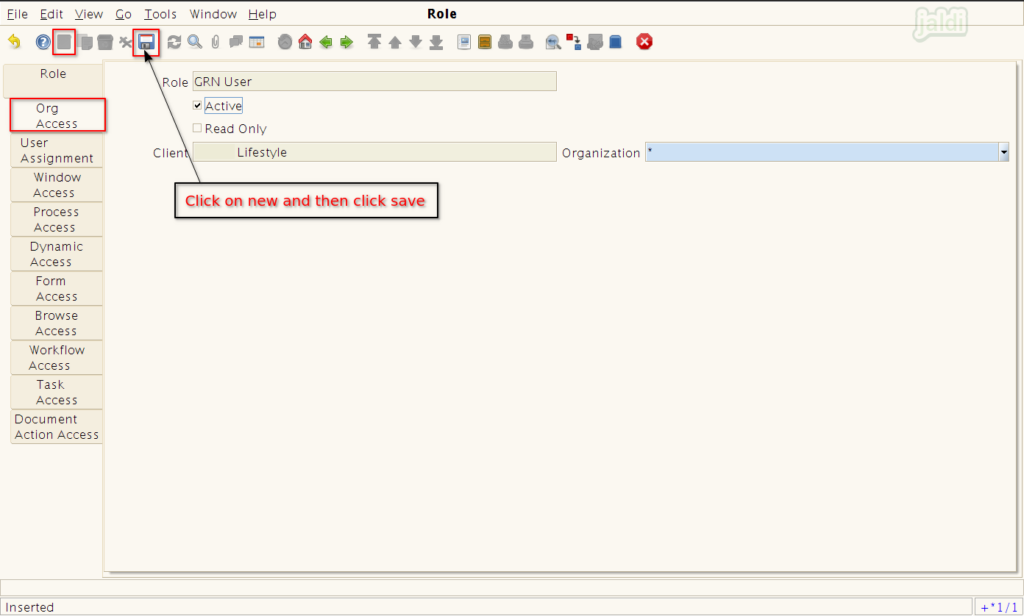
- Then go to “Org Access” tab, click on new and then click on save. No need to change any details here.
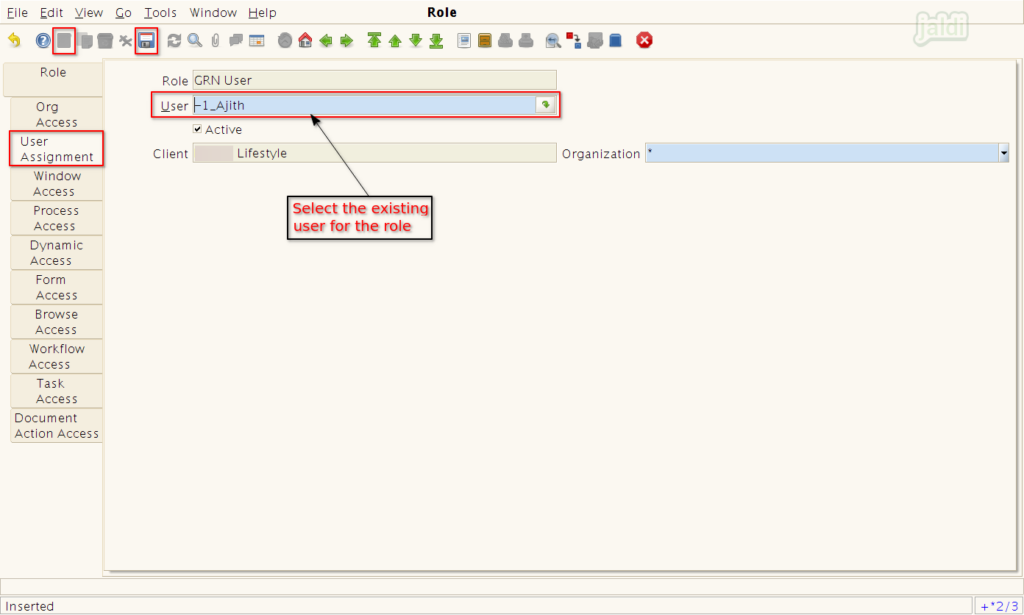
- Now move to “User Assignment” tab and press new and select existing users for the creating role.
- We can select multiple users for the single role.
- Other tabs are not mandatory to fill, just enter first 3 tabs alone and save the data.
How to provide specific menu access to the created roles ?
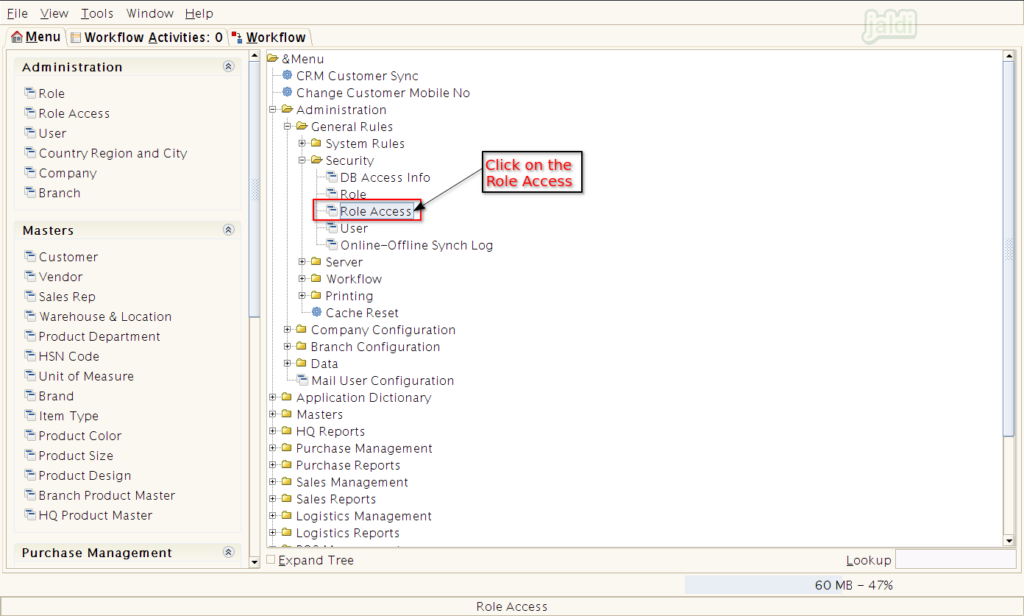
- Go to application path Administration > General rules > Security > Role Access.
- Click on the “Role Access” to go to the screen where we can map the menu for the created roles.
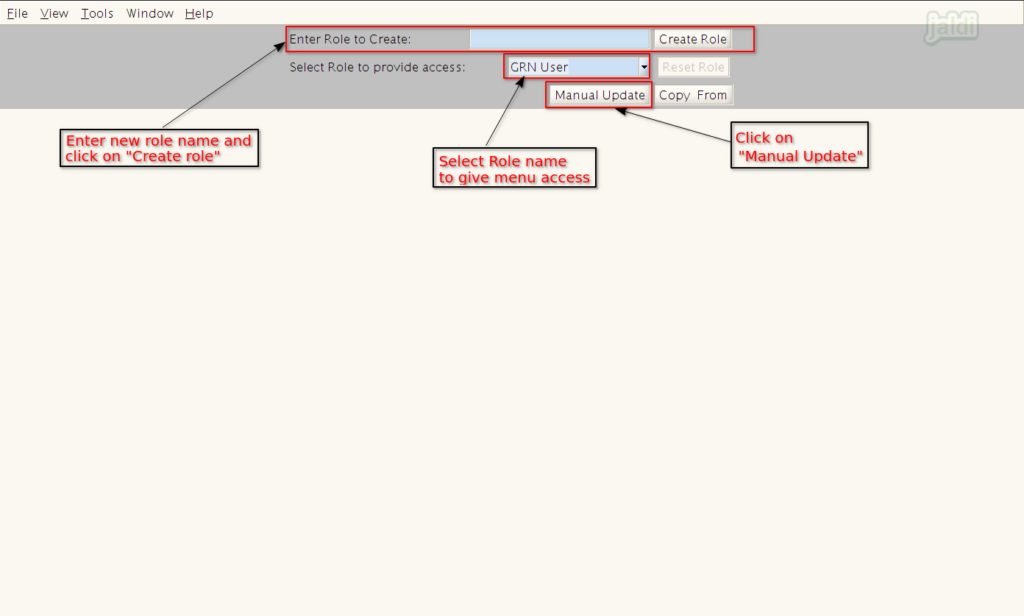
- You can also create a new role if you wanted, enter the role name in “Enter Role to Create” field and click on “Create Role” button.
- In this screen, Select the created role name in “Select Role to provide access”.
- Then click on “Manual Update” function button.
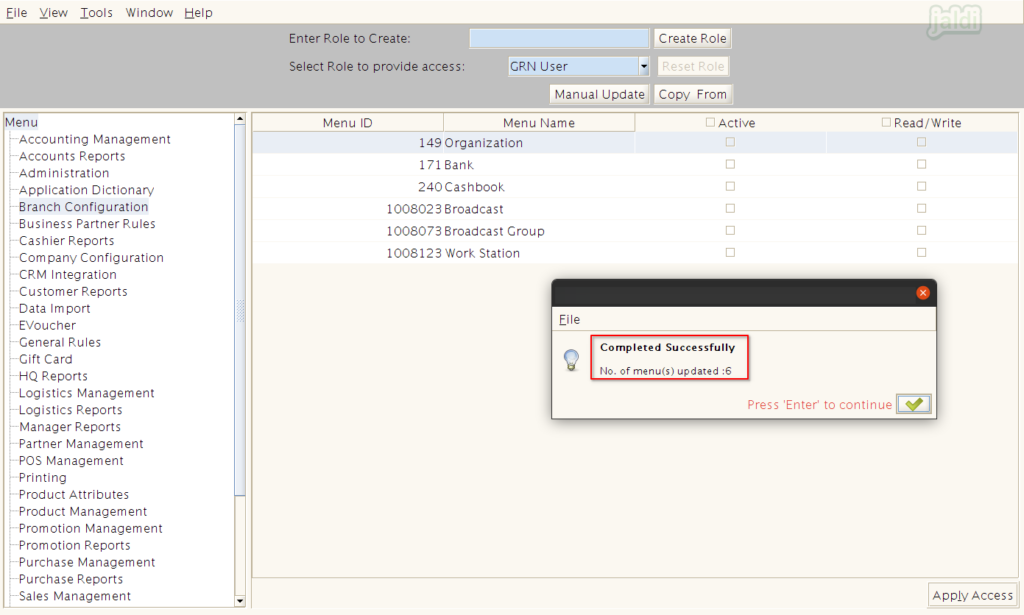
- Once manual update is clicked, then system will show the available main menus in left and sub menus in right with check boxes.
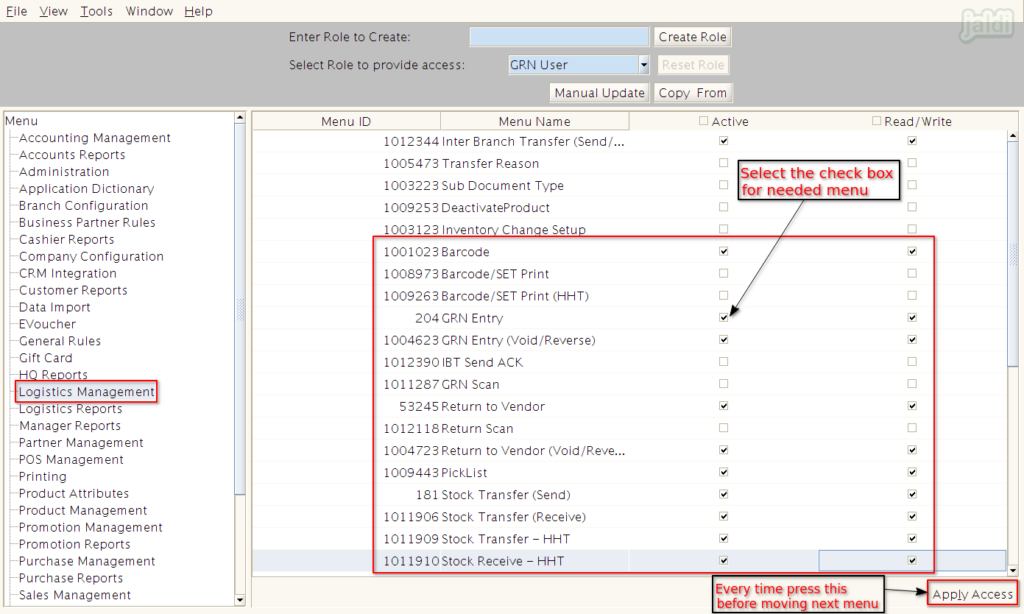
- Select each menu in left and remove the selected check boxes for the sub menu which you don’t wanted to show to this role users.
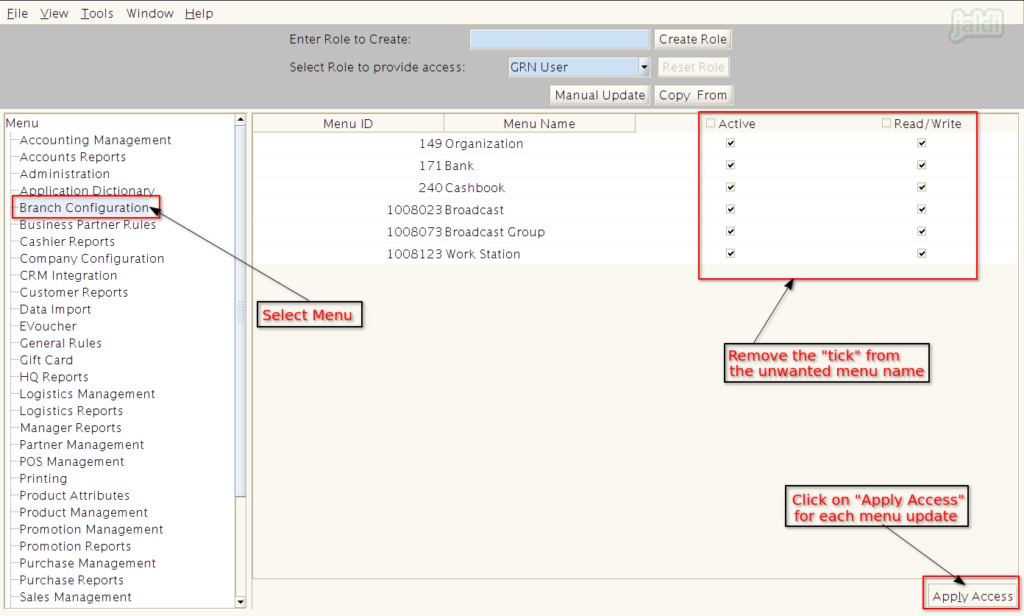
- Click on “Apply Access” which marked in above image at each tab when ever the changes done in menu access process.
- You have to select only the menu name which you wanted to provide the access to the selected role like below shown image.
How to copy the access between the roles ?
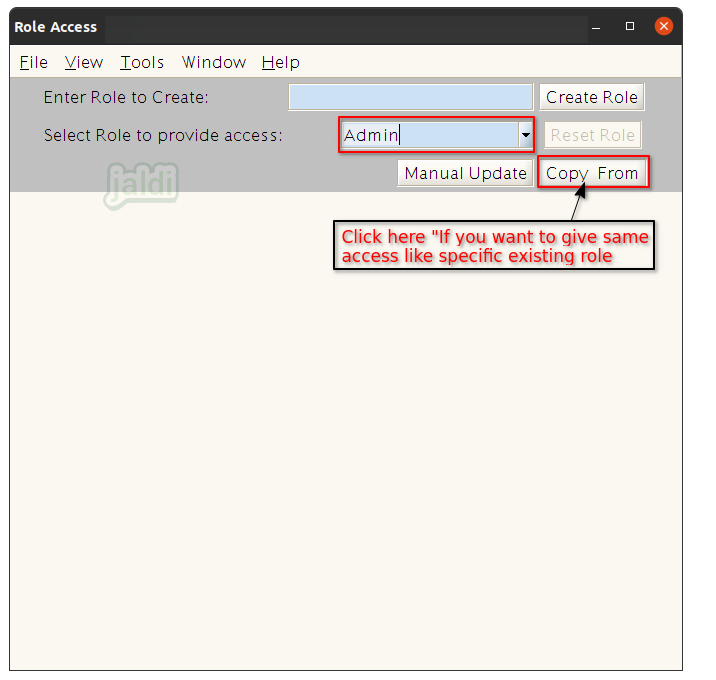
- Open the role access screen, then select the role in “select role to provide access” field.
- Then click on “Copy from” option.
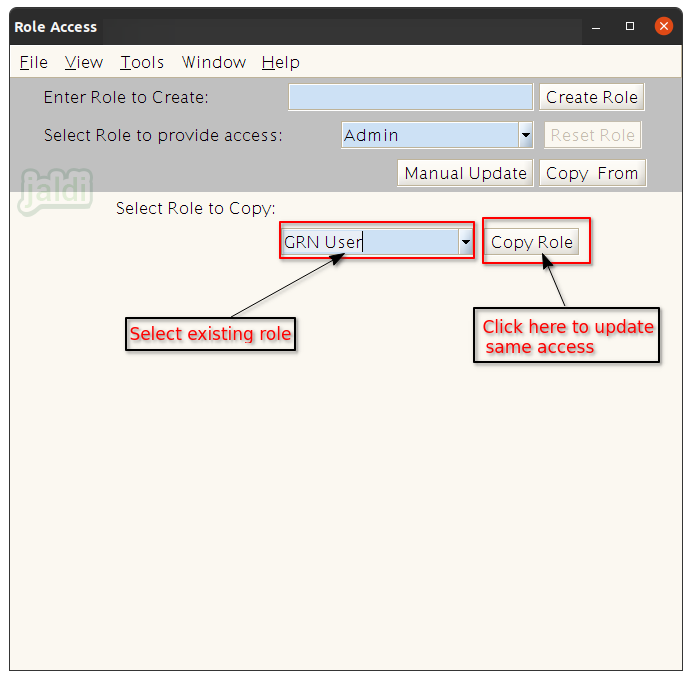
- Then Select the role to Copy the menu access like below shown image.
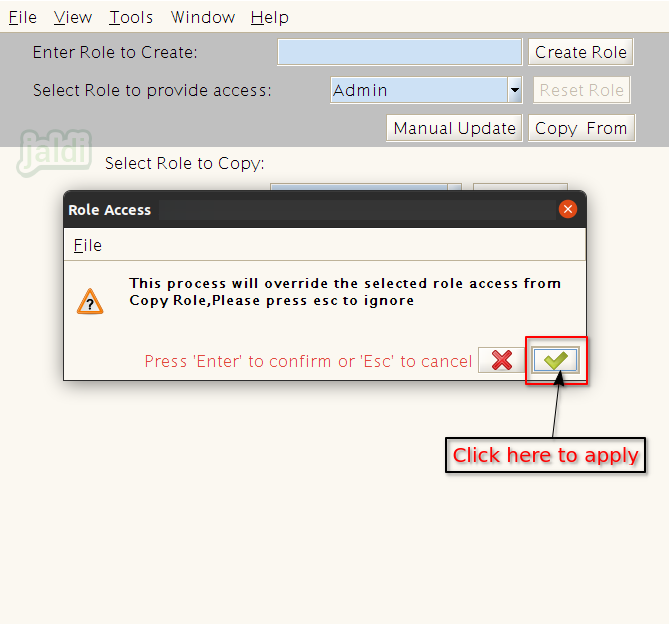
- Then click on “Copy Role” option which is marked in below image.
- Then system will ask you for the confirmation, click on the green tick mark which is amrked in below image.
How to create a new user under created role ?
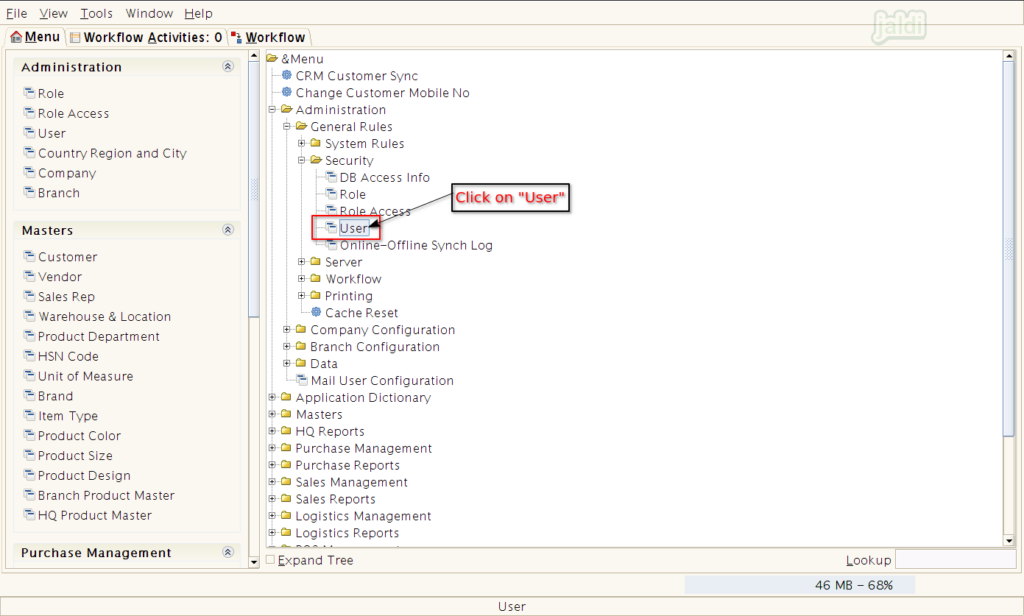
- Go to application path Administration > General rules > Security > User.
- Click on “User” menu for go to the screen where new user will be created.
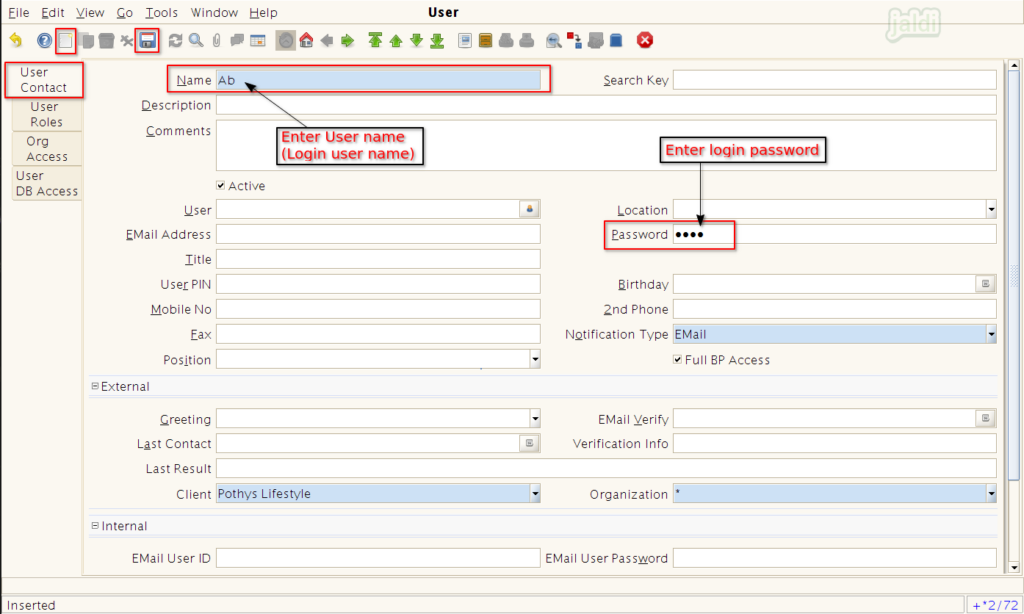
- In User screen, click on “New” and enter the required details in following fields.
- Name – Enter user’s name (This will be the user’s login username)
- Password – Set the login password
- Other details are optional to fill.
- Click on the “Save” option to save the “User Contact” tab.
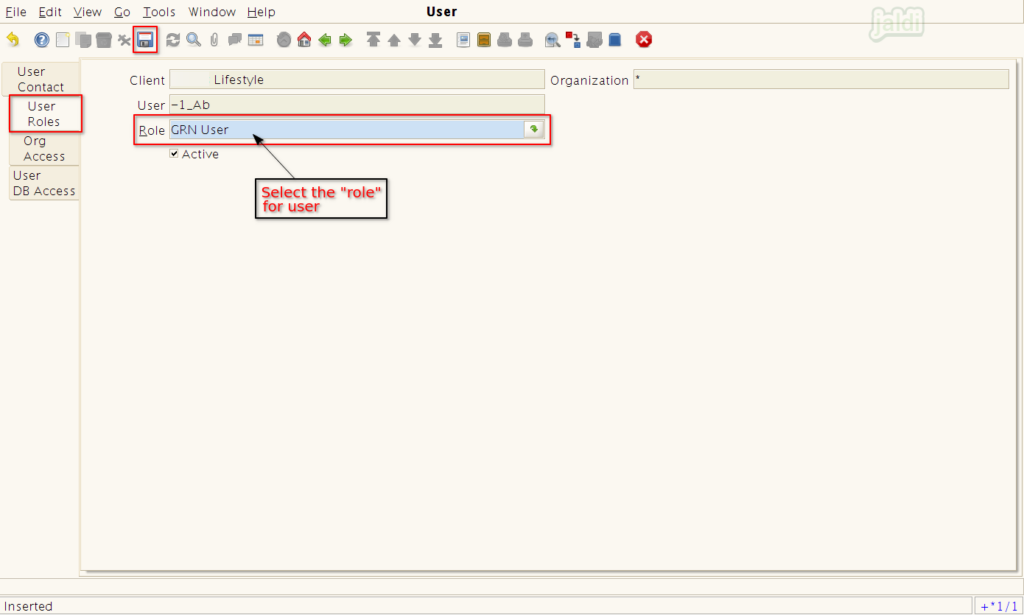
- Now move to “User Roles” tab, and click on new.
- Then select the required roles for creating user.
- Multiple roles can be configured to one single user.
- After selecting the required roles, click on save.
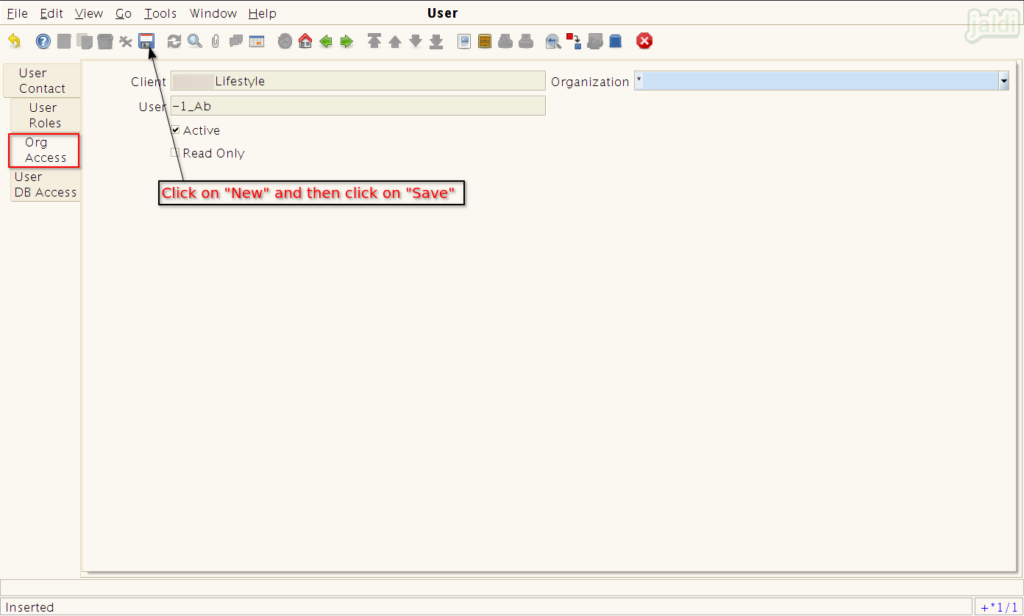
- Then move to “Org Access” and click on new and press save.
- No need to change or enter any details in this tab.
- Now we can login using the created new user and access only the menu which is provided for the role in role access.
- Once the role, role access and user creation process is completed, then newly created user can be login to the application and access the given menus.
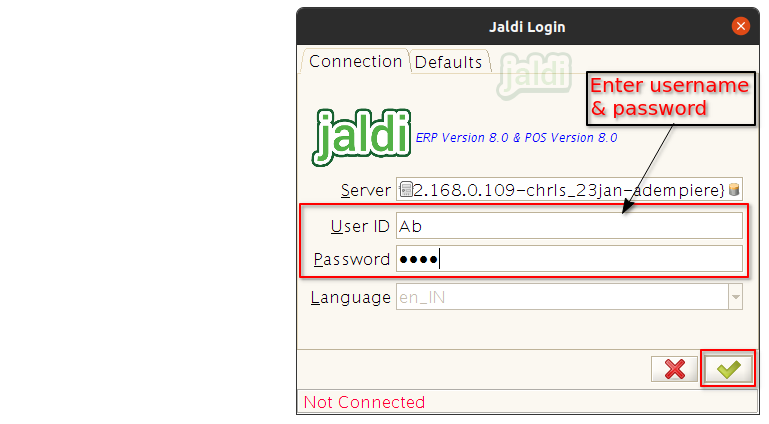
- Enter the user ID (username – Ab) and password like below shown image and press Enter or click on the green tick.
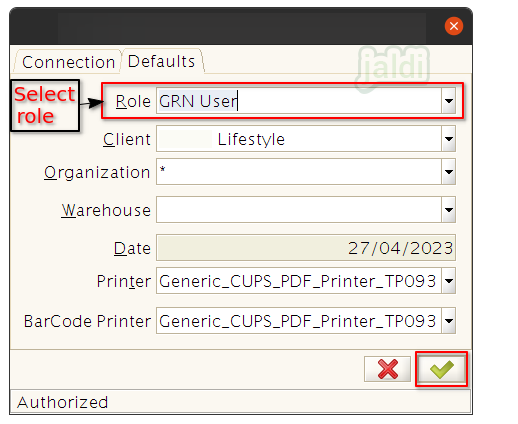
- Then select the “Role” in Role field which is marked in below image then click on Enter or click on green tick mark.
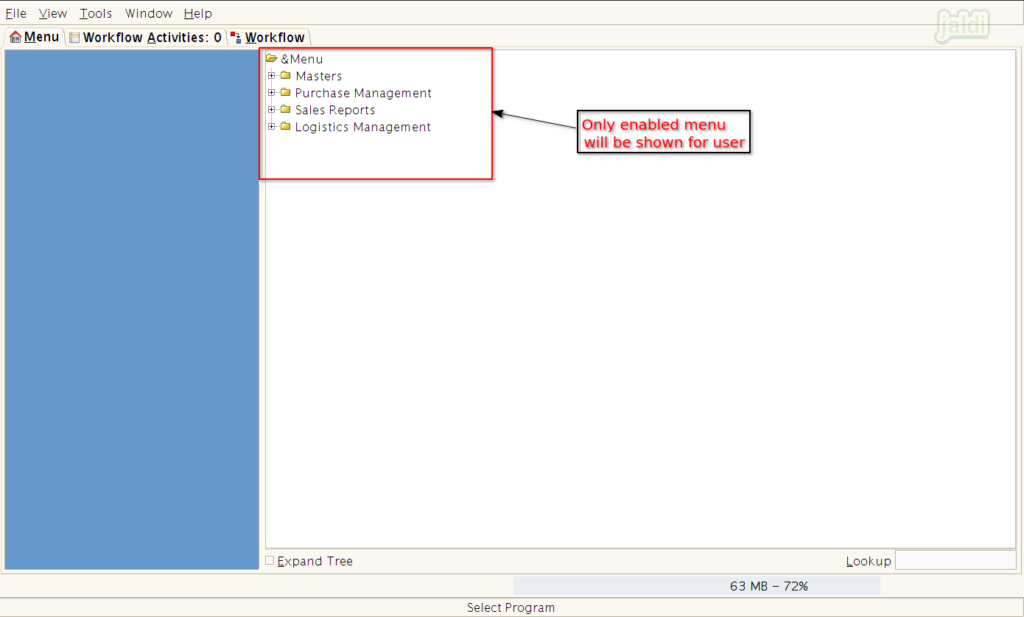
- Once user logged in to the application, user can only see the menu which is given access for him.
- Other menu will not be available for the login user.
