Security Management in Jaldi Superstore POS
The menu or feature called “security” is used to create multiple roles and users for each user who will log in to the application and work.
- Roles – To create a User groups (Ex – Admin, Manager, Cashier, GRN Users, Accounts)
- Roles Access – To map the required menu for each Roles
- Users – To generate a unique username and password for each user.
Let us examine a fictional scenario in which you wish to create an employee role in role master called “GRN user” and only allow access to the menu items related to purchase and logistics management. You also want to create a user named “Aaron” under the GRN user role. To learn more about managing users and roles in Jaldi Superstore POS, follow these steps.
Steps to add new user role
- Go to menu called “Role” and click to open.
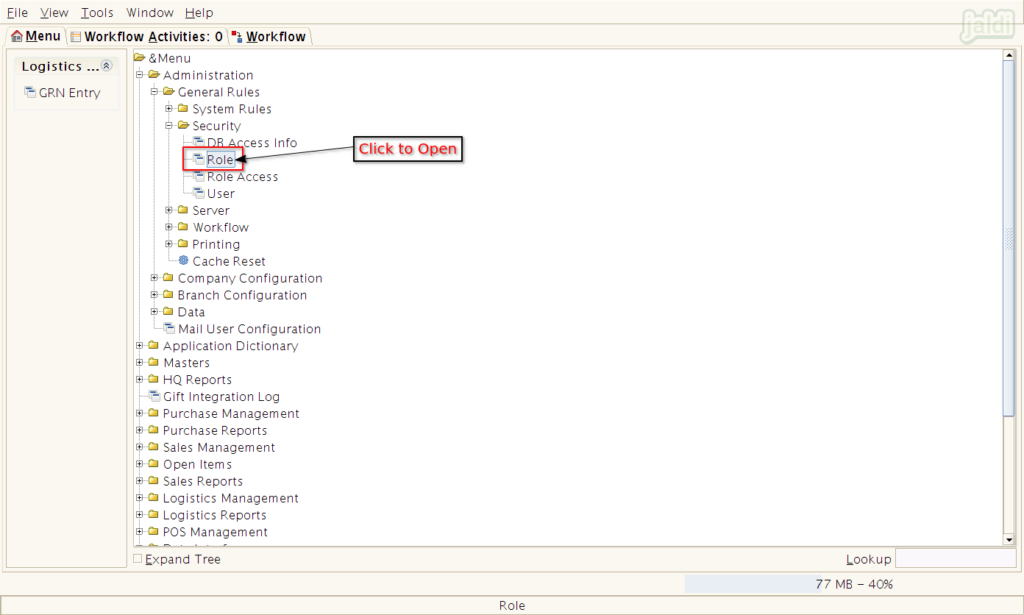
- Then Role list will be shown in the screen like below shown image.
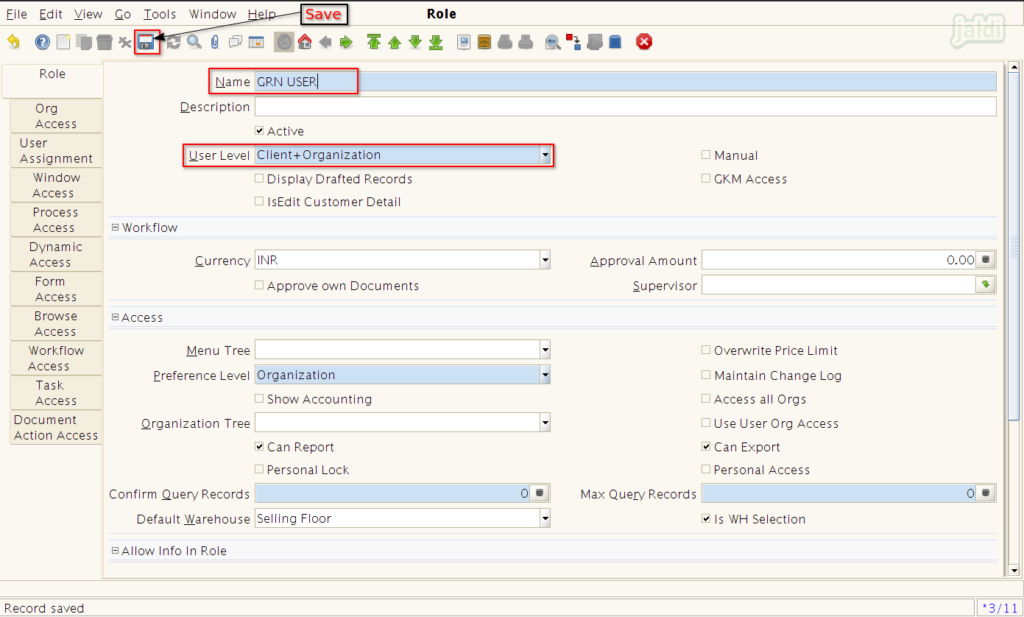
- Press “New” function key which is marked in below image.
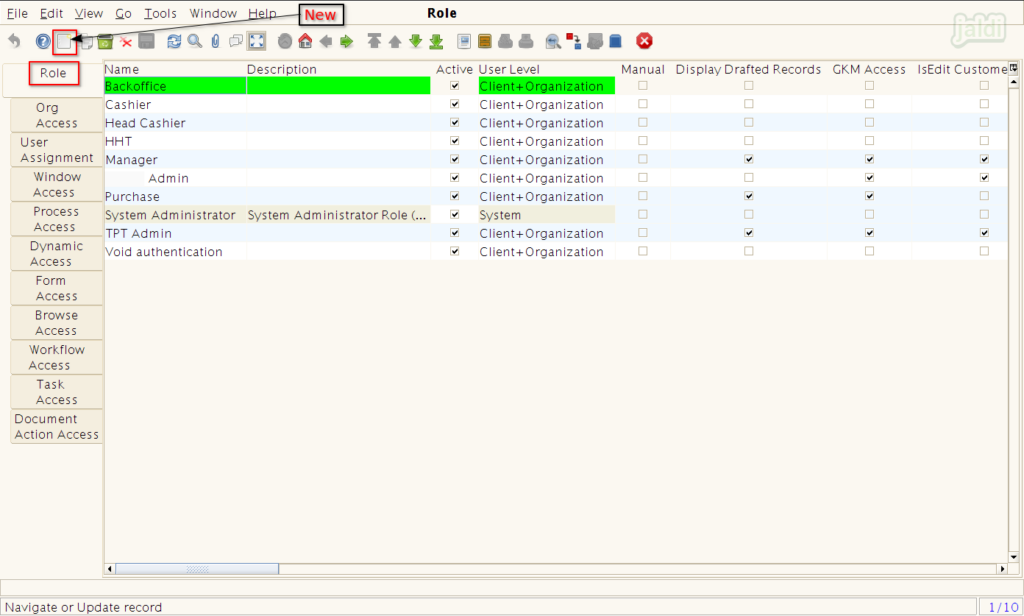
- Once “New” function key is clicked then enter the input data in the mandatory input fields. The fields which is shown in red colours are the mandatory fields.
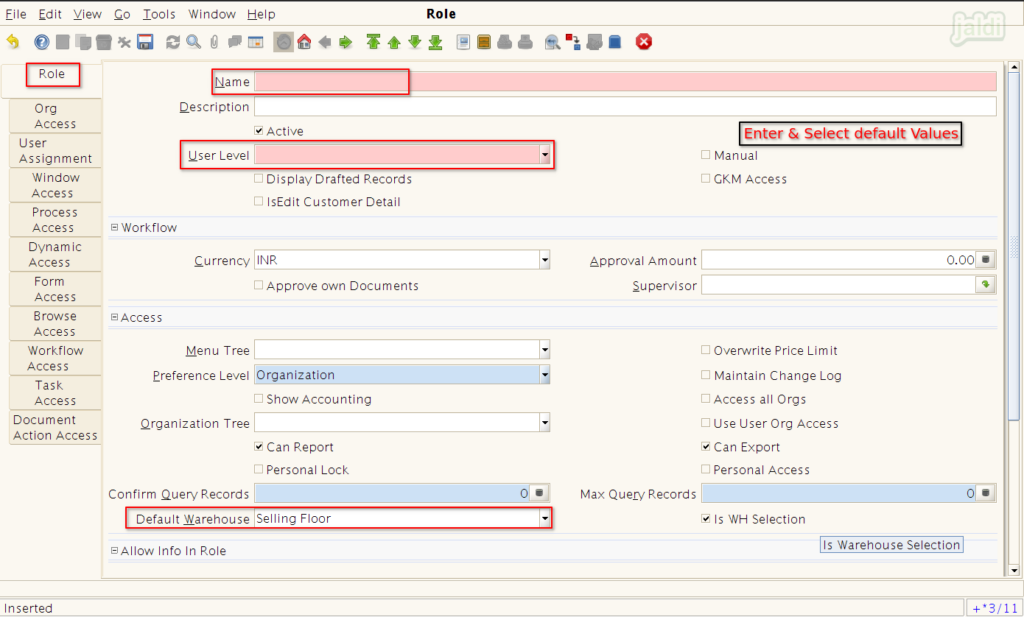
- Under Role tab screen, enter the following input data
- ‘Name’ – Update names
- User Level – Select user level from the drop down
- Enable and select the other details based on the requirements.
- Once required details were filled then press “Save” function key.
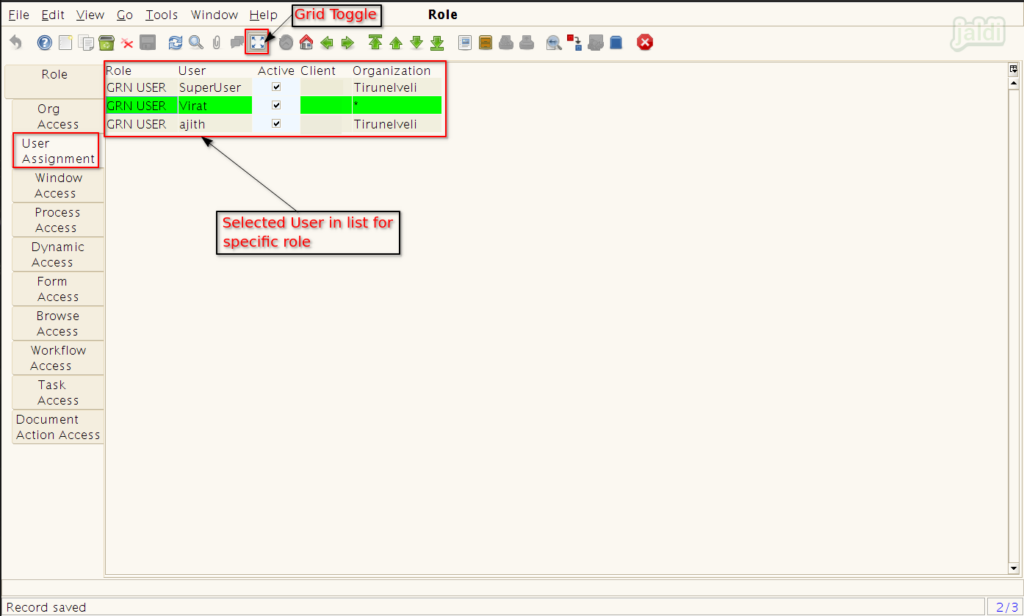
- Press “Grid Toggle” function key to view all the users in list who are all mapped under the existing role.
Grant module access to role
- Click on ‘role access’ and open to update permission.
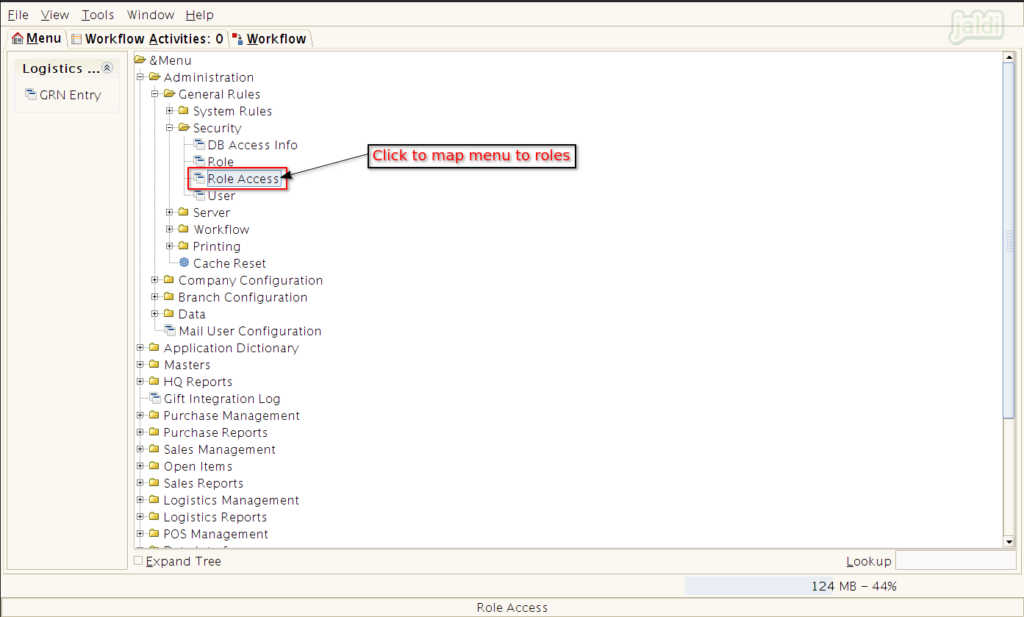
- There is a input field called “Enter Role to Create” to add a role name instantly.
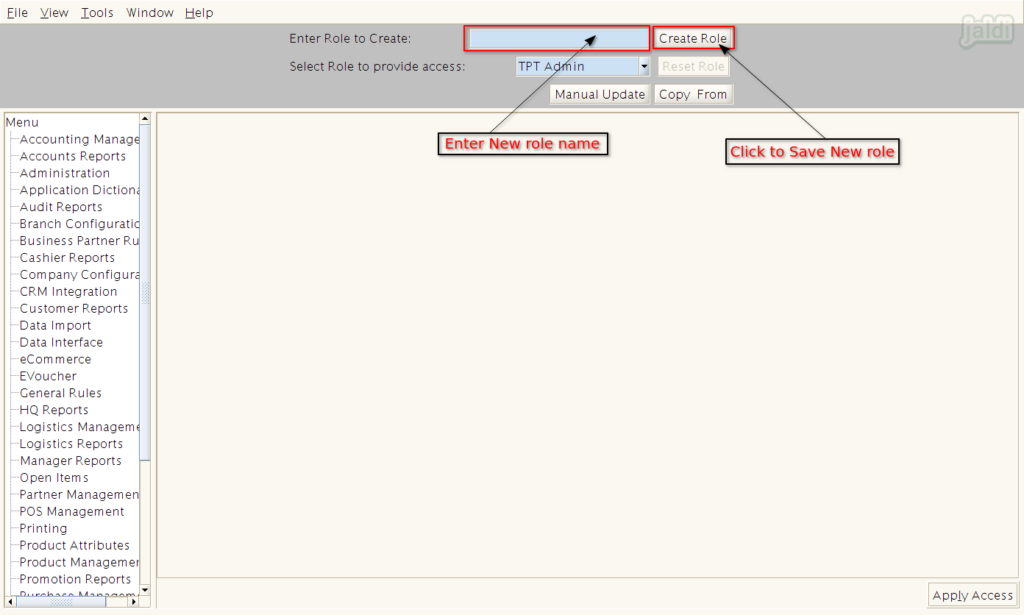
- Choose added user-role and press ‘manual update’.

- In next, the only menu and features which you want to give access to role should be enabled and other features and menus should be disabled.


Copy permission from existing role to new role
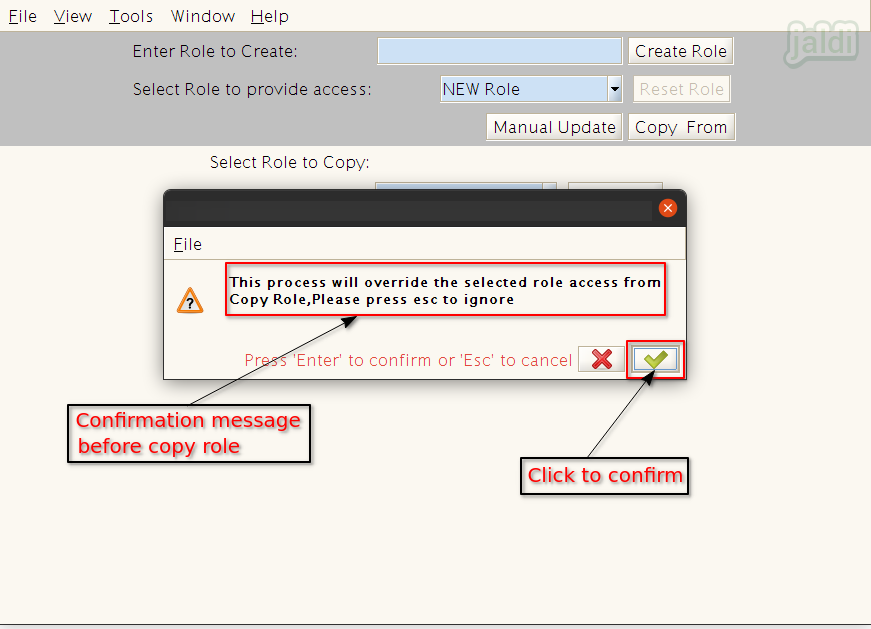
- Follow below steps to know how to copy the role permissions.


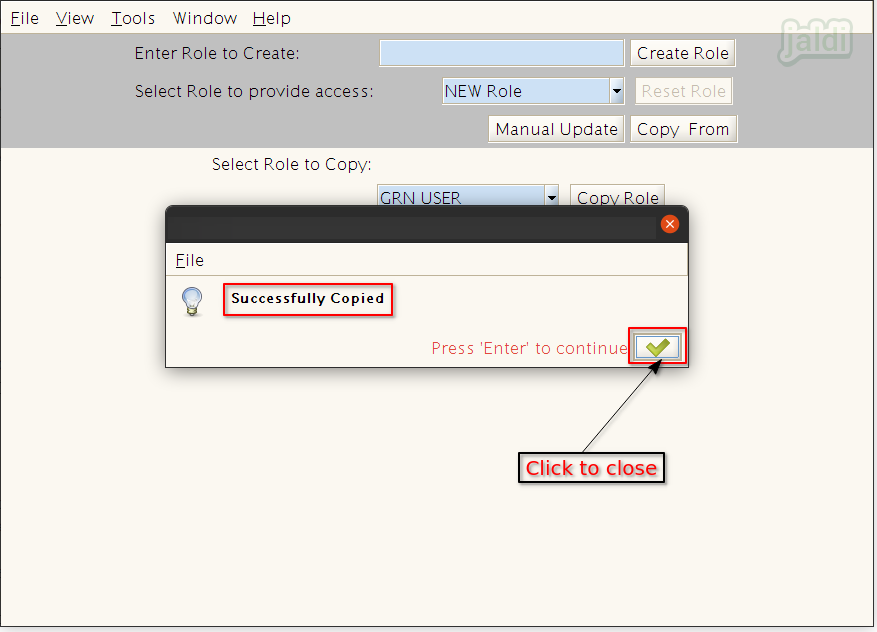
- Once the process is completed, then system will show the success message in popup like below shown file.
Add new users for roles
- Open ‘User’ screen to add new users details in master.
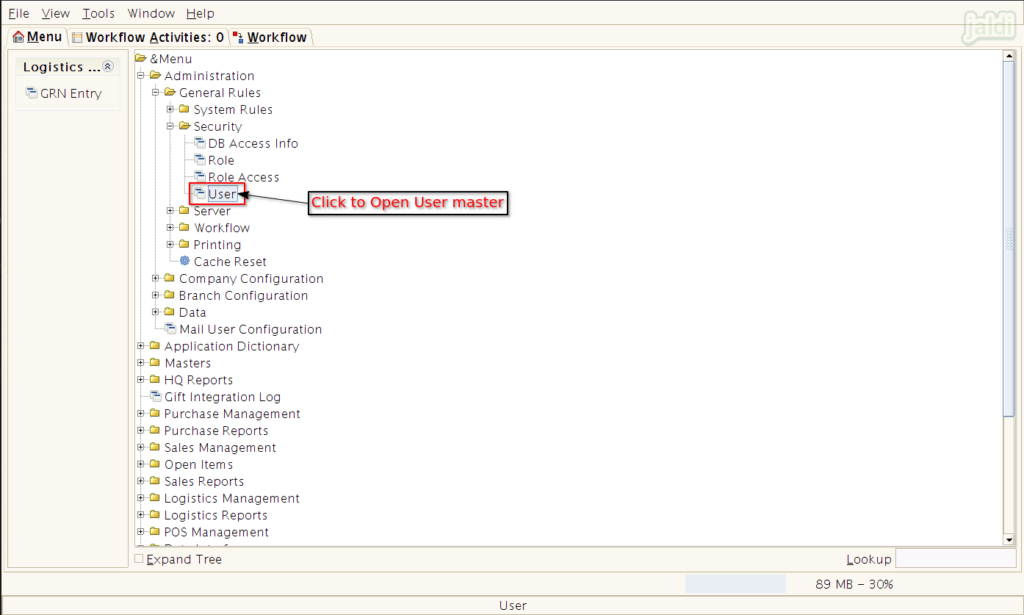
- Under user contact tab, press “New” function key to create a new user.
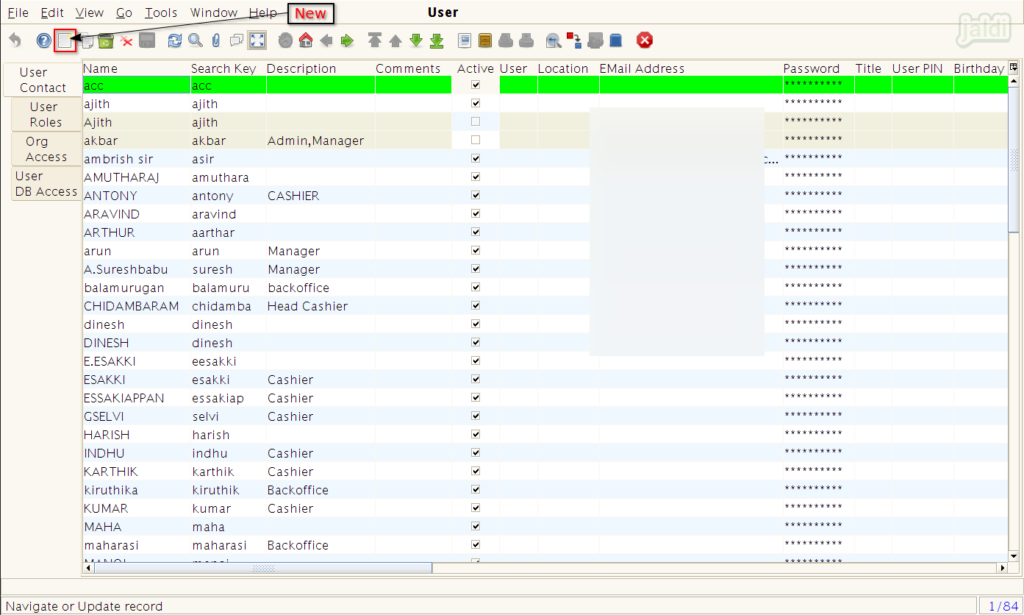
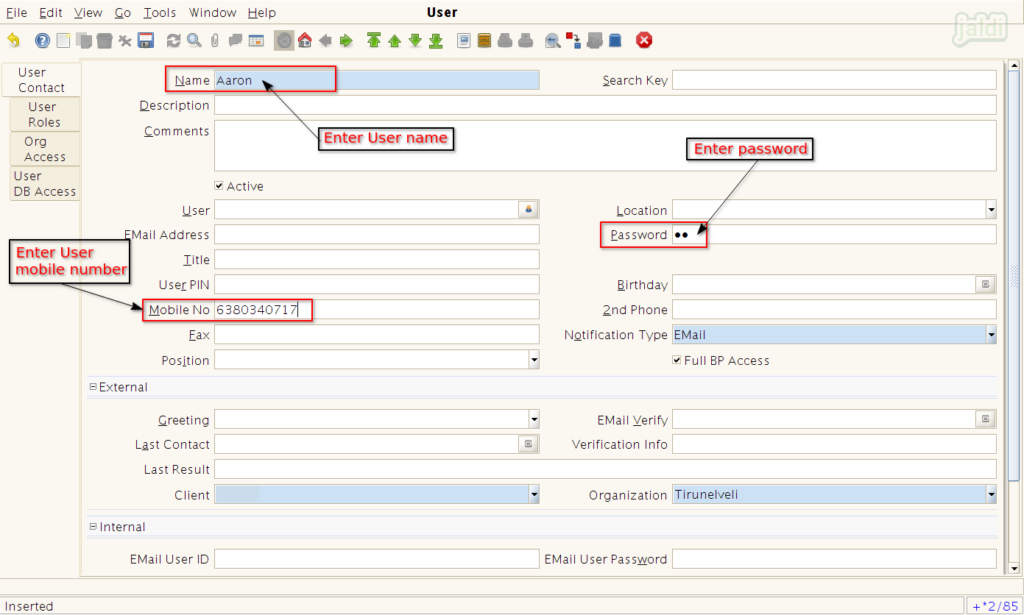
- To create a new user enter the following input data & save.
- Name – Enter login User name
- Password – Enter login password
- Mobile number – Enter the mobile number.
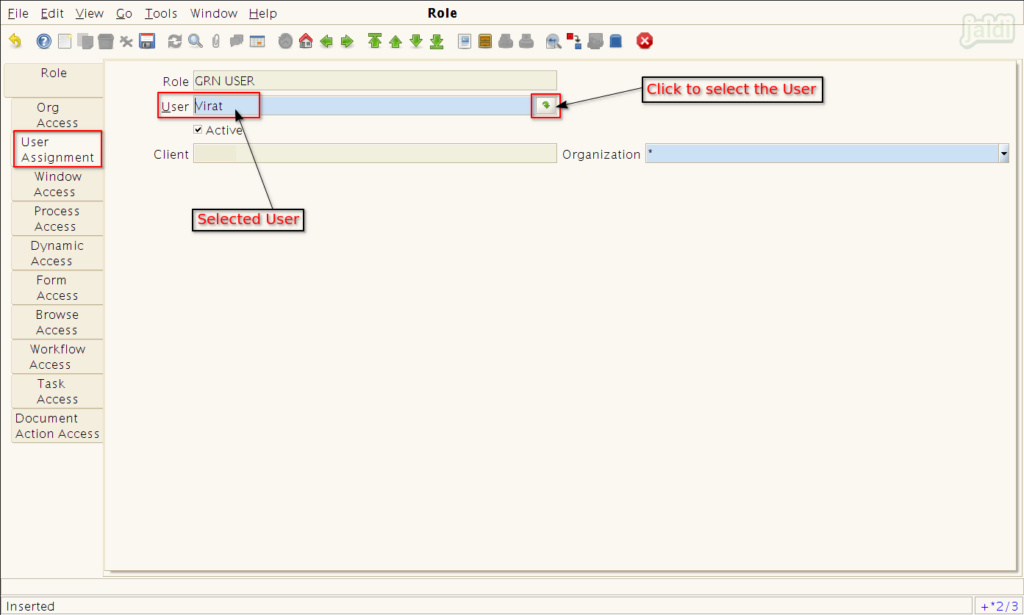
- Go to ‘User Role’, press on search icon in the input field “Role” to search the role for user. You can also enter the value and press enter to start search like shown in below image.
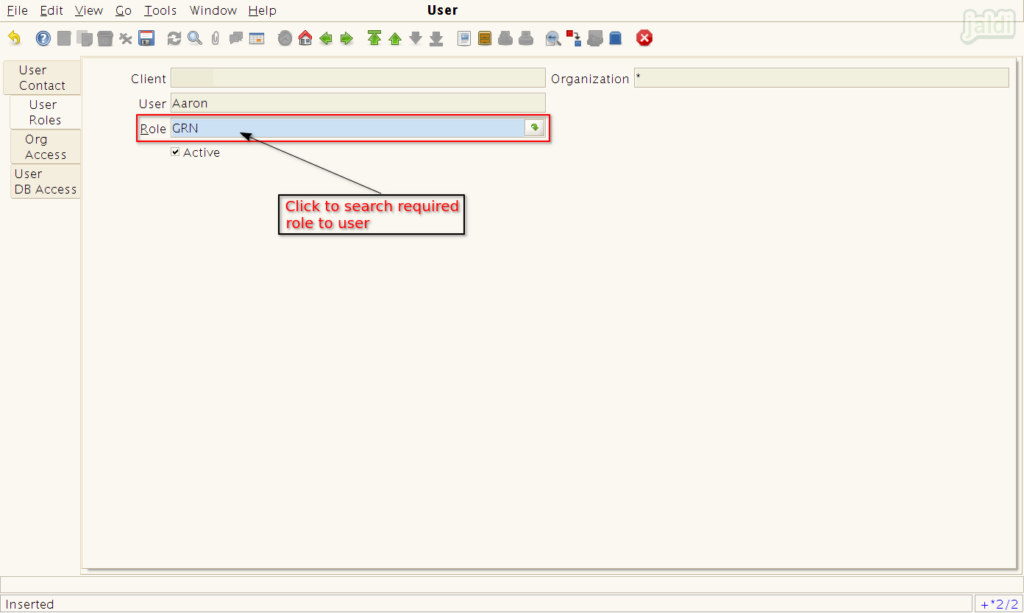
- Select the specific user name from list of values and press “Ctrl+Enter” or click on “green tick” mark which is marked in below image.
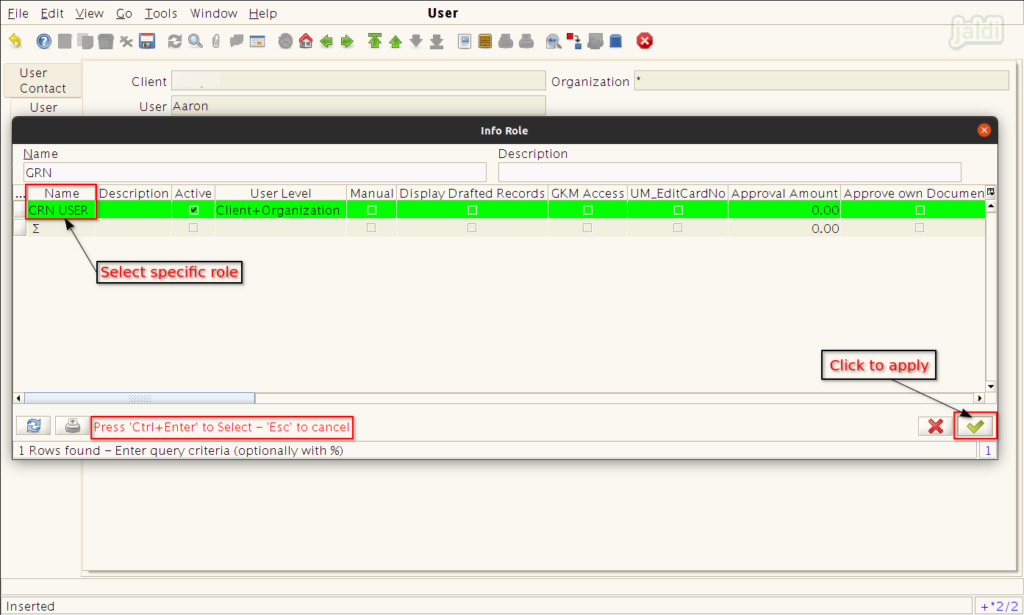
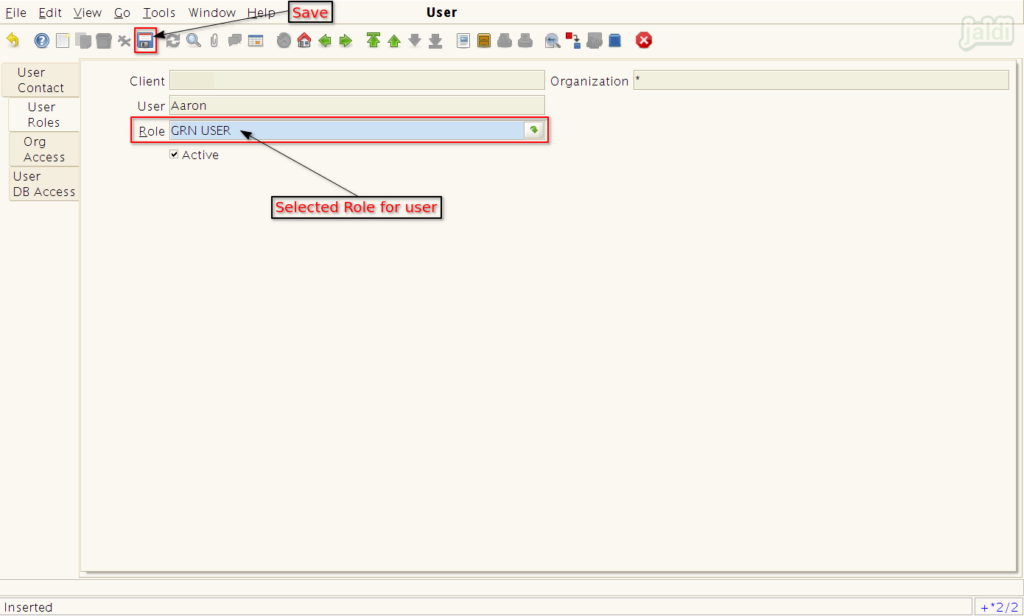
- After selecting role, press “Save” function key to save the data.
- We can map multiple roles to single user.
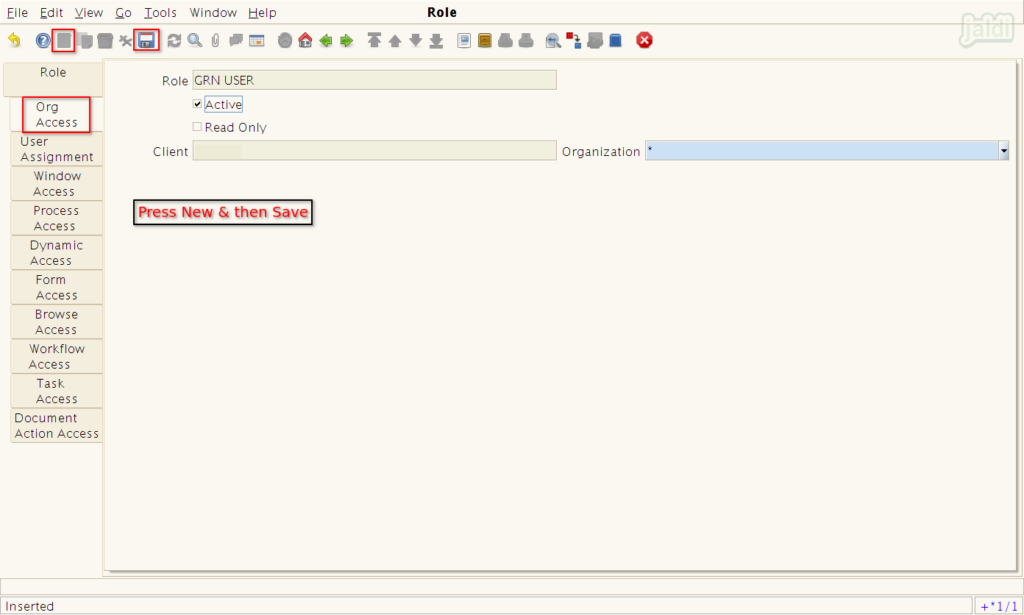
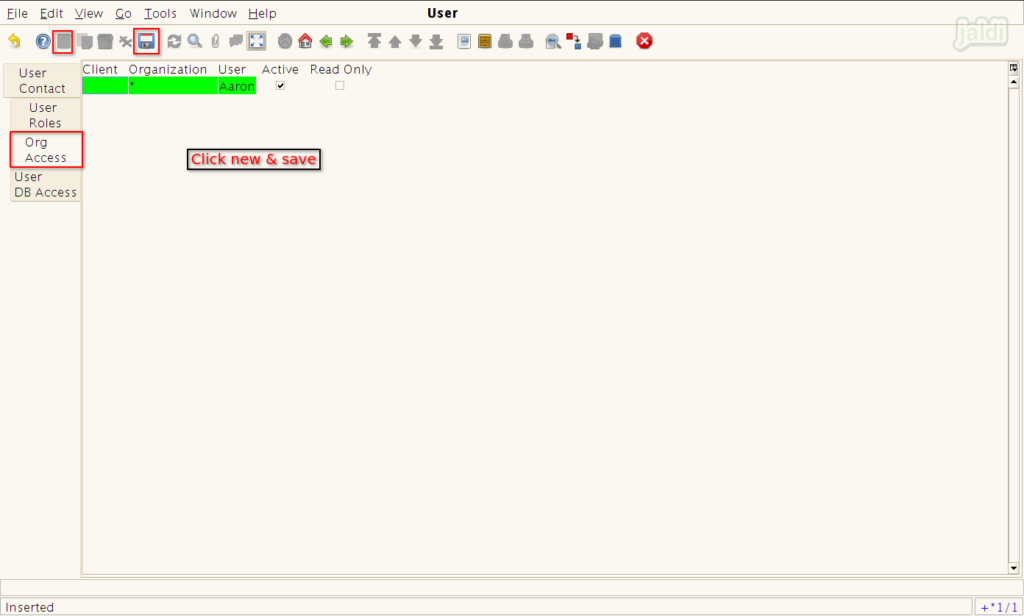
- Now move to “Org Access” tab and then just click on new and save. No need enter any input in this screen.
- Once the role, role access and user names are created successfully in POS application then we can login the application using the created user name.
- Like below shown image, enter “User ID & Password” and click tick mark to continue the login process.
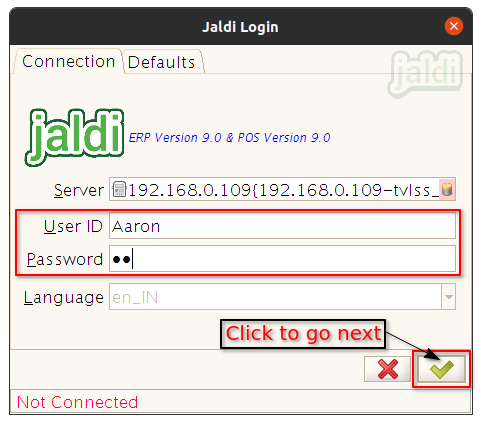
- Then select the required “Role” from the drop down list and press “tick mark” to login the application.
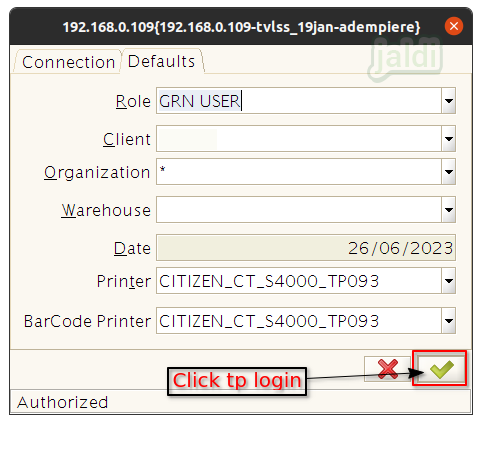
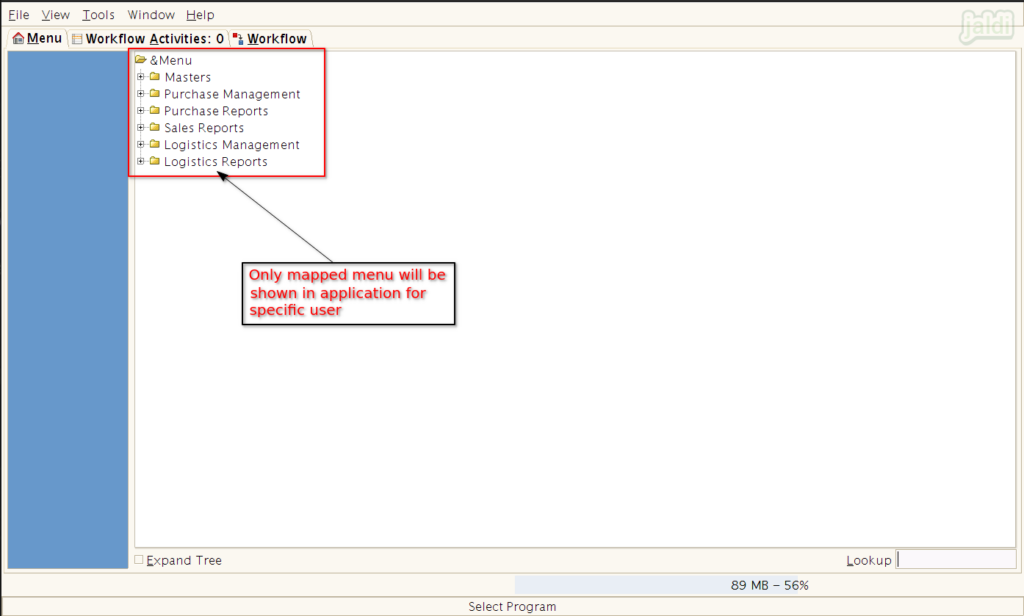
- Only enabled menus are visible to the users.
