SS Integration in Jaldi Lifestyle POS
SS Integration is menu folder which is used for user to proceed the manual synchronisation of following process to third party applications,
- Inter branch transfer sync
- Return to vendor sync
- GRN sync
- Daily sales tax sync
Auto sync already there with scheduled period for all the above process, but you can sync data manually when ever you need using this menu.
Inter Branch Transfer Synchronisation
Inter Branch Process API
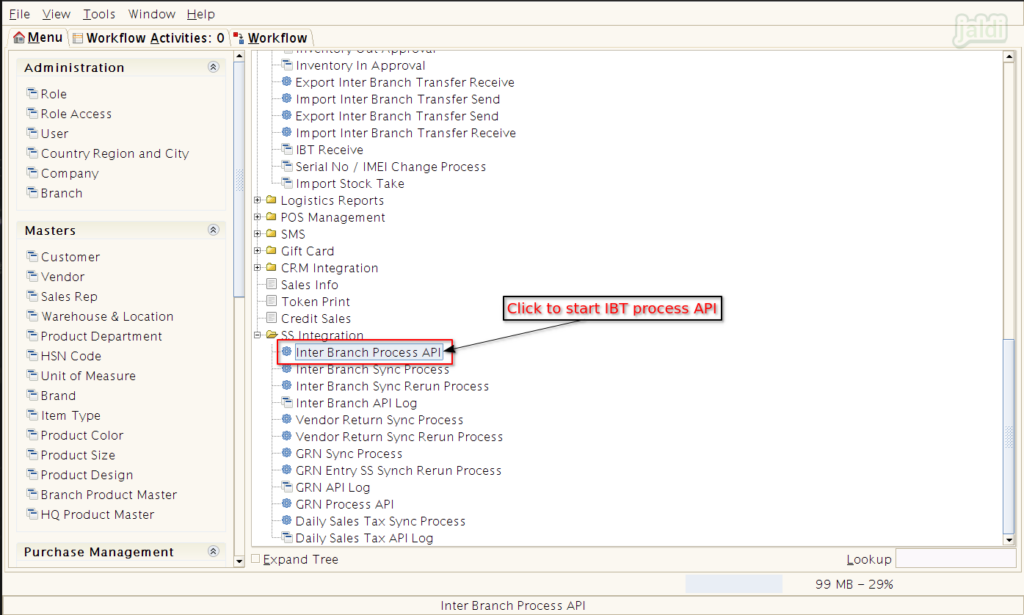
Inter branch process API is the feature to manually start the synchronisation process of IBT auto sync to third party integrated application.
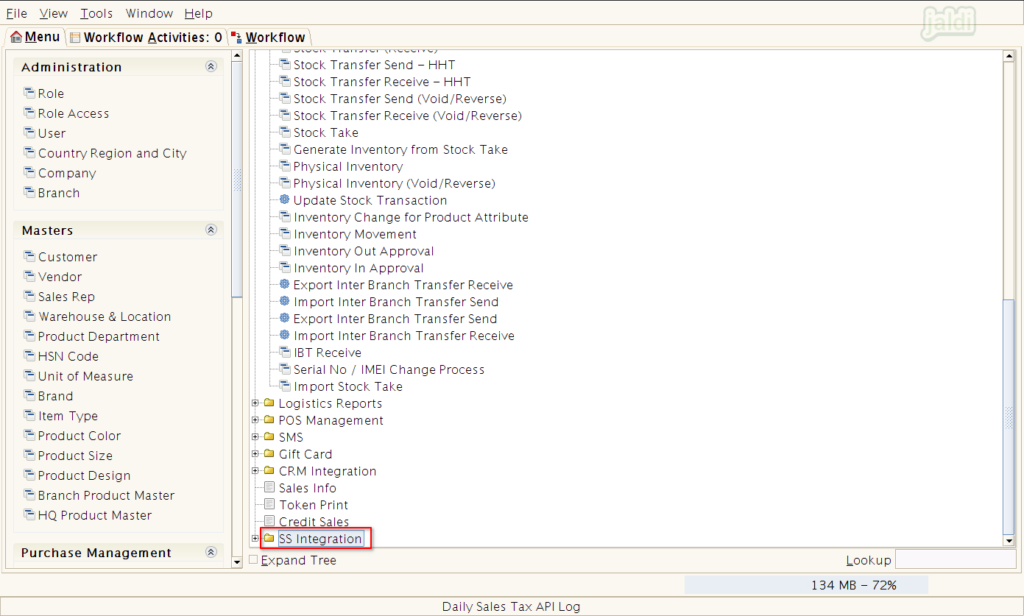
- Go to application path, SS Integration > Inter Branch Process API
- Click on the Inter branch process API menu.
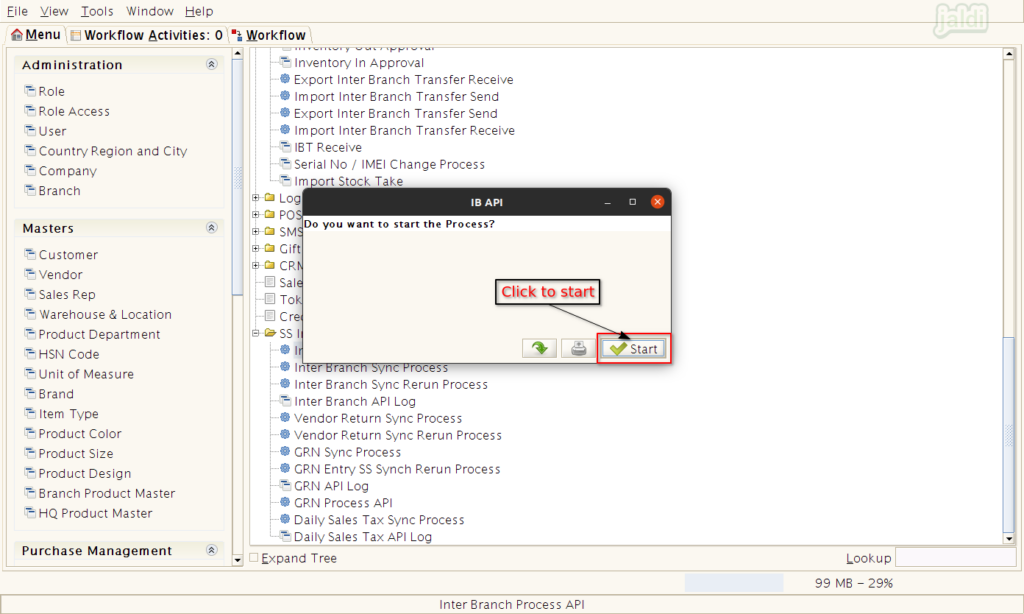
- In IB API screen, click on “start” to start the IBT API.
Inter Branch Sync Process
Once the IB API is started, the completing IBT will be auto synced to third party application. If there is any issue in sync, then you can use the following menu and process to start the inter branch process sync manually
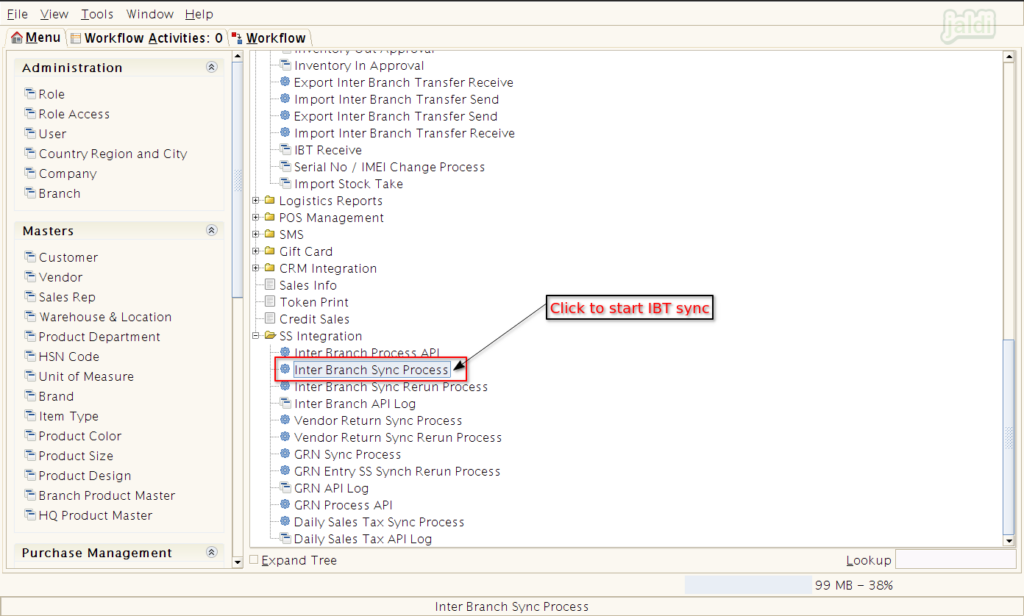
- Go to application path, SS Integration > Inter Branch Sync Process
- Click on the Inter Branch Sync Process menu.
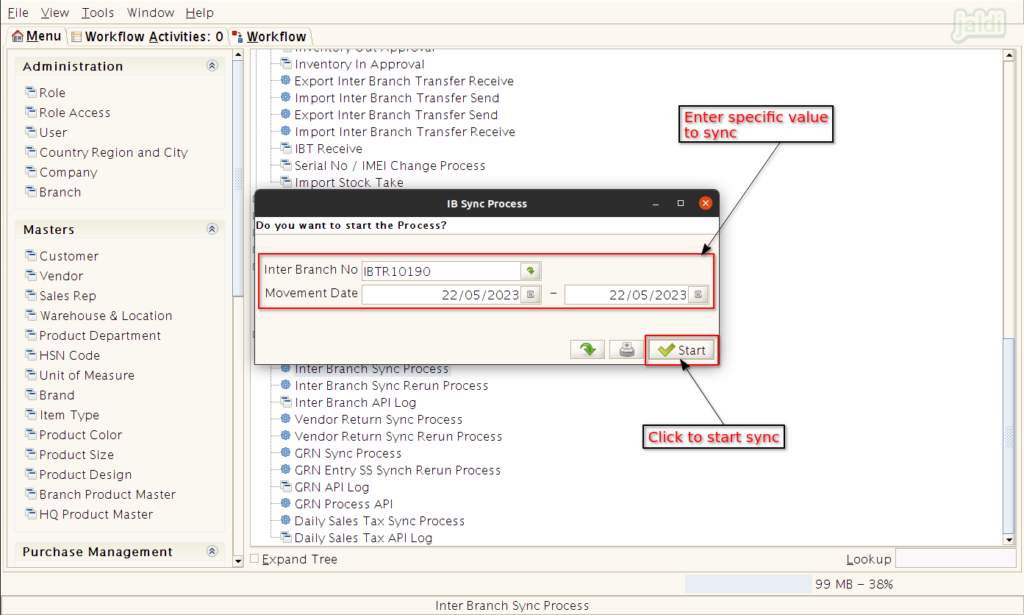
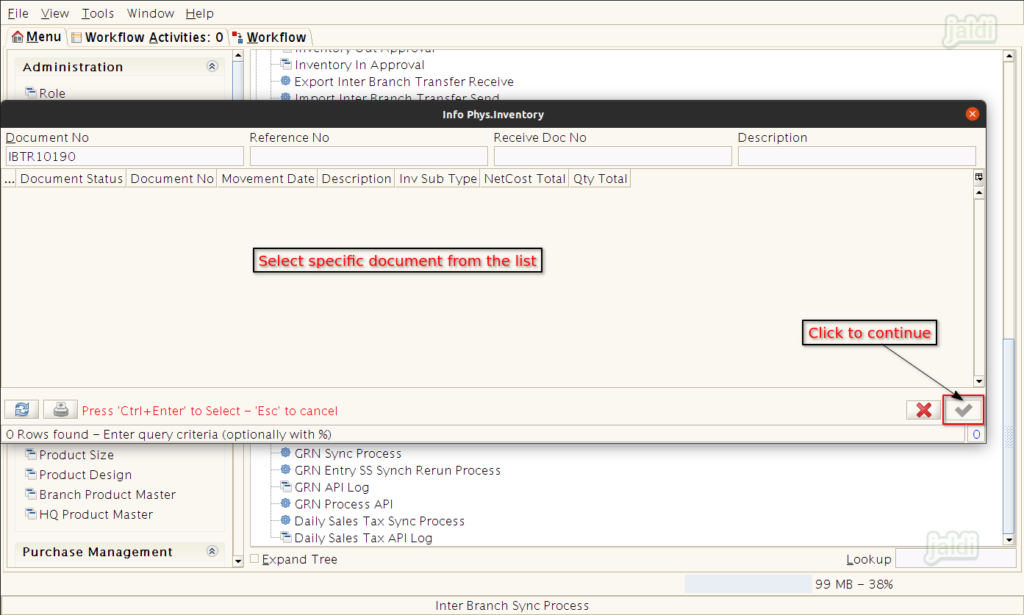
- In showing IB sync process screen, Enter Inter Branch No, Movement date range and then click on start to sync the specific value for the first time to third party integrated application.
Inter Branch Sync Rerun Process
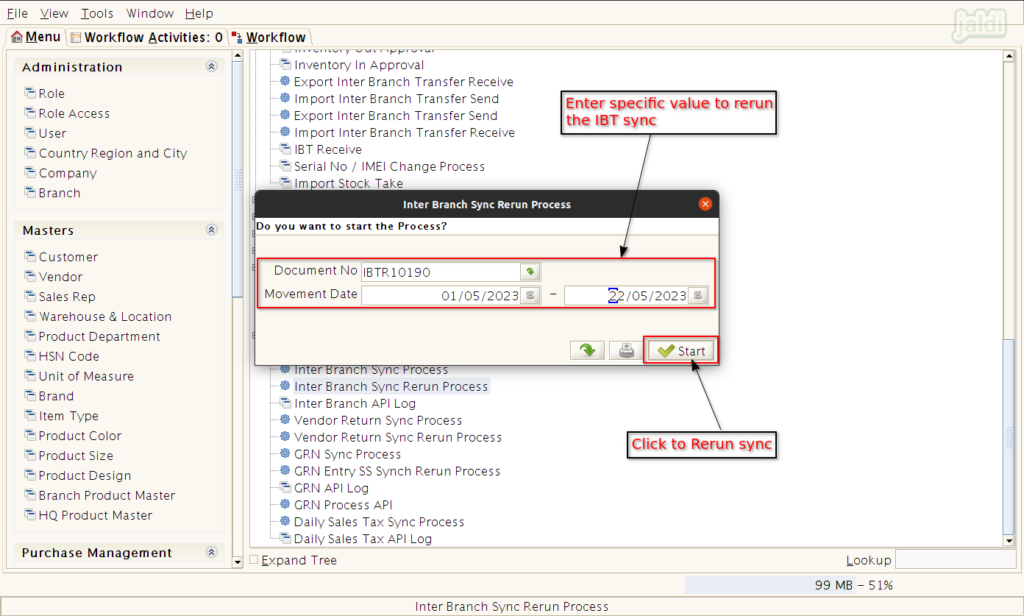
This is the process which used to rerun the specific inter branch document no which is not synced properly after Inter branch sync process.
- Go to application path, SS integration > Inter Branch Sync Return Process and click on that.
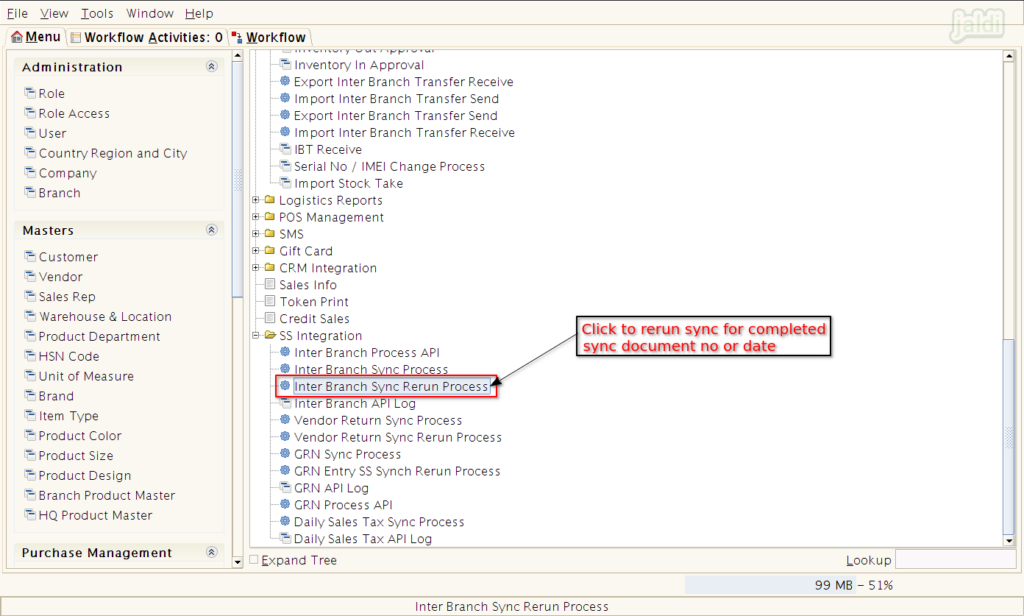
- Then in showing popup, enter document no, movement date range and click on start to rerun the sync process.
Inter Branch API Log
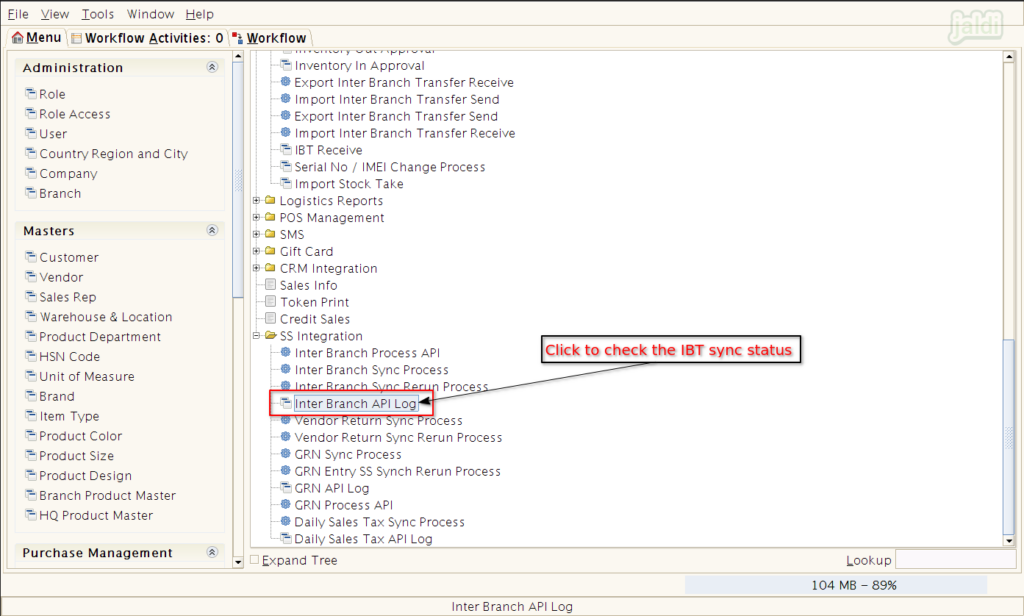
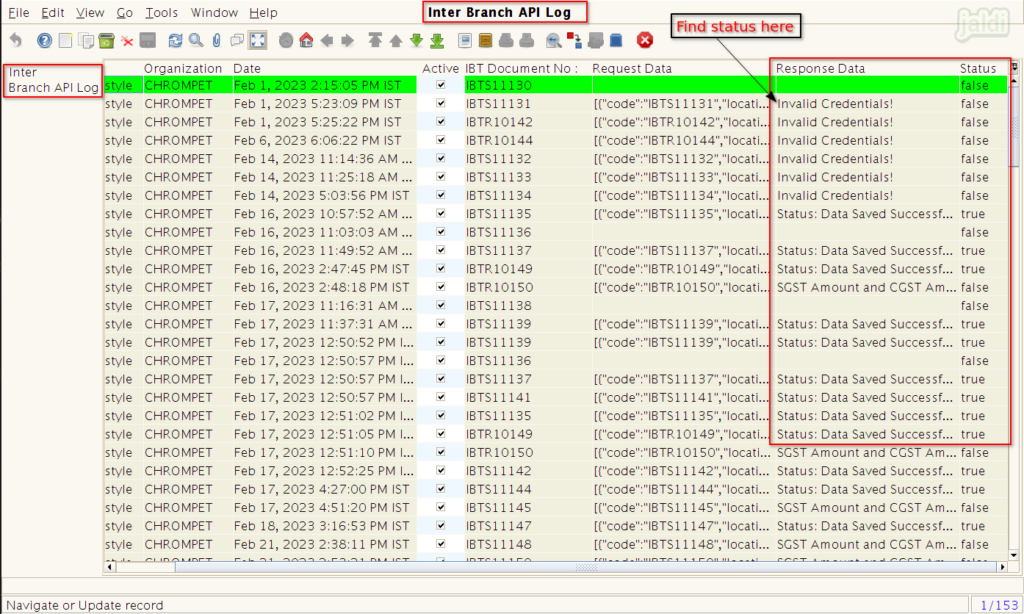
This is the menu screen which is used to check the status of each IBT document’s sync status with remarks.
- Go to application path SS Integration Inter Branch API Log menu and click on that.
- In this list, we can check the status of each IBT details using response data and status column.
Vendor Return Synchronisation
Vendor Return Sync Process
This the feature screen used for to start the sync process for vendor return.
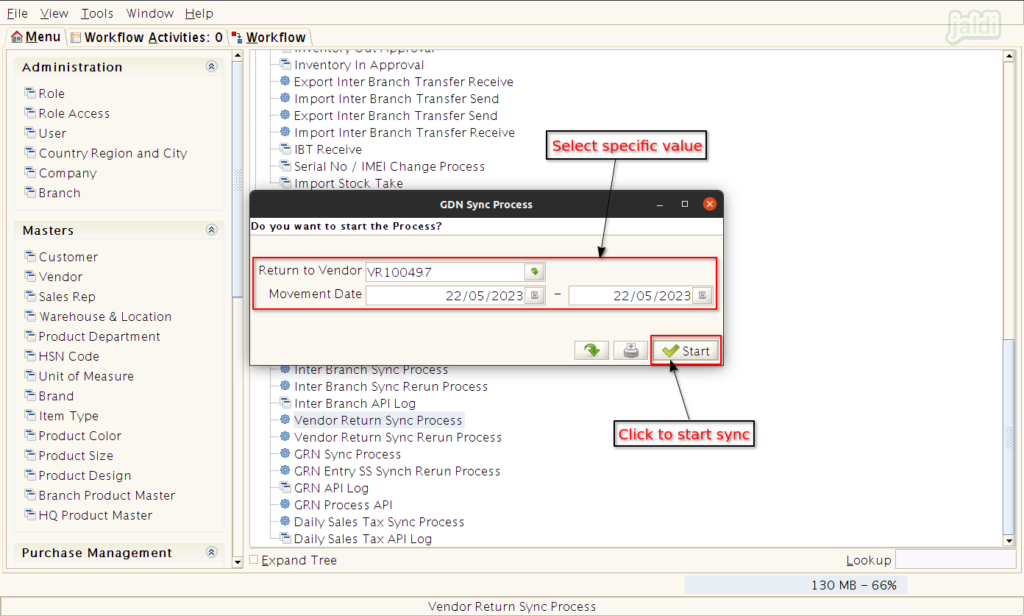
- Go to application path, SS integration > Vendor return sync process and click on that.
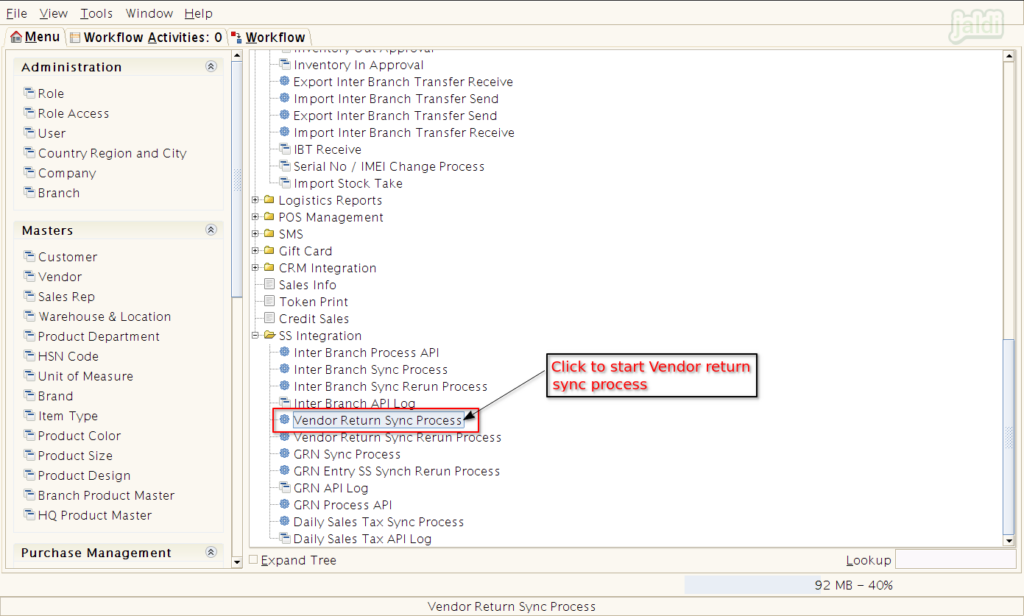
- Then enter Return to vendor no and movement date range and then click on “start” to start the return sync process
Vendor Return Sync Rerun Process
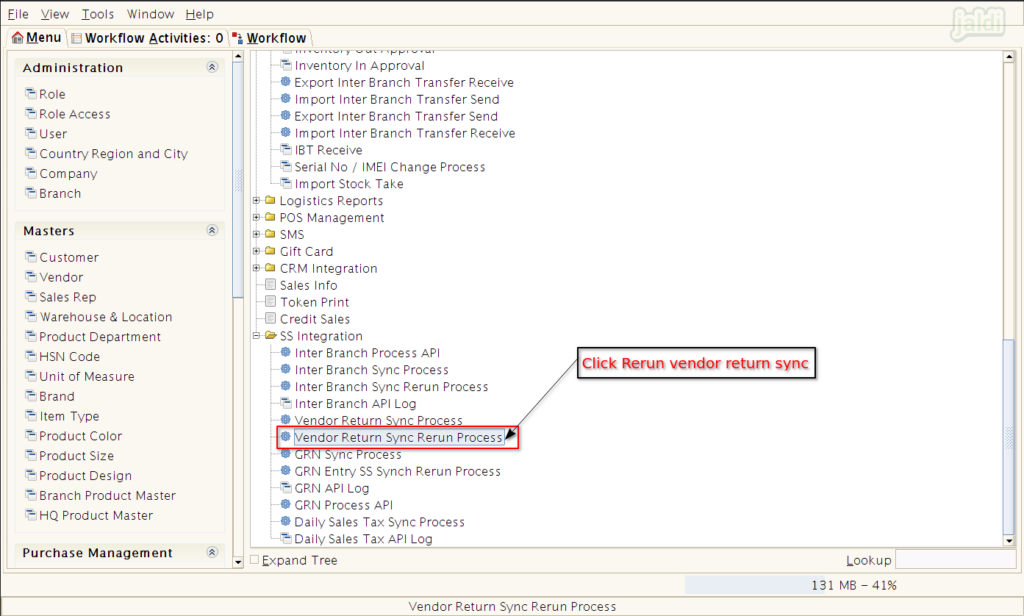
This is the menu which is used for to rerun the vendor return sync process.
- Go to application path, SS integration > Vendor return sync rerun process and click on that.
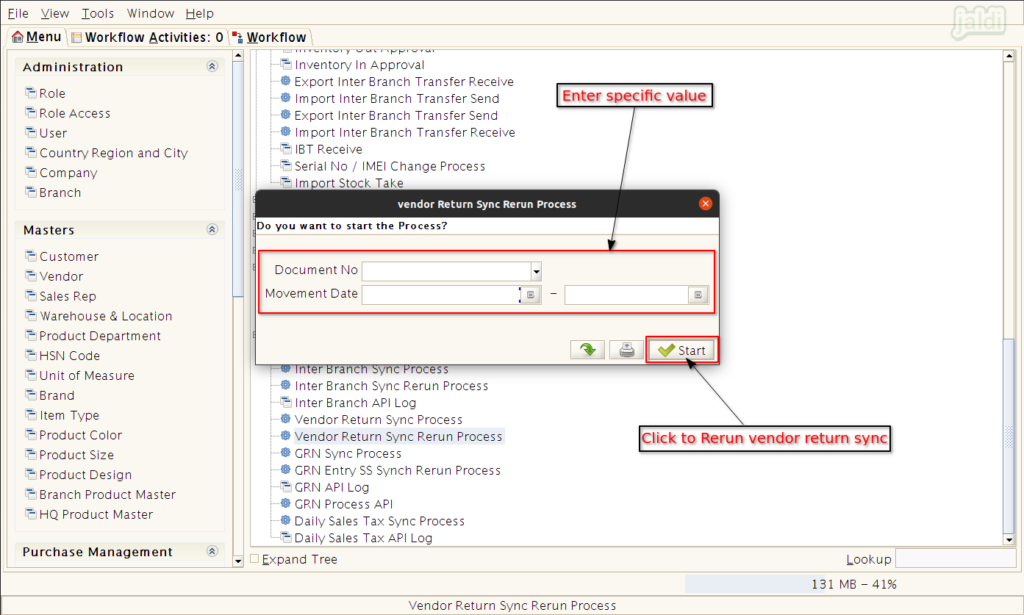
- Then enter Document no and movement date range and the click on “start” to rerun the vendor return sync process.
GRN Synchronisation
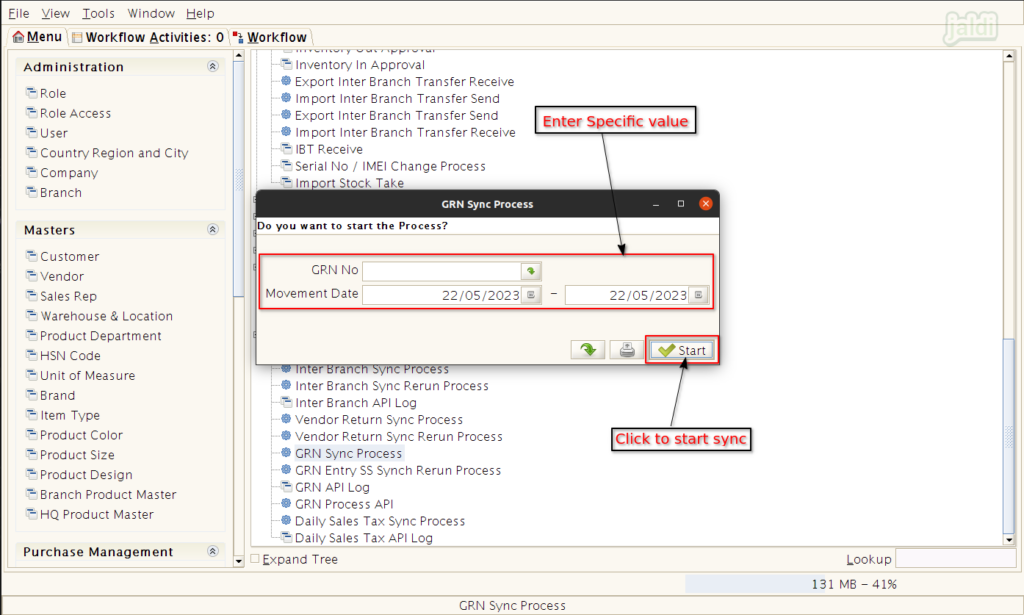
GRN sync process
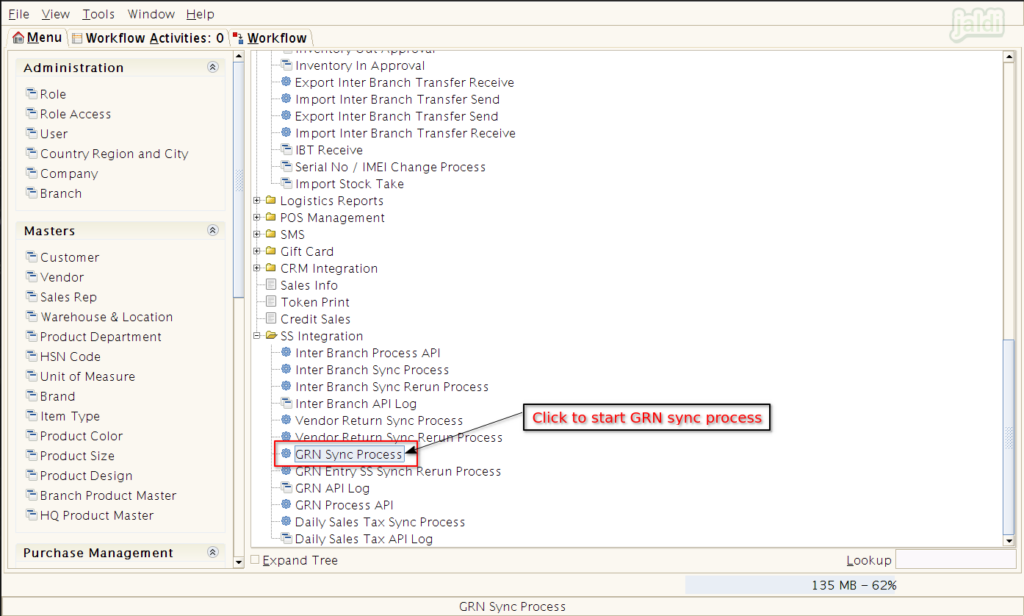
This is the menu feature which is used for to sync the GRN entries to third party application.
- Go to application path, SS integration > GRN sync process and click on that.
- Then enter GRN No and movement date range and then click on start to start the GRN sync to third party application
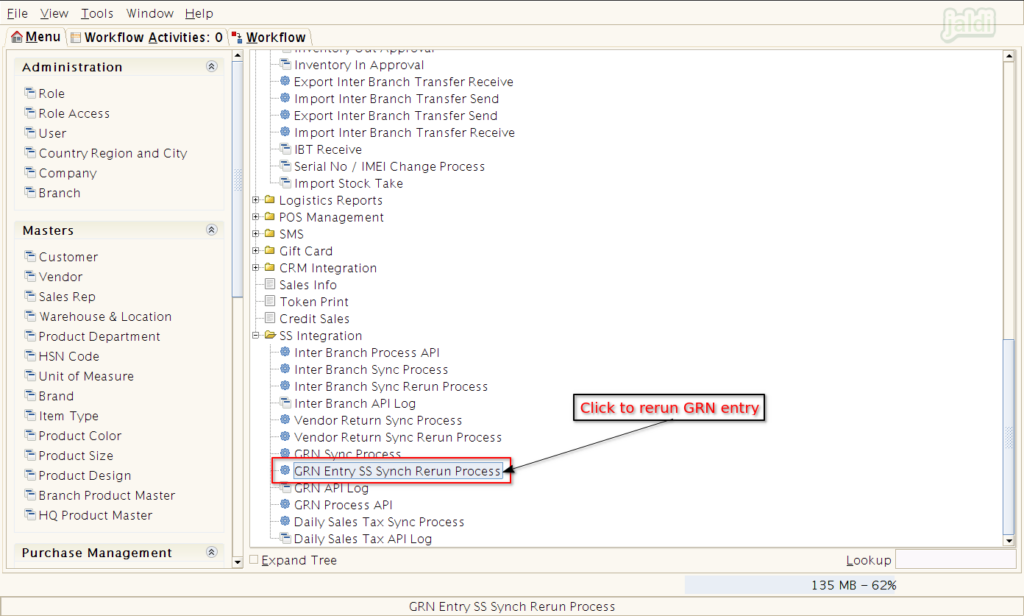
GRN Entry SS Sync Rerun process
This menu is used for to rerun the GRN entry which is not properly synced in GRN Sync process.
- Go to application path, SS integration > GRN entry SS sync rerun process and click on that.
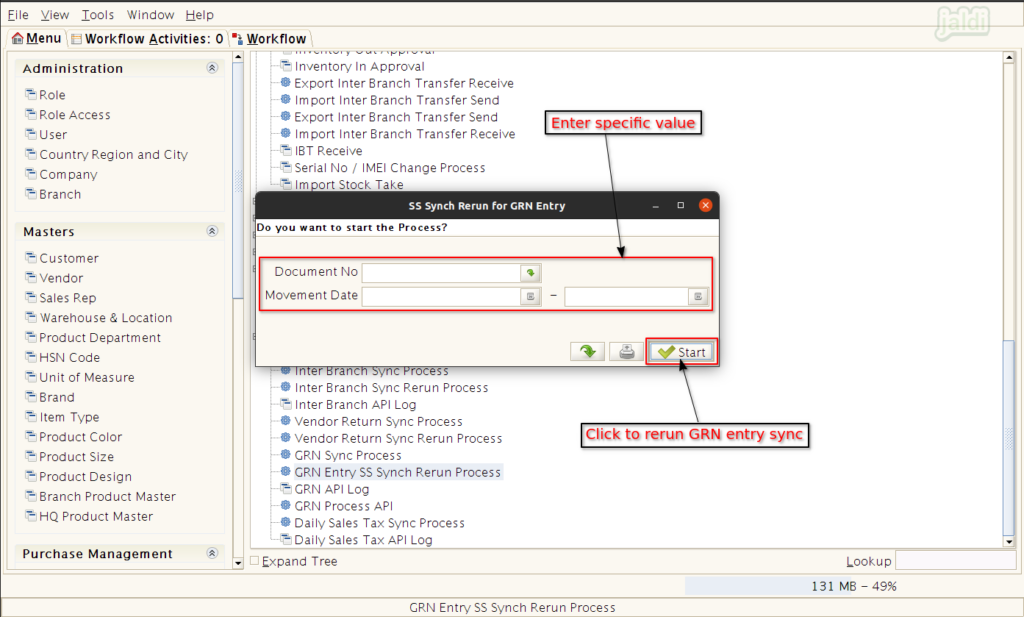
- Then enter document No and movement date range like below shown image and click on Start to rerun the GRN sync.
GRN API Log
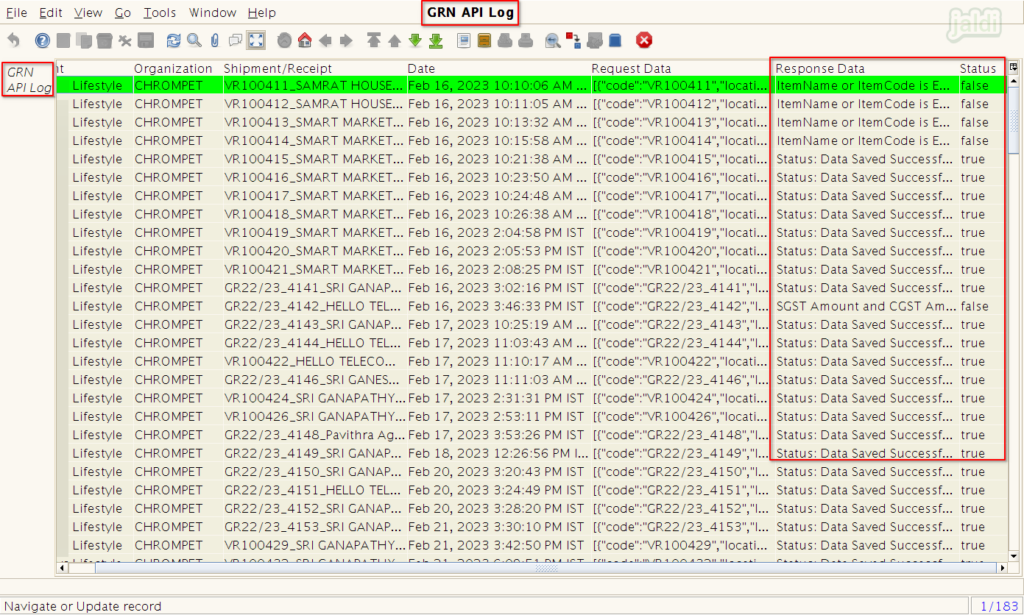
This is the menu screen where user can check the synced GRN entries status with remarks.
- Go to application path, SS integration > GRN API Log and click on that.
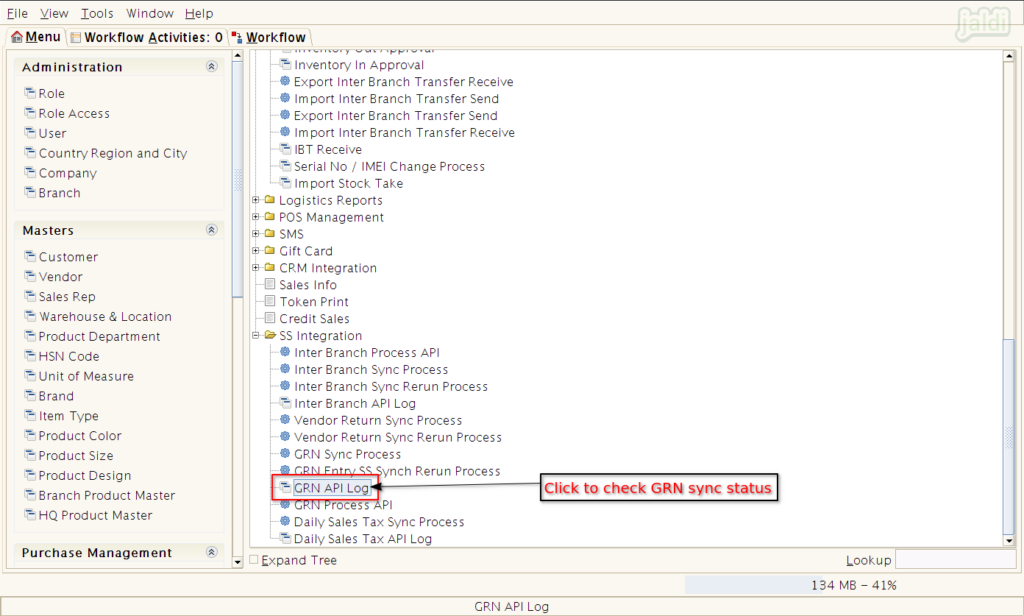
- In list of synced GRN API entries, we can see the status and remarks in Status and Response data respectively.
GRN Process API
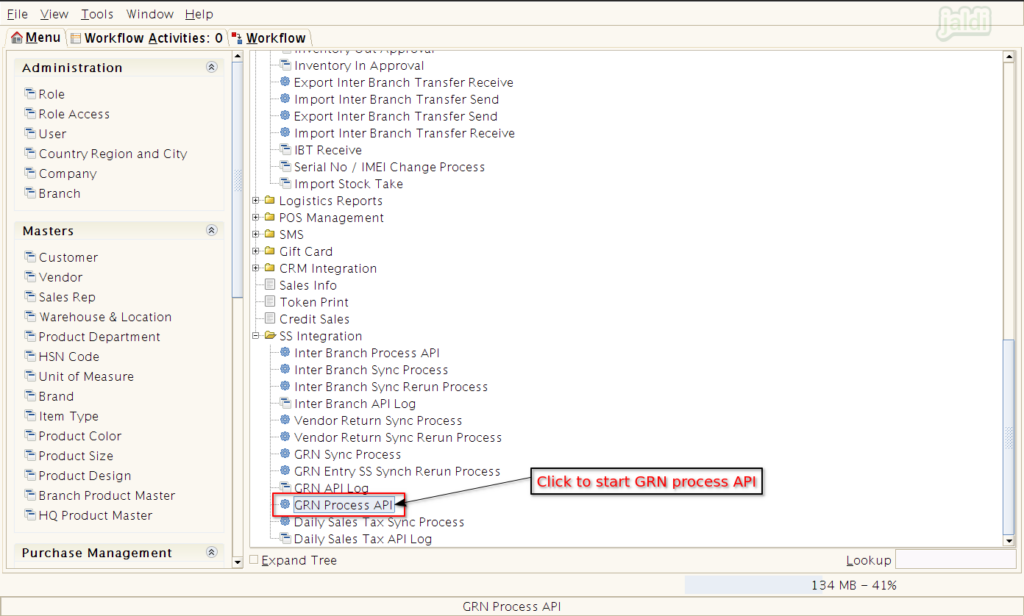
This is the menu which is used to start the auto sync process of all the completed GRN entries to third party integrated application.
- Go to application path SS Integration > GRN Process API menu.
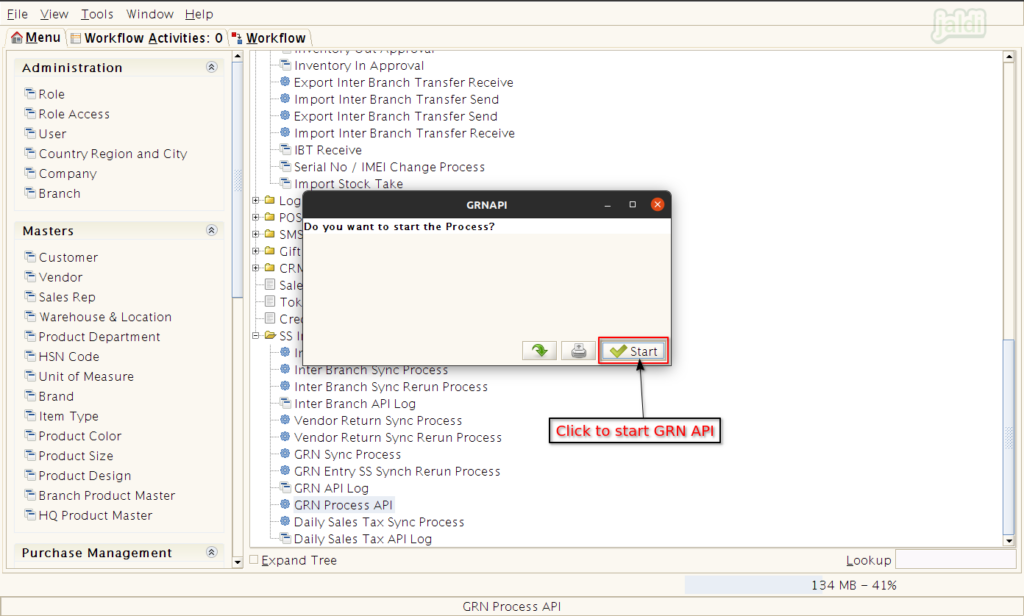
- Then in GRN API screen, click on “Start” to start the GRN API process.
Daily Sales Tax Synchronisation
Daily Sales Tax Sync process
This is the feature which is used to sync the sales tax data to third party accounts application. Data will sync automatically based on schedule time, Also you can sync the data manually whenever you need.
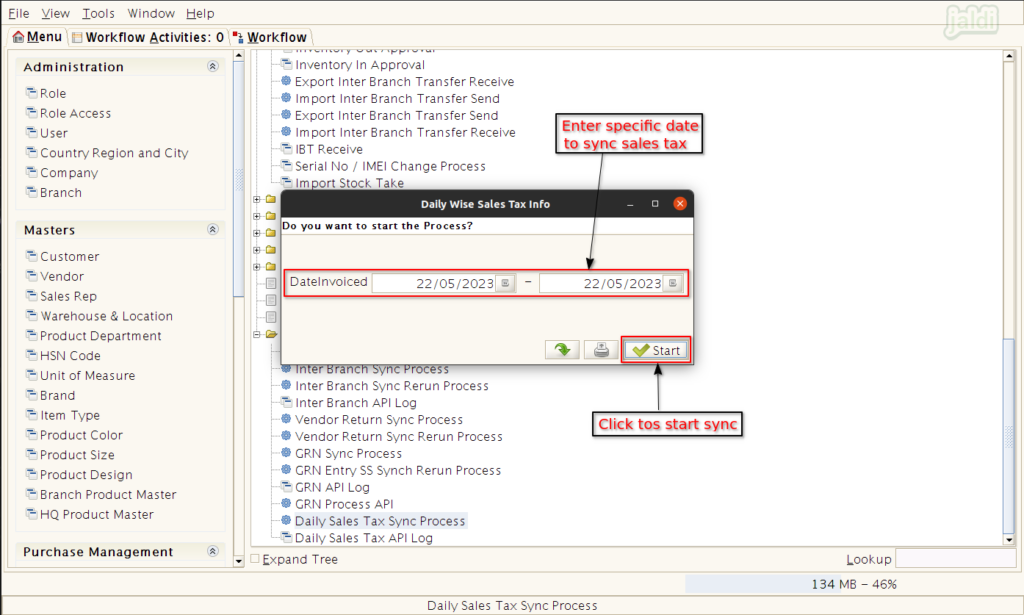
- Go to application path, SS Integration > Daily Sales Tax Sync process menu and click on that.
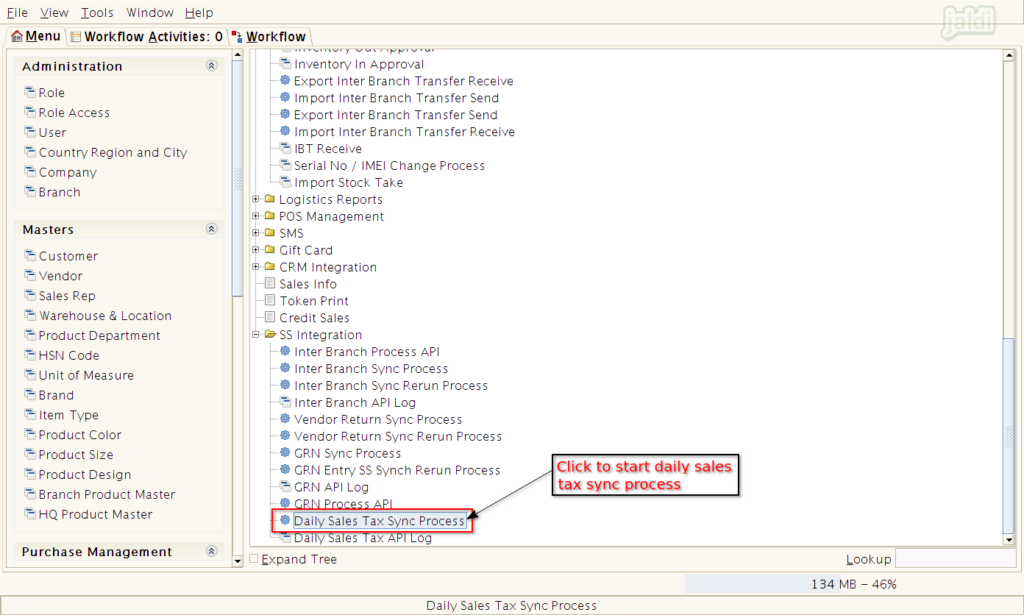
- Then in Daily wise Sales Tax Info screen, enter date invoiced range (from and to date) and then click on “start” to start the sync process of sales tax data.
Daily Sales Tax API Log
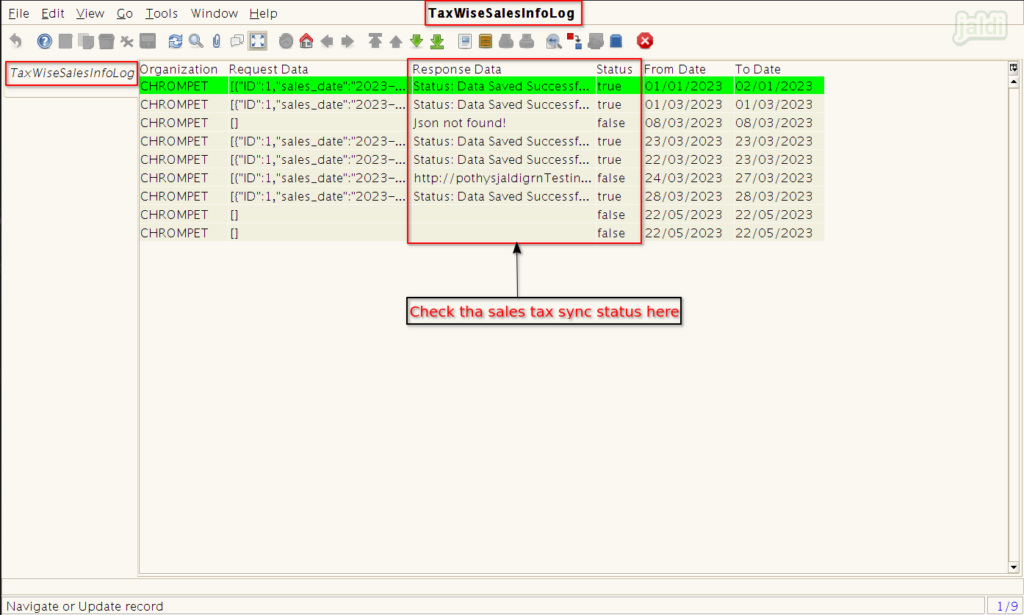
This is the log screen where user can find the synced sales tax details with remarks.
- Go to application path SS Integration > Daily Sales Tax API Log menu and click on that.
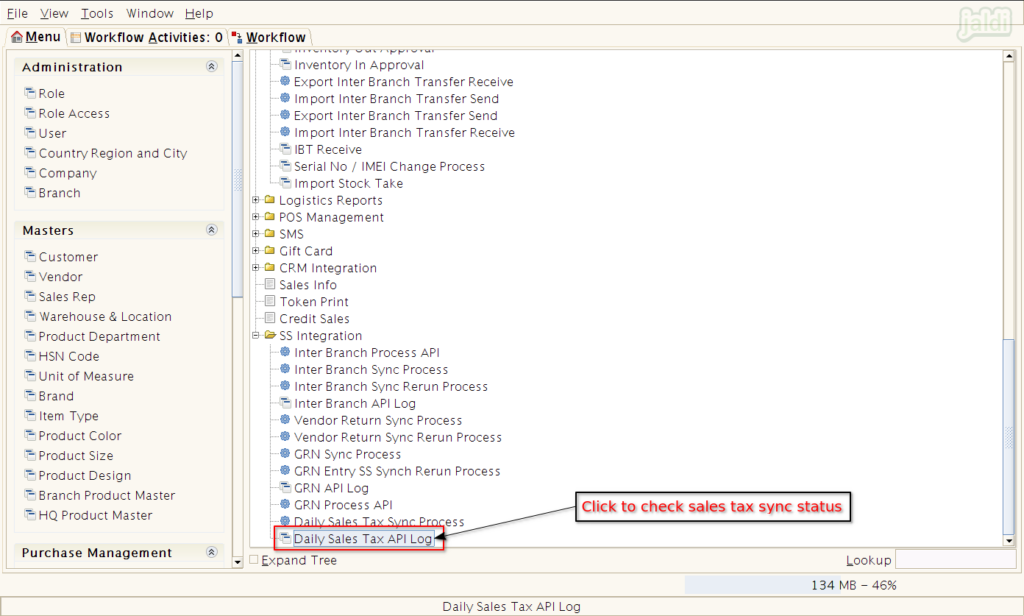
- Then we can see the list of synced day wise sales tax data. We can find the status and remarks in status and Response data columns respectively.
