Stock transfer receive using HHT in Jaldi Lifestyle POS
Stock transfer receive HHT is the feature screen which is used for user to receive the transferred stock in current location from another location.
For example, lets consider a real time scenario where few product’s stock has been sent to “Godown” location from selling floor location due expiry, damage or any other reason. Follow the below mentioned steps to complete stock transfer receive HHT document entry to receive the stock.
Stock transfer Send
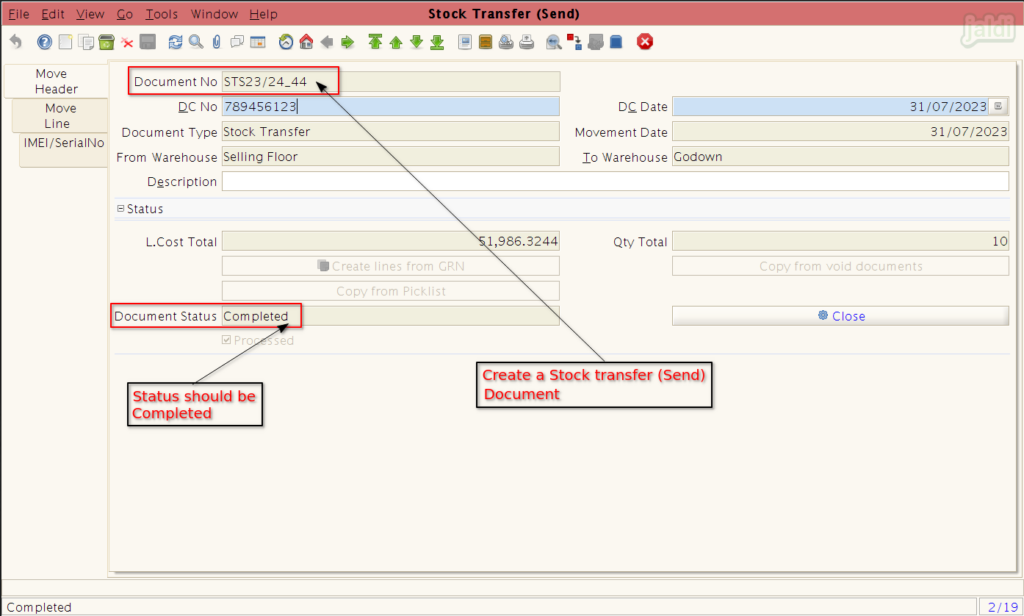
- Go to stock transfer (send) in Jaldi Lifestyle POS and complete the stock transfer (Send) entry like below shown image.
- Note down the document number of completed entry.
- Only completed stock transfer (Send) entry can be received in Stock transfer receive entry.
- Document status should be “Completed”.
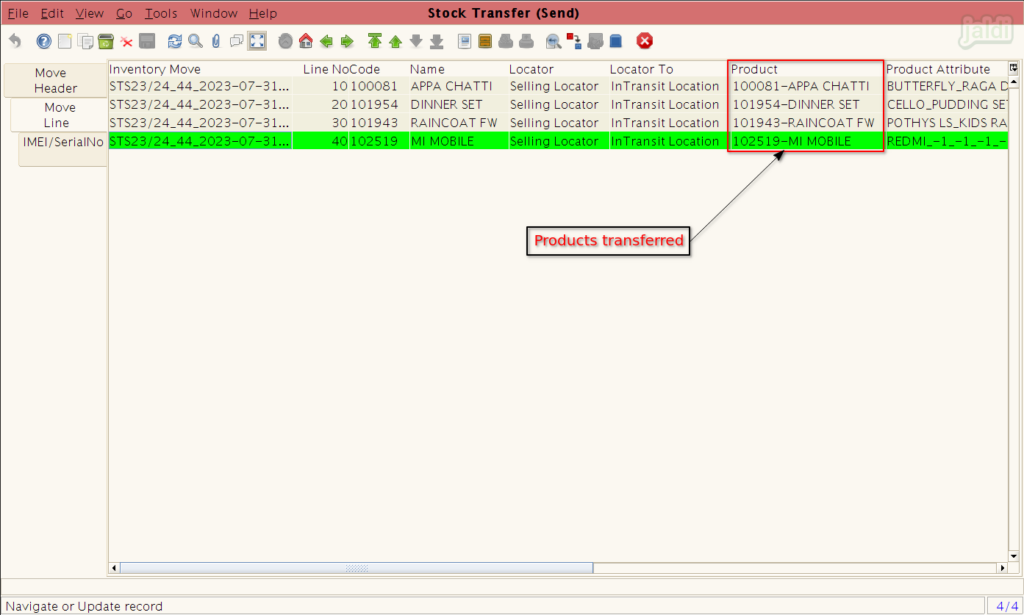
- Products should be added and transferred to required location in stock transfer (Send) entry like below shown image.
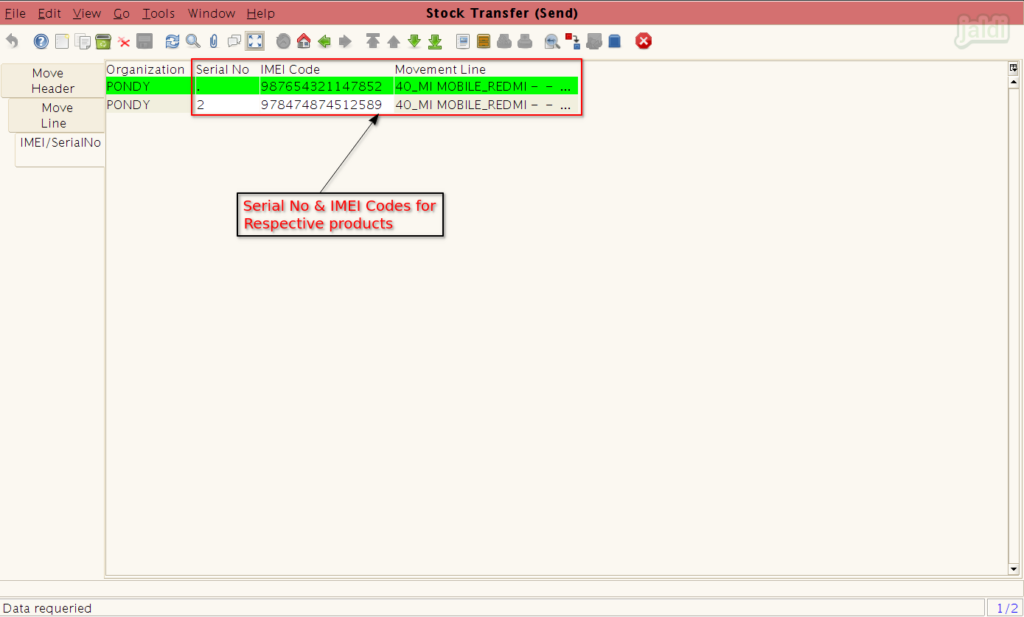
- For “Mobile department” products, IMEI codes and Serial numbers should be added to each transferred stocks like below shown image.
- To know more about stock transfer (Send) process in Jaldi Lifestyle POS, click on this link https://jaldi.store/stock-transfer-send-and-stock-transfer-receive-between-locations/.
- User can also transfer stock using, Stock transfer Send – HHT menu in HHT web mobile URL interface. To know more about this click on this link https://jaldi.store/stock-transfer-using-hht-in-jaldi-lifestyle-pos/
How to receive transferred stock using HHT Web mobile interface ?
- Open HHT web mobile interface URL and login using the respective user credentials.
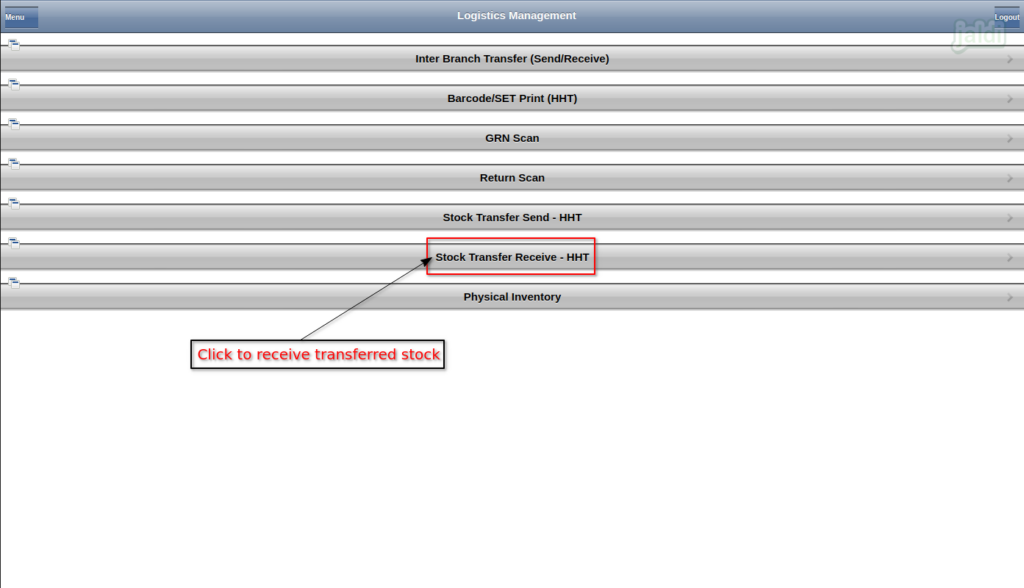
- Then go to URL path Logistics Management > Stock Transfer Receive – HHT.
- Click on “Stock Transfer Receive – HHT” menu to open.
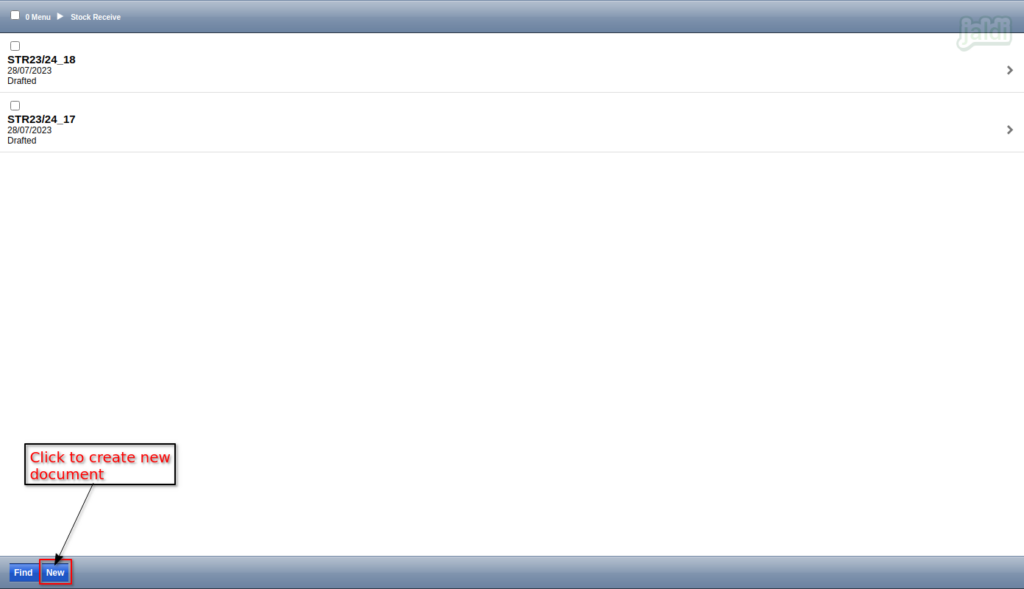
- In next screen, press “New” function key to create a new stock transfer receive – HHT document.
- Then system will show the screen where user can create a new “Stock transfer receive HHT” document entry.
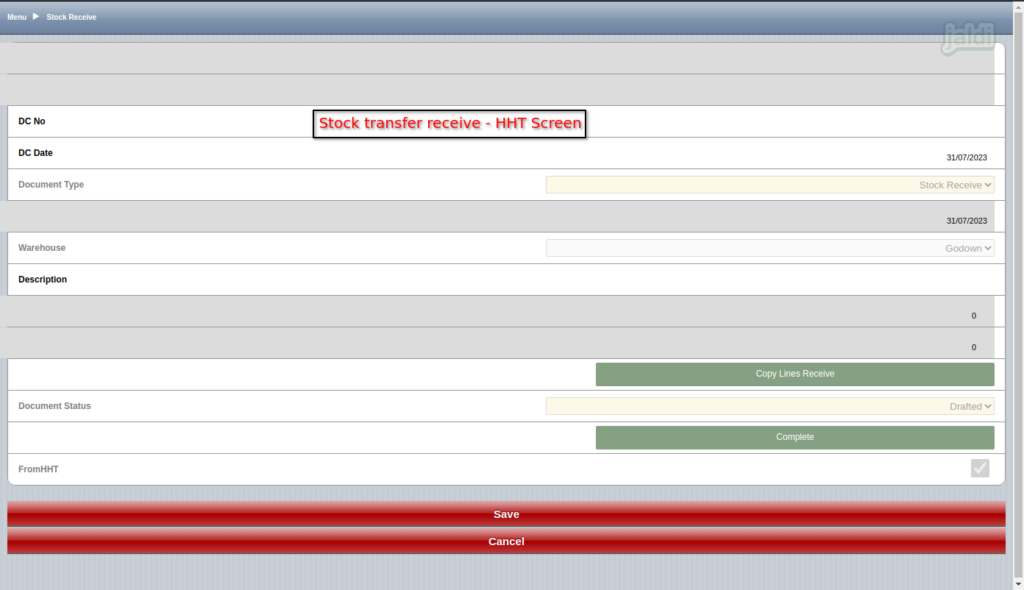
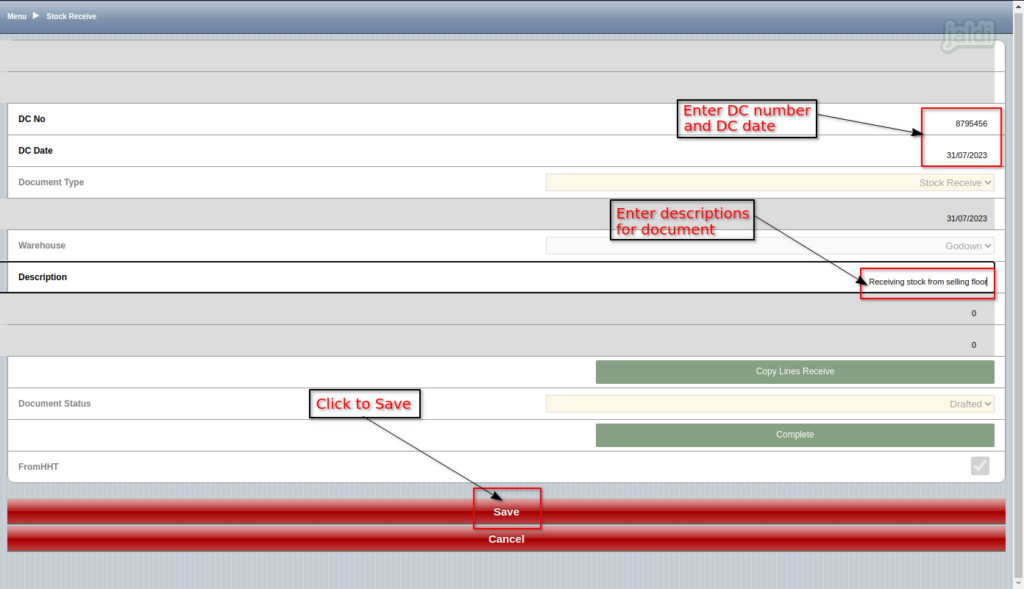
- To create a new document, enter the following input data under stock receive tab screen,
- DC No – Enter DC number of stock transfer receive
- DC Date – Enter DC date
- Description – Enter description for the current entry
- Once all the above mentioned input data are filled in screen, then press “Save” function key to save the stock receive tab.
- Once the stock receive tab screen record is saved, then the function keys called “Copy Lines Receive” and “Edit” are enabled to click.
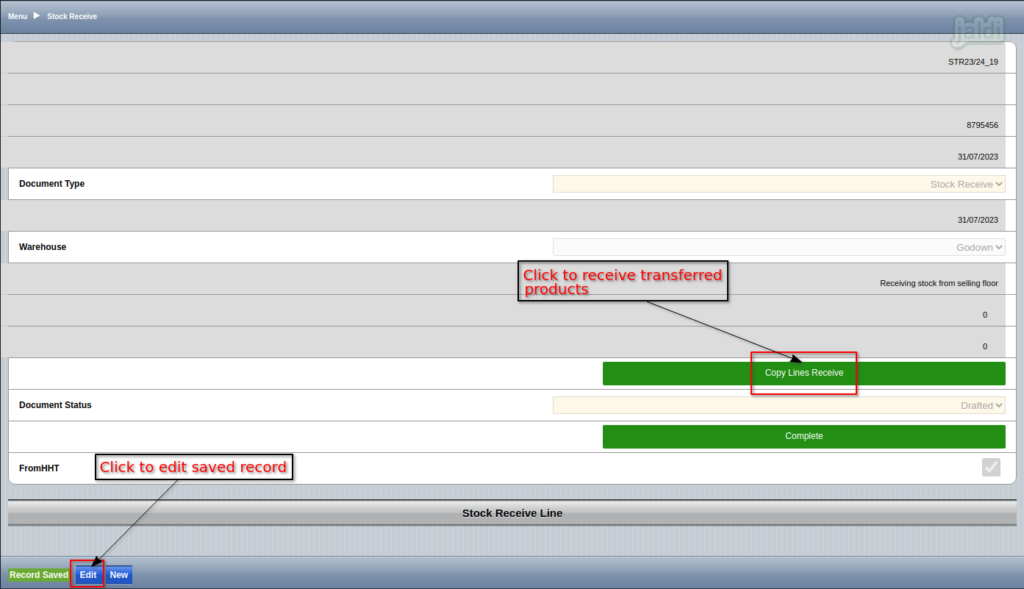
- Click on “Edit” function key to edit the saved record. DC No, DC date and Description can be edited using “Edit” function key.
- Click on “Copy Lines Receive” function key to receive the transferred stock.
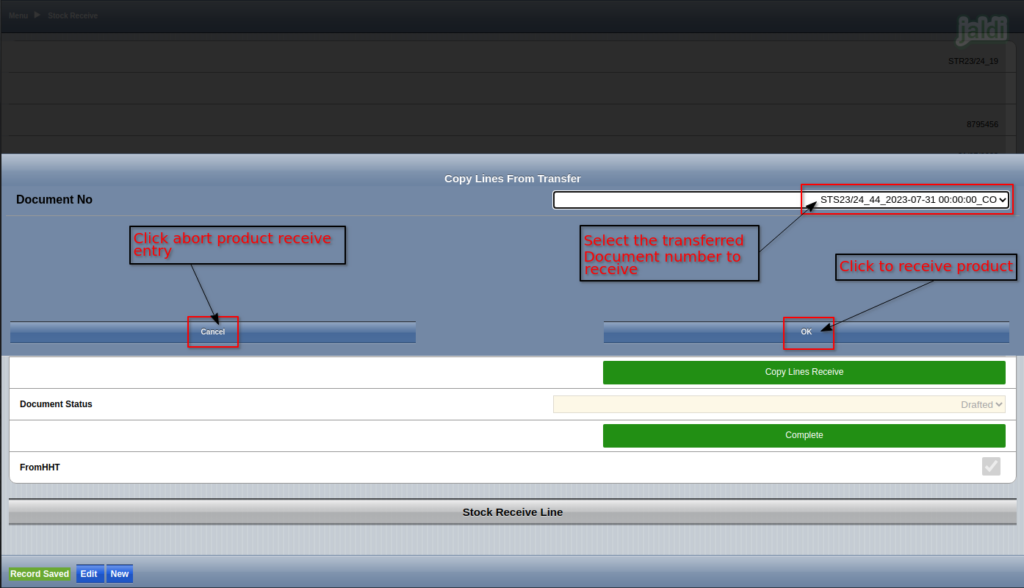
- In copy lines from transfer screen, Click on “Document No” drop down field and select required document number like below shown in image.
- Then press “OK” to receive transferred stock or press “cancel” to abort the process.
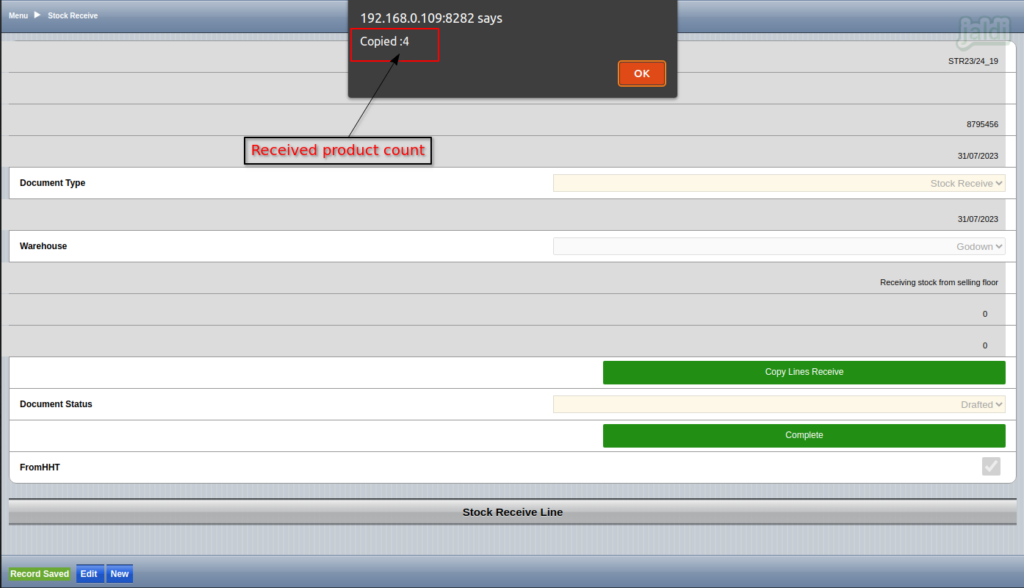
- Then the transferred stock will be received and received product count will be shown like below shown image.
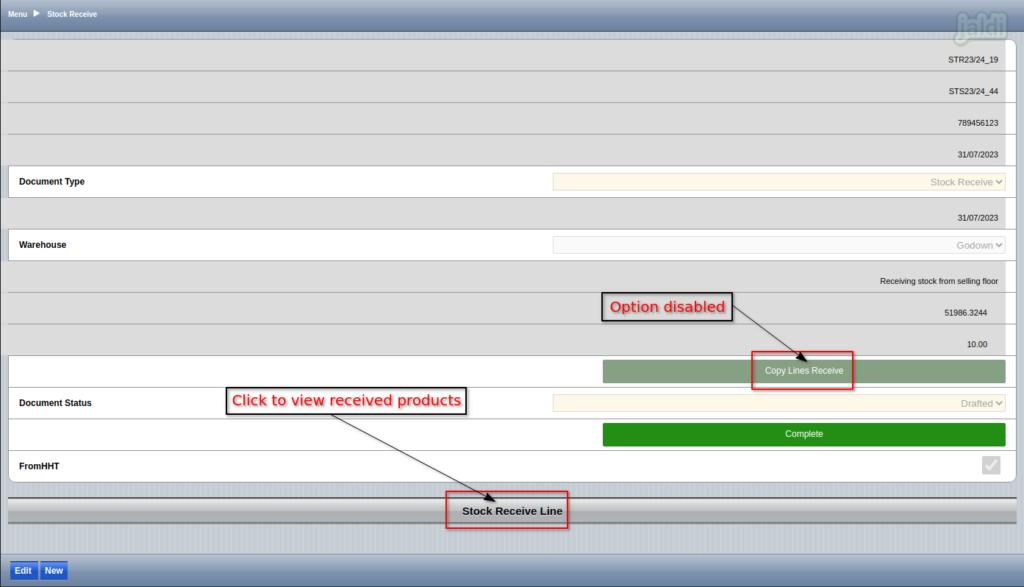
- Once the stock receiving is completed, then “Copy Lines Receive” function key will be disabled.
- Press “Stock Receive Line” to view the products details.
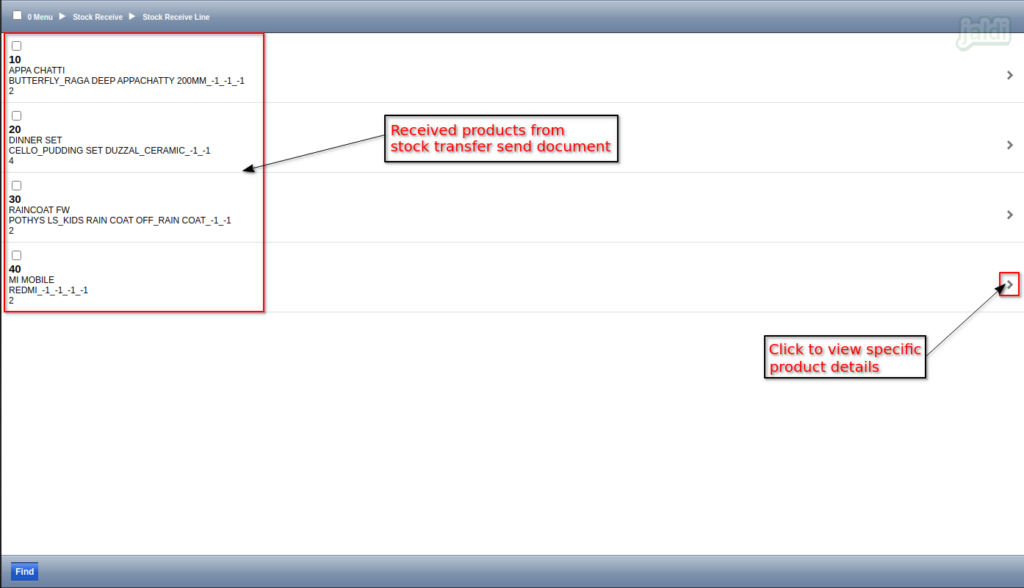
- The list of received products will be displayed under stock receive line tab like below shown image.
- Then press “>” marked arrow symbol to view the details of specific products.
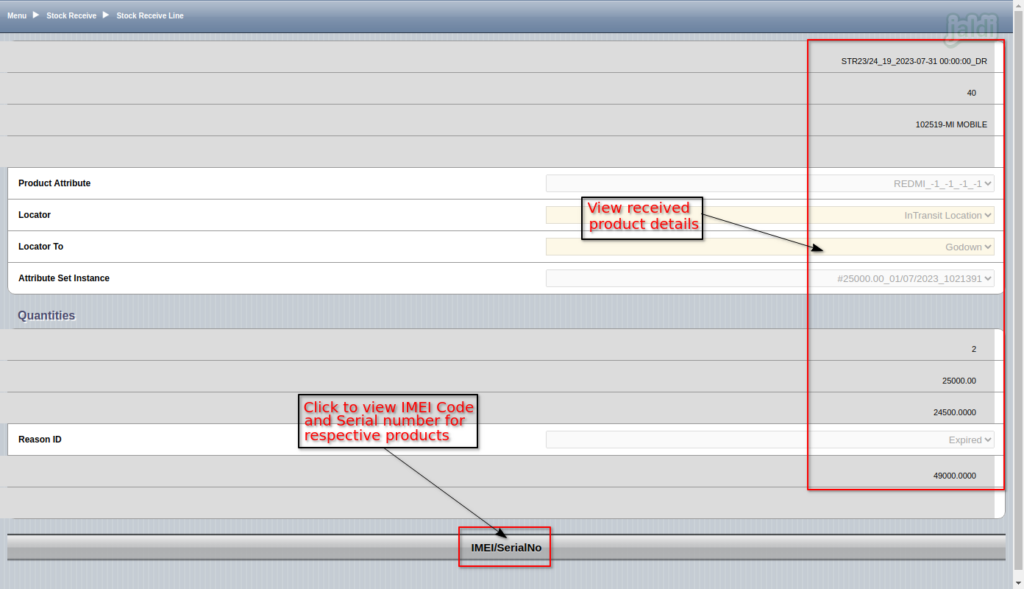
- Like below shown image, user can view each received product details.
- User can only view the product details, user cannot edit or delete the product.
- Press “IMEI/SerialNo” to view IMEI code and serial numbers of the received mobile department products.
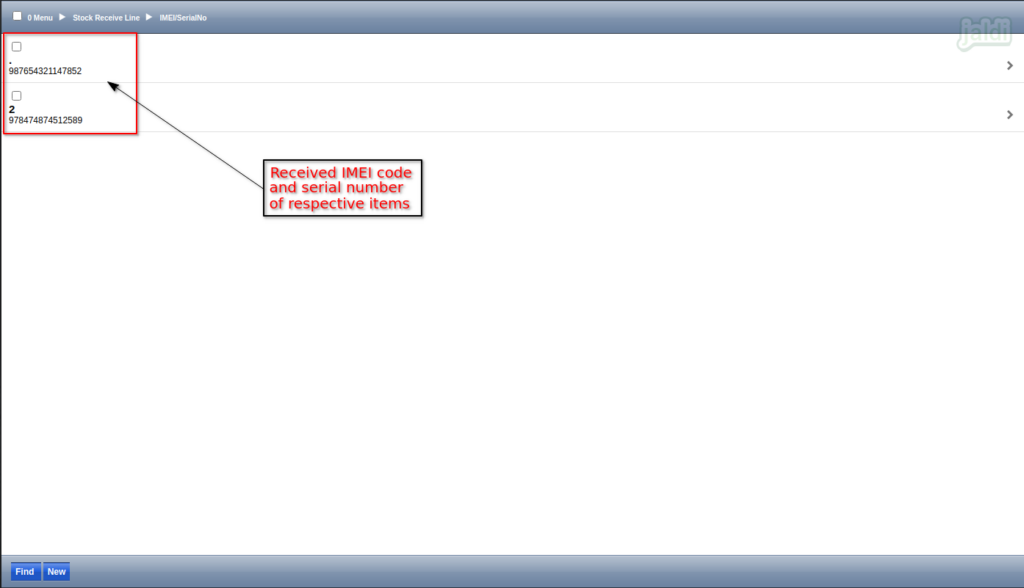
- User can view the IMEI code and serial number of mobile department products like below shown image.
- Press “>” symbol to view detailed view of IMEI code and serial number.
- User can only view the IMEI code and serial number and user cannot edit those details.
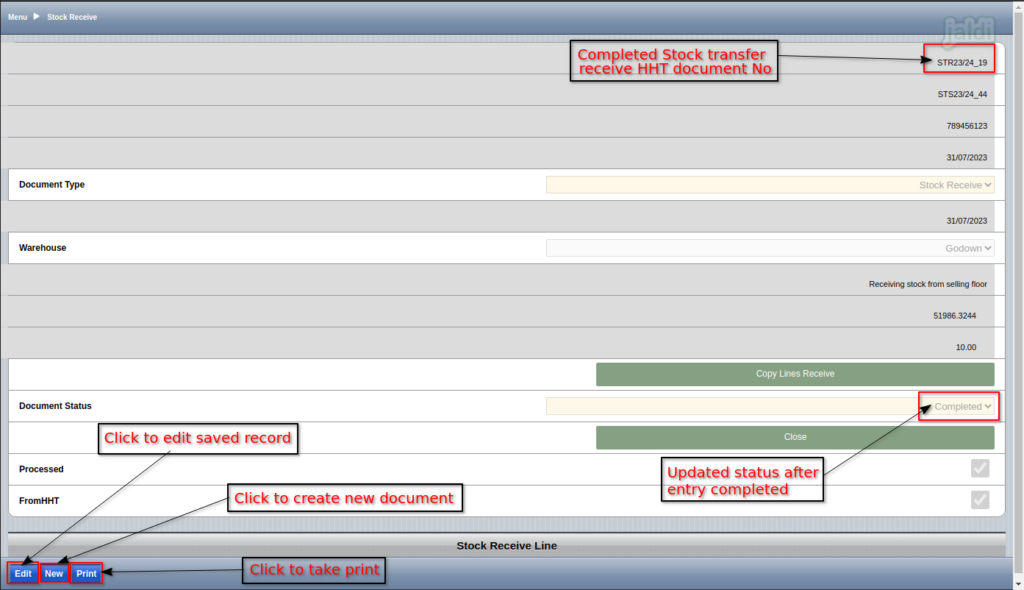
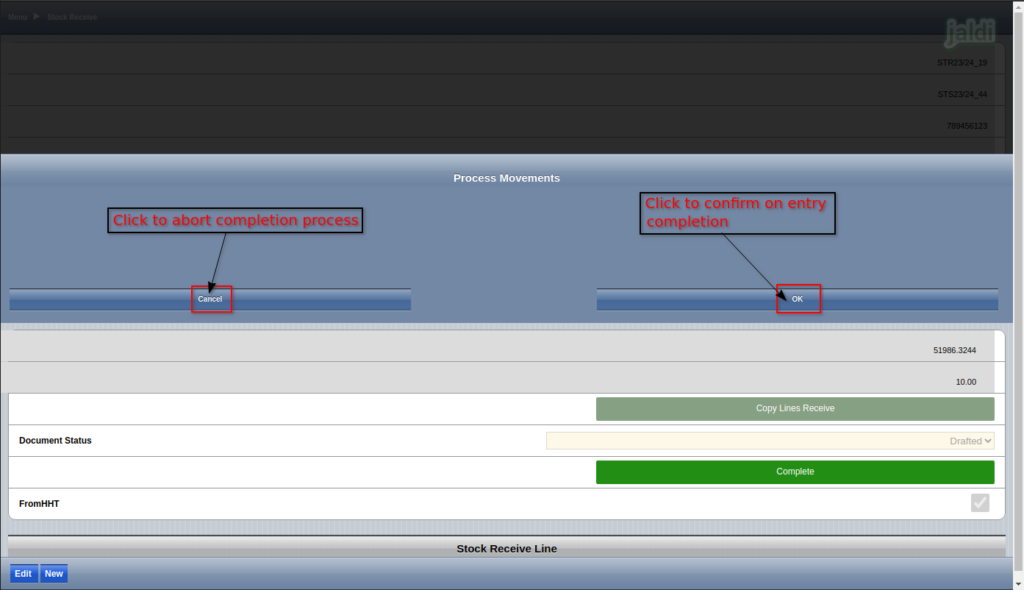
- To complete the stock transfer receive HHT document, click on “Complete” function key which is marked in below image.
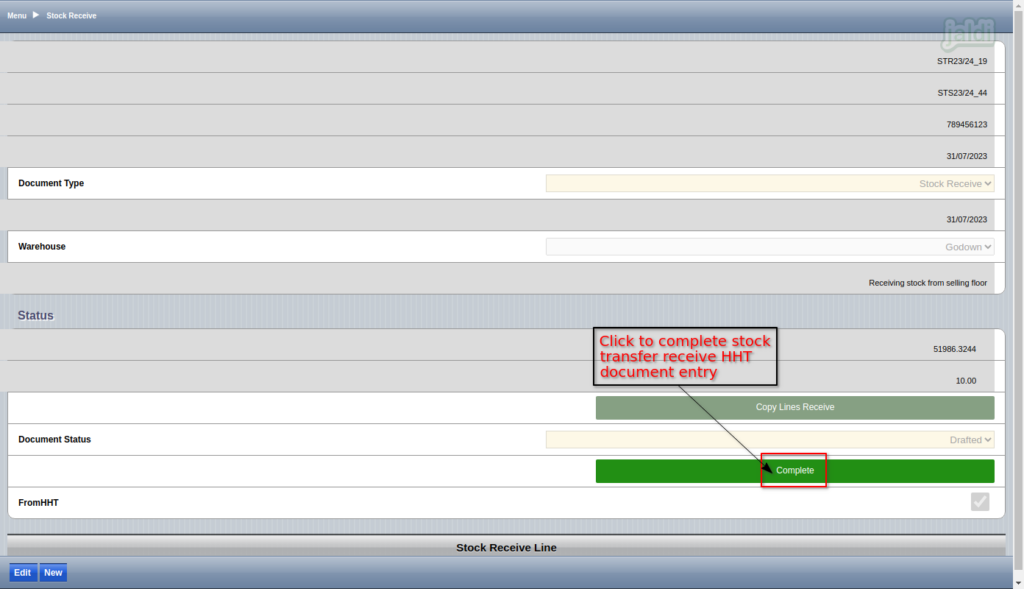
- Then in process movements screen, press “OK” to confirm on entry completion or press “cancel” to abort completion process.
- Once the stock transfer receive HHT document entry is completed, the documents status will be changed to “Completed”.
- Note down the completed stock transfer receive HHT document number which is marked in below image.
- Once the process completed, use the function keys like “Edit, New and Print” for To edit saved record, To create a new record and To take print respectively.
