Vendor master in Jaldi Lifestyle POS
It is used for user to add a new supplier and manage a imported existing suppliers in an application.
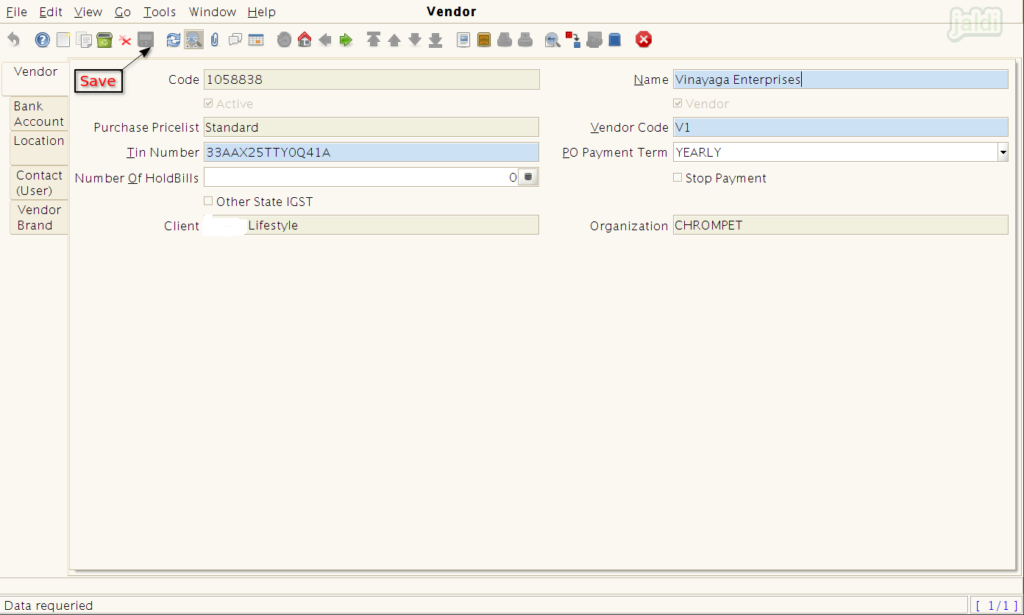
Lets take a supplier “vinayaga enterprices” who supplying an items to your store. To add that vendor follow the below instructions,
Supplier creation
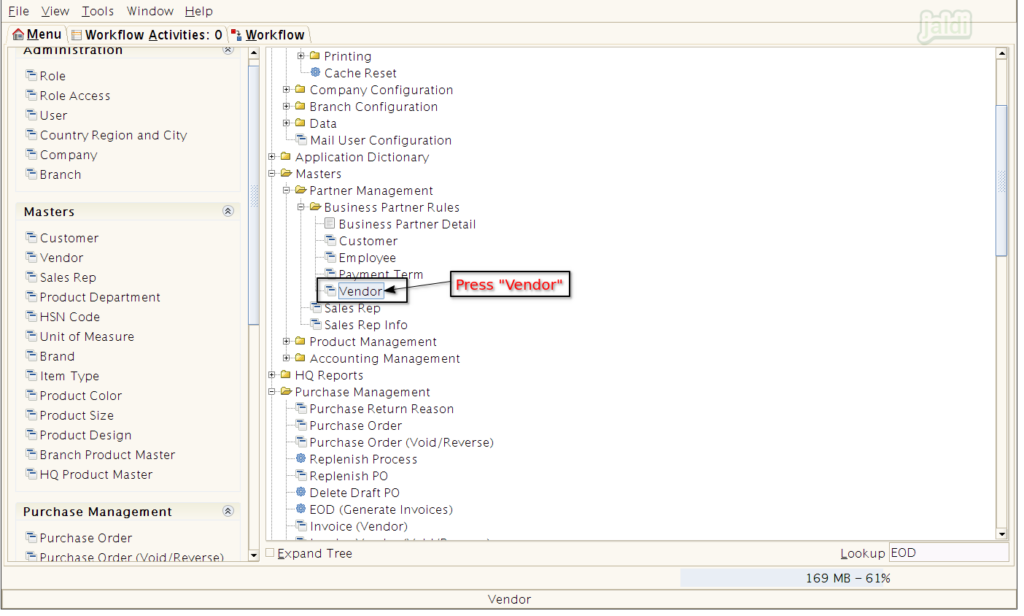
- Press the menu named “Vendor” to add a new supplier in application.

- In vendor master, update all the mandatory fields like name, code, GST number, Payment term under the vendor tab and save.
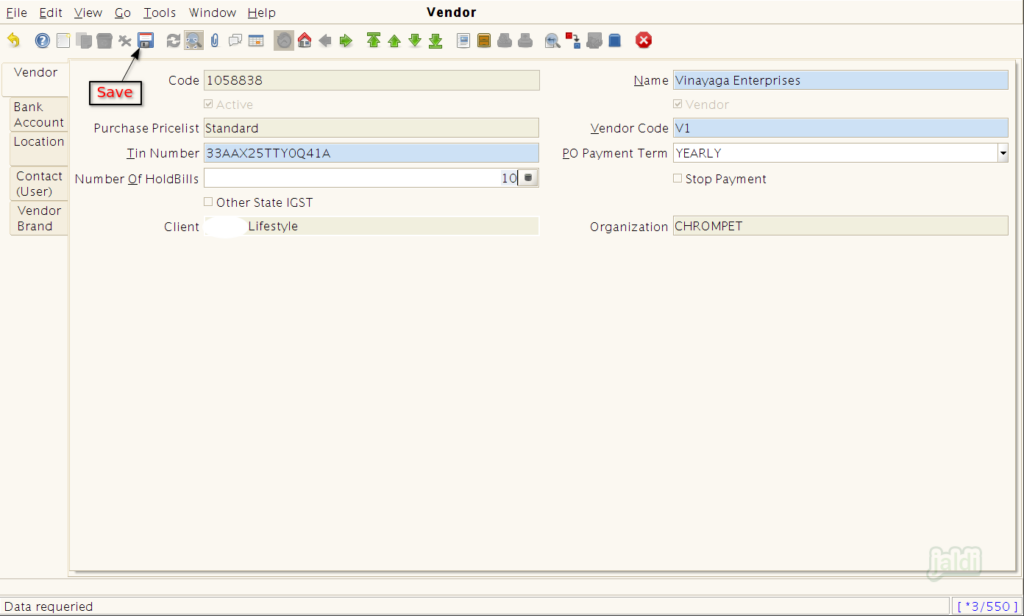
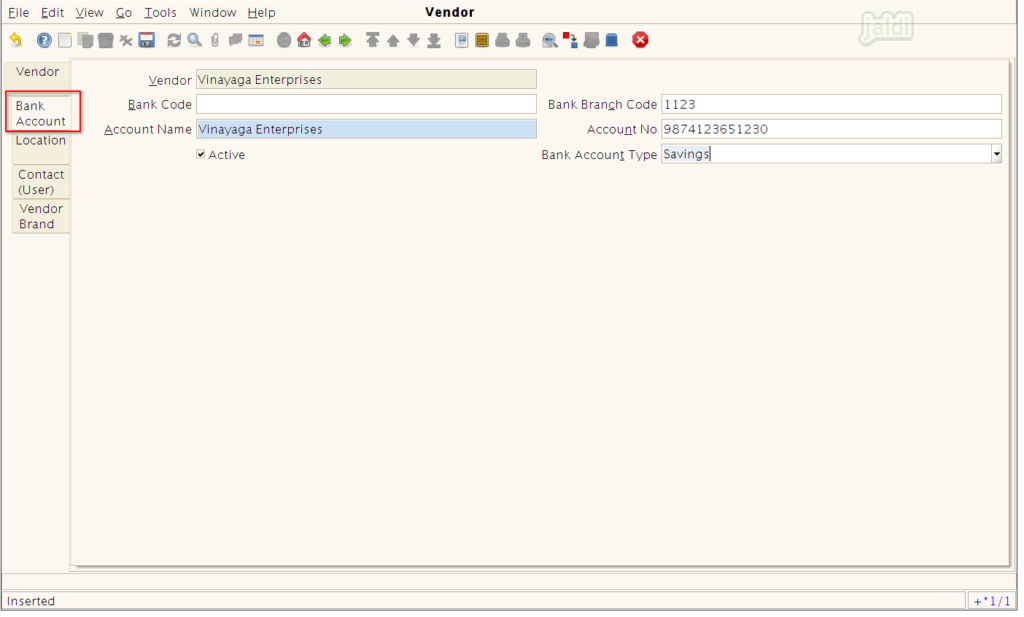
- Now move to “Bank Account” tab to create the Bank account details,
- Update bank account data and press save.
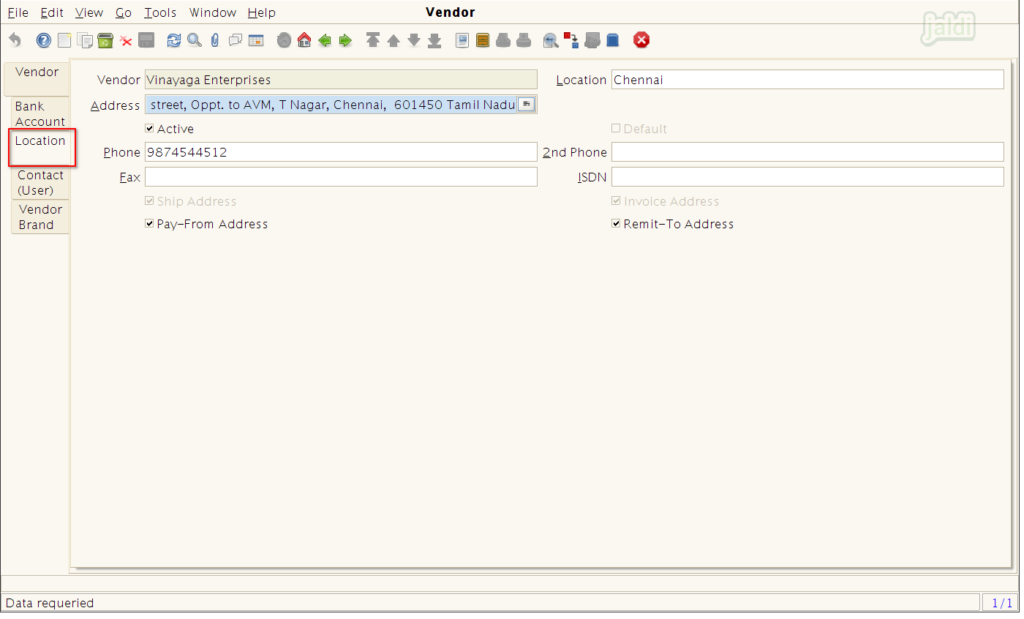
- In “Location” screen and update below mentioned inputs
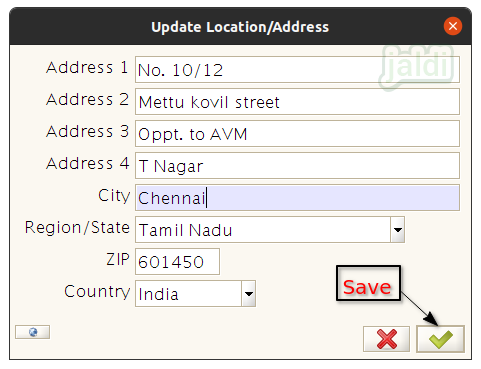
- Addresses – Fill full address of the vendor.
- Phone
- 2nd Phone
- Fax
- ISDN
- Except address and Location other details not mandatory.
- After entering the required details press “Save” function button to save “Location” data.
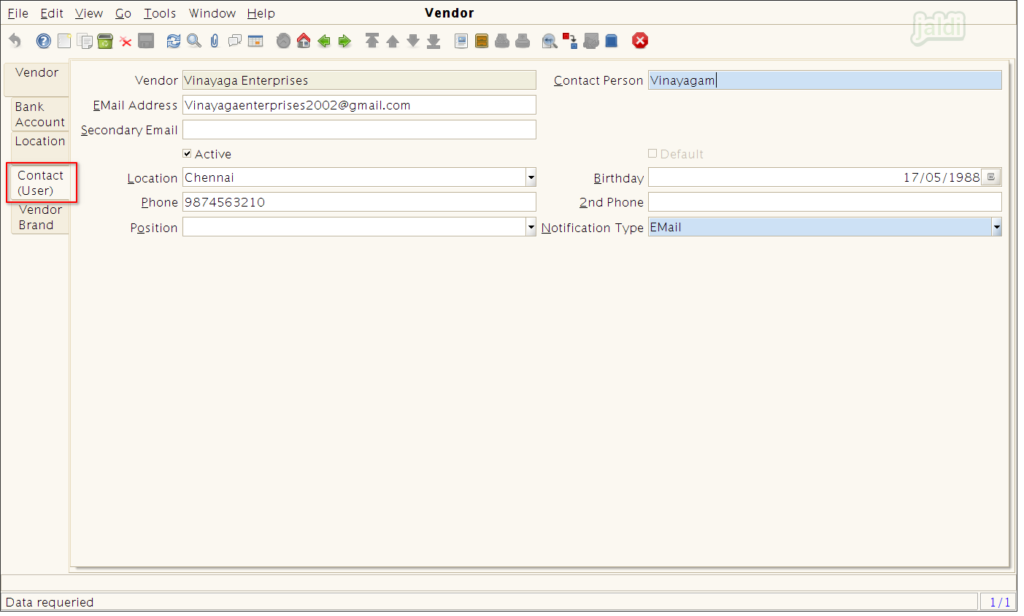
- Under “Contact (User)” screen enter below details,
- Contact-person
- Email address
- Secondary email
- Location
- Birthday
- Phone
- 2nd Phone
- Notification type
- We can enter the required details in this screen, every fields are optional to fill.
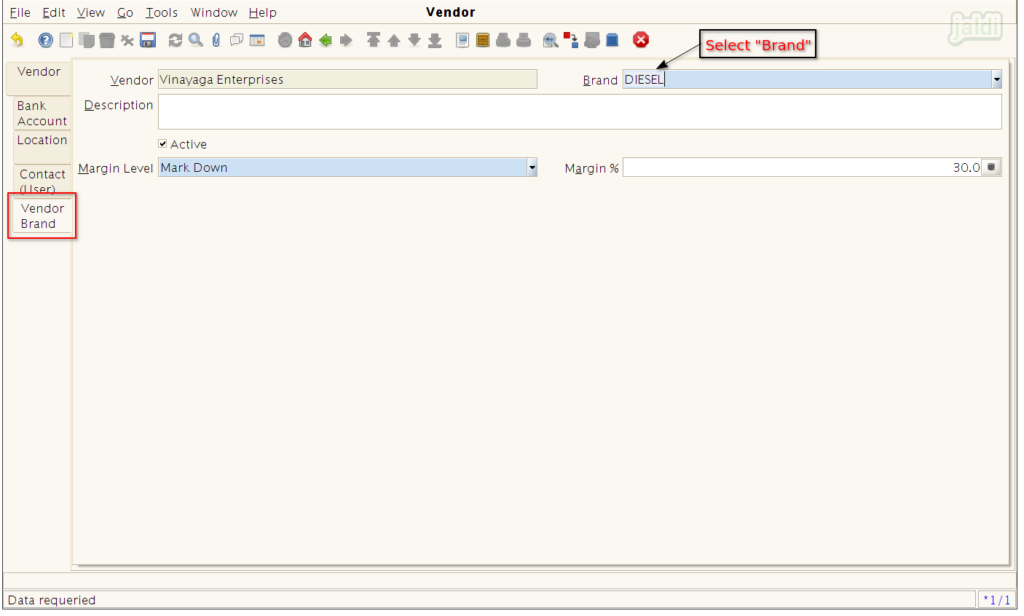
- Now we can move to “Vendor-brand” tab, and give the following details.
- Brand – Select the Vendor “Brand” here.
- Margin level – Mark Down / Mark Up
- Margin % – Enter margin percentage value.
- Finally press save to save existing screen
How to Edit the created vendor details ?
- Only created and existing vendors can be searched and edited.
- Press “Lookup” function button which is shown in picture.
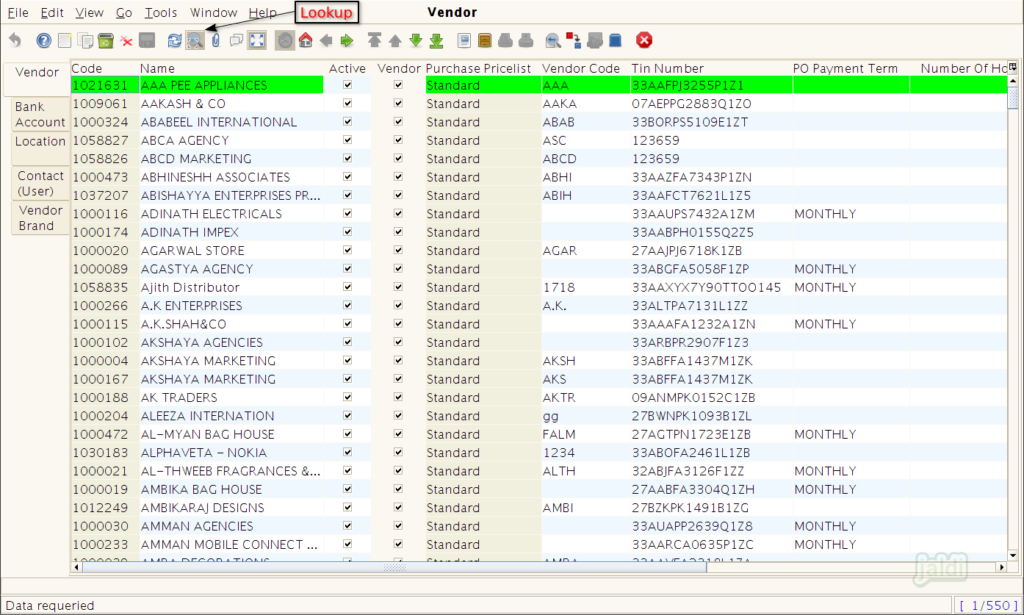
- We can search the vendor using the following data,
- Code – Vendor code
- Name – Vendor name
- CardNo – Vendor customised code
- Mobile No – Enter mobile number
- Enter minimum any one of the details to lookup for unique vendor.
- Now press “green tick” button to start the search or lookup the vendor data.

- Once data is filtered, press “Grid Toggle” to go from list view to detailed view.
- Change any required details under any tab and click “Save”.