Vendor master in Jaldi Superstore POS
Vendor master is the master where user can create and manage their suppliers or distributor details in Jaldi Superstore POS application for effective purchase management.
Ex:- Lets consider the real time scenario where you purchasing the goods from the vendor named “Murugan enterprises”. Before we creating the GRN entry against their invoice, the vendor “Murugan enterprises” should be created in vendor master. So that a GRN user can select the created vendor “Murugan enterprises” to complete the GRN entry.
Created vendor names will be selected during the GRN entry, purchase order and purchase return.
Follow the below steps to create a new vendor in vendor master,
How to create a new Vendor in vendor master ?
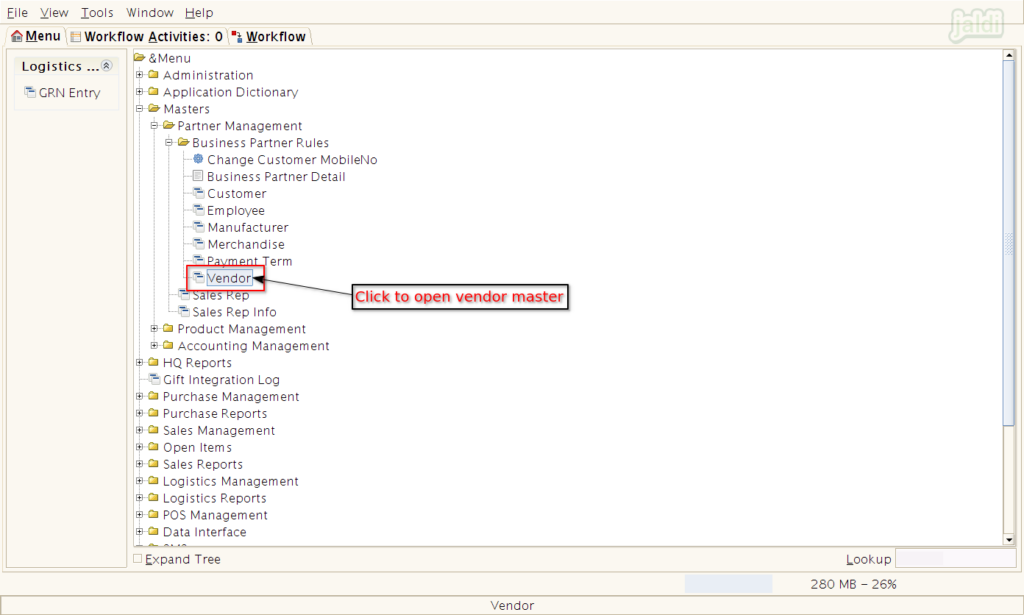
- Go to application path – Masters > Business Partner Rules > Vendor.
- Click on “Vendor” menu to open vendor master screen.
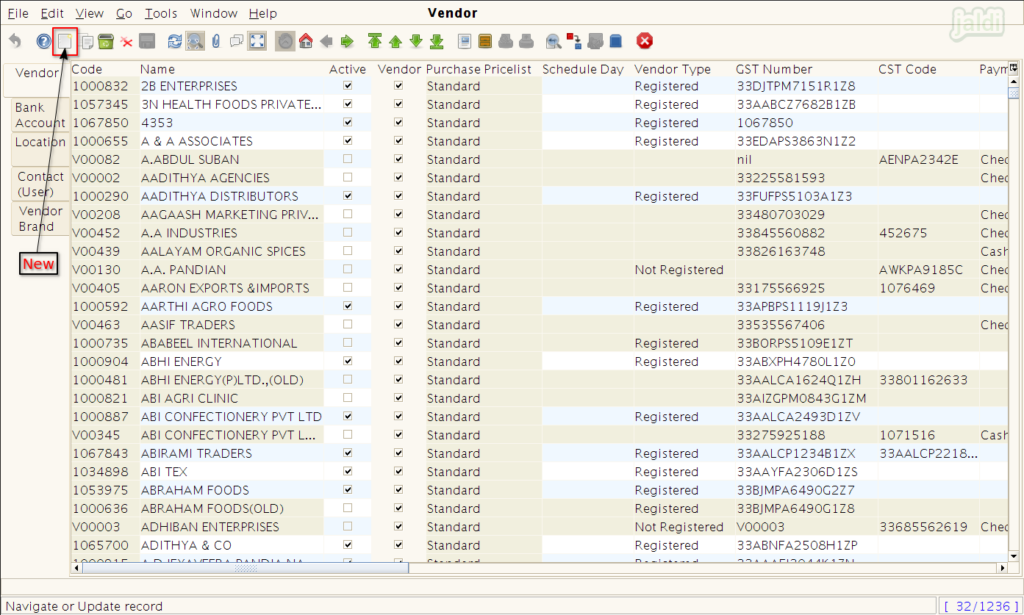
- In vendor screen, Click on “New” function key to create a new vendor.
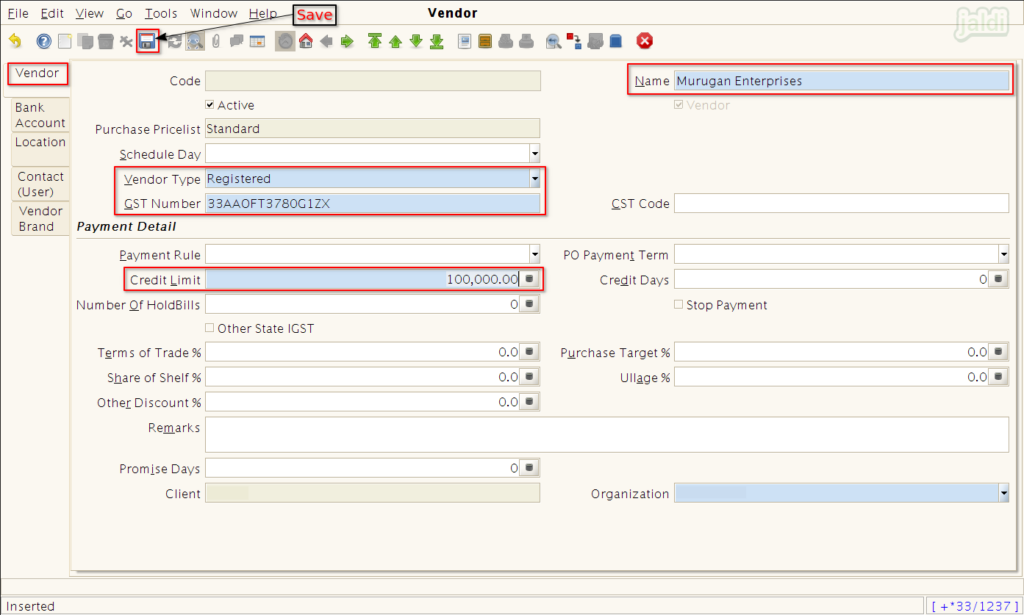
- Under Vendor tab, enter the following details to create a vendor,
- Name – Enter vendor name
- Vendor type – Registered / Unregistered (in GST)
- GST number – Enter GST number only for Registered vendors.
- You can also enter other payment details like credit limit and etc under vendor tab.
- Once the required data were filled then click on “save” function key to save the data.
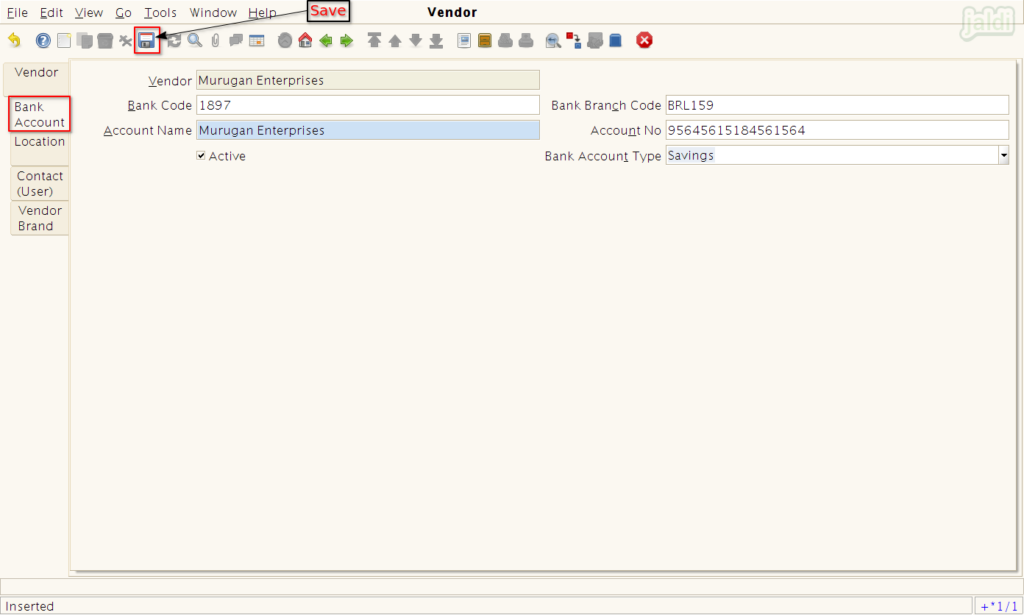
- Under bank account tab, enter the inputs in following fields,
- Bank code
- Account name
- Bank branch code
- Account No
- Bank account type.
- You can enter multiple bank account details, After saving existing data, press new and start to enter another bank account details.
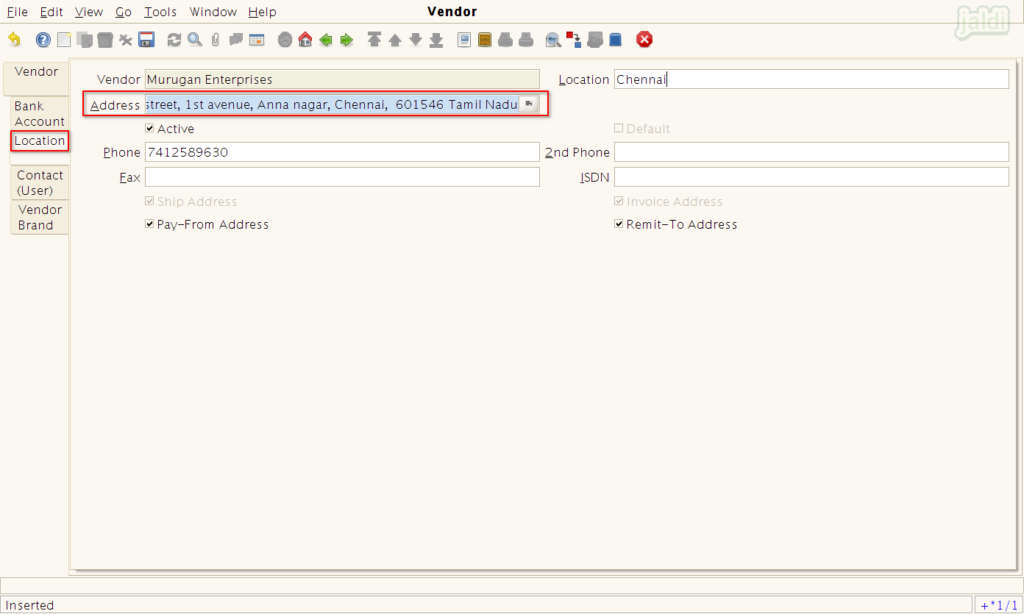
- Then move to Location tab and enter following details,
- Address
- Location
- Phone
- Fax
- 2nd phone
- ISDN
- Only Address field is mandatory other fields are optional to fill.
- You can save multiple location for single vendor.
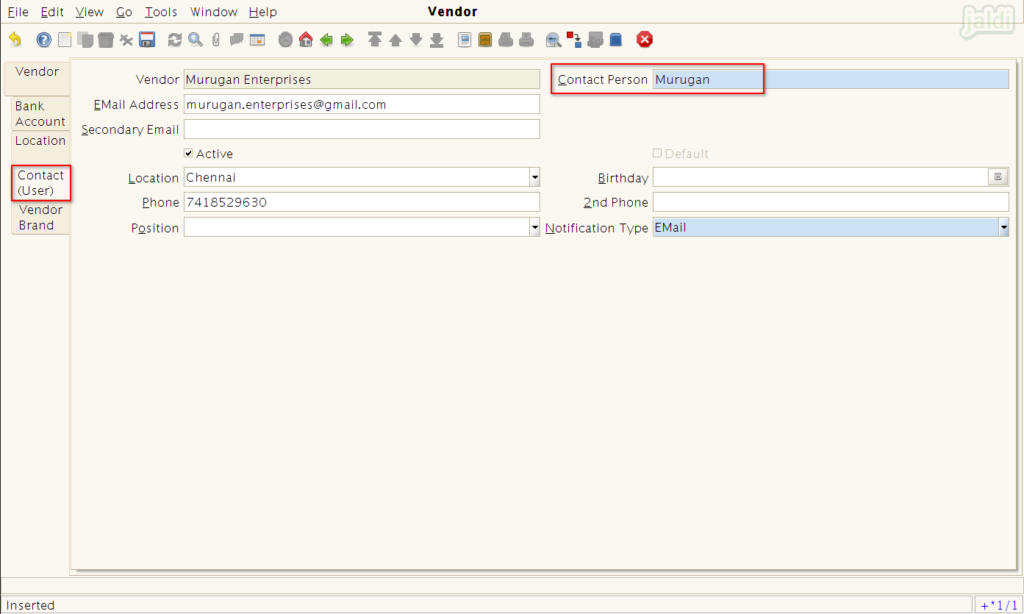
- Under Contact (user) tab, enter the following details,
- Contact person (mandatory)
- Email Address
- Location
- Phone
- You can also enter other available input fields.
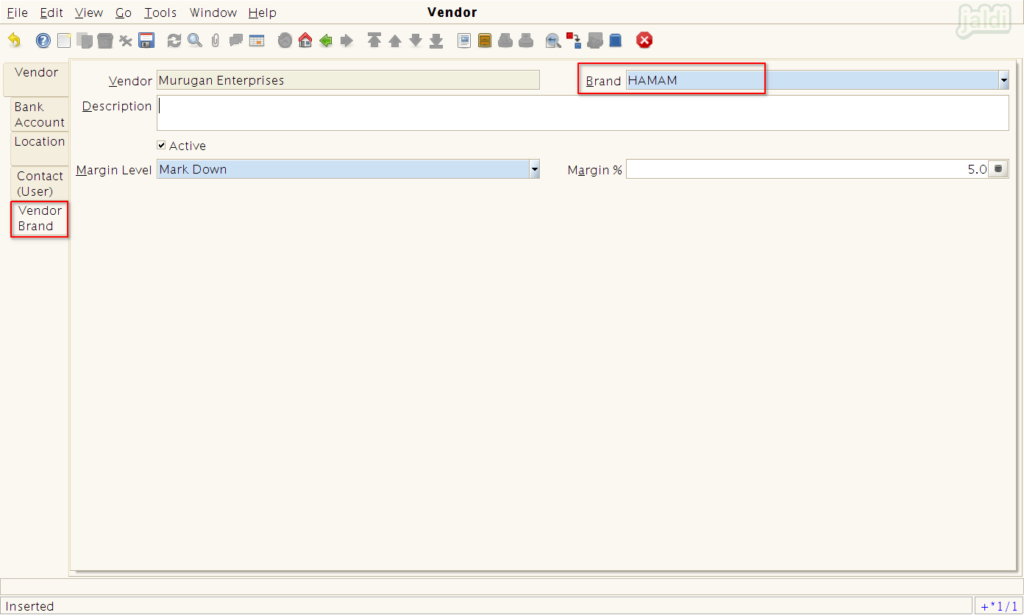
- Under vendor brand tab, Select the Brand, Margin level and enter margin %.
How to edit existing vendor details ?
- Go to vendor master screen and click on the “lookup/ search” function key to search the specific vendor which you need to edit.
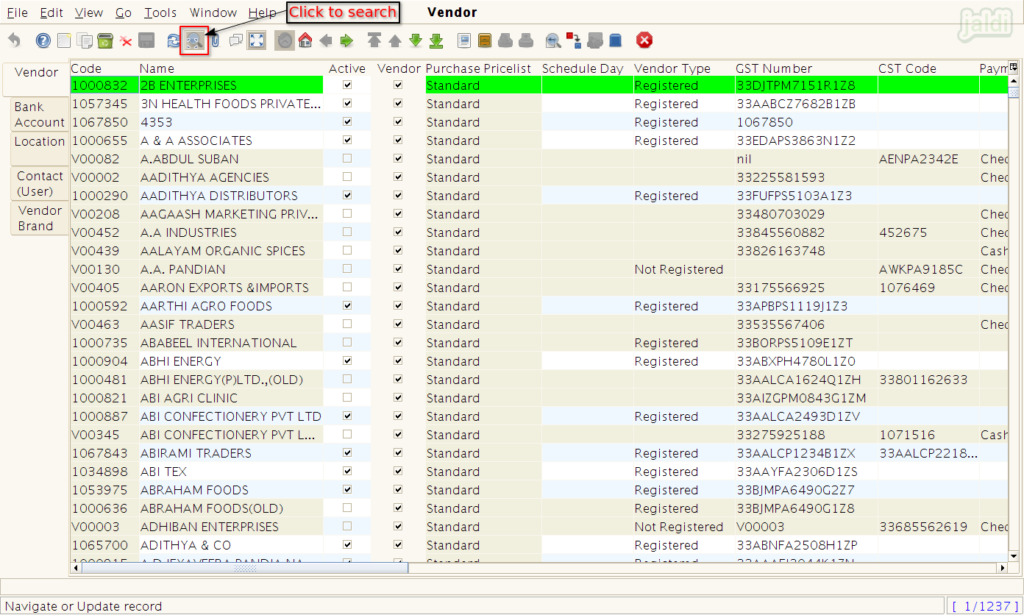
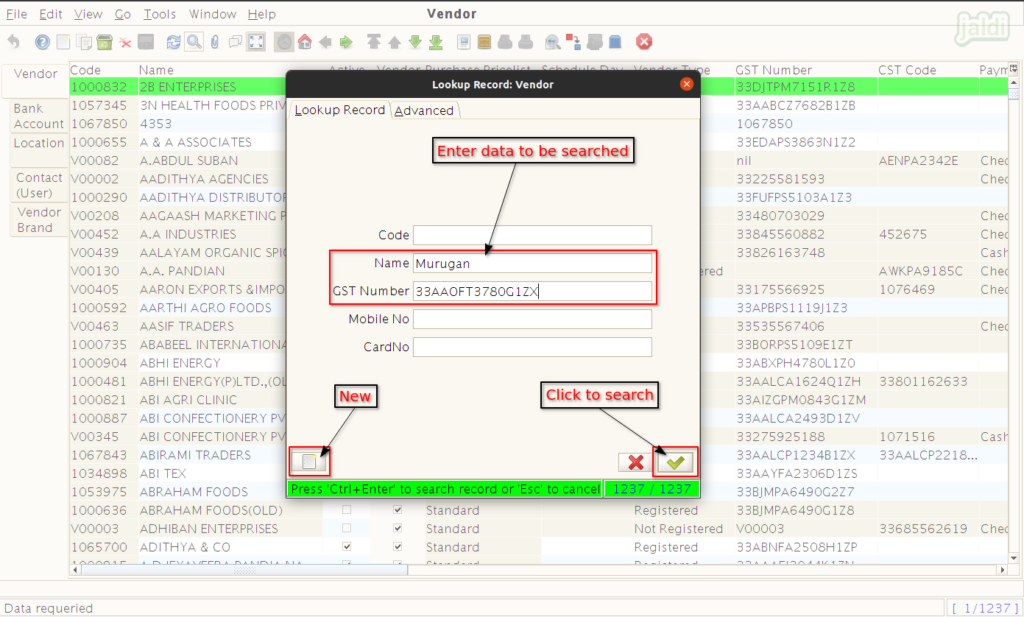
- In lookup record screen, enter data to be searched in available input fields.
- Then click on “tick” symbol which is marked in below image to start search.
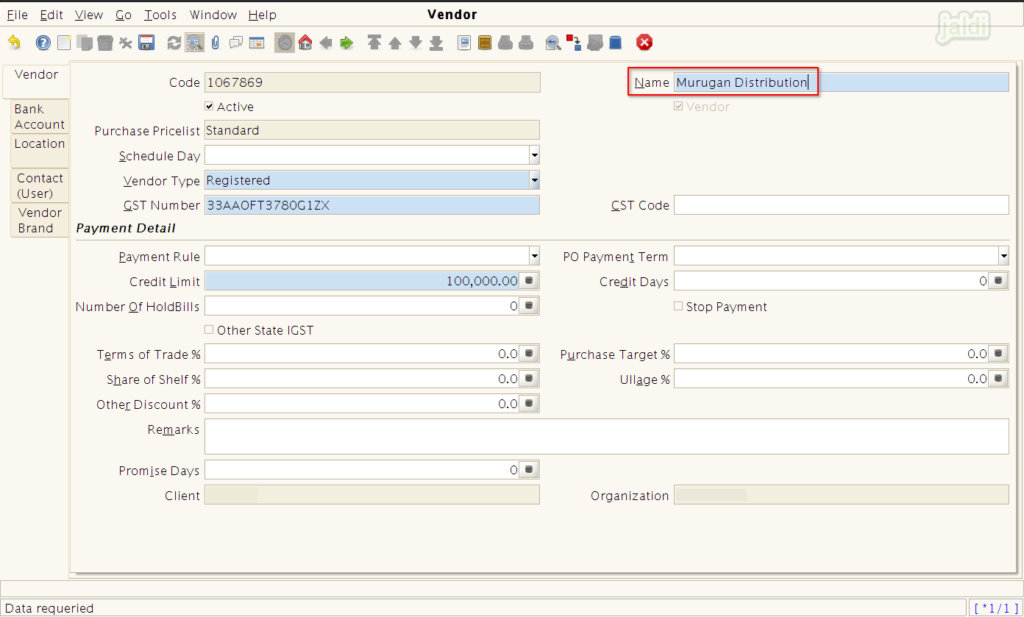
- Now update the required details in existing vendor details and click on “Save” function key.
How to deactivate existing vendor ?
- Go to vendor master screen and open specific vendor name which you want to deactivate.
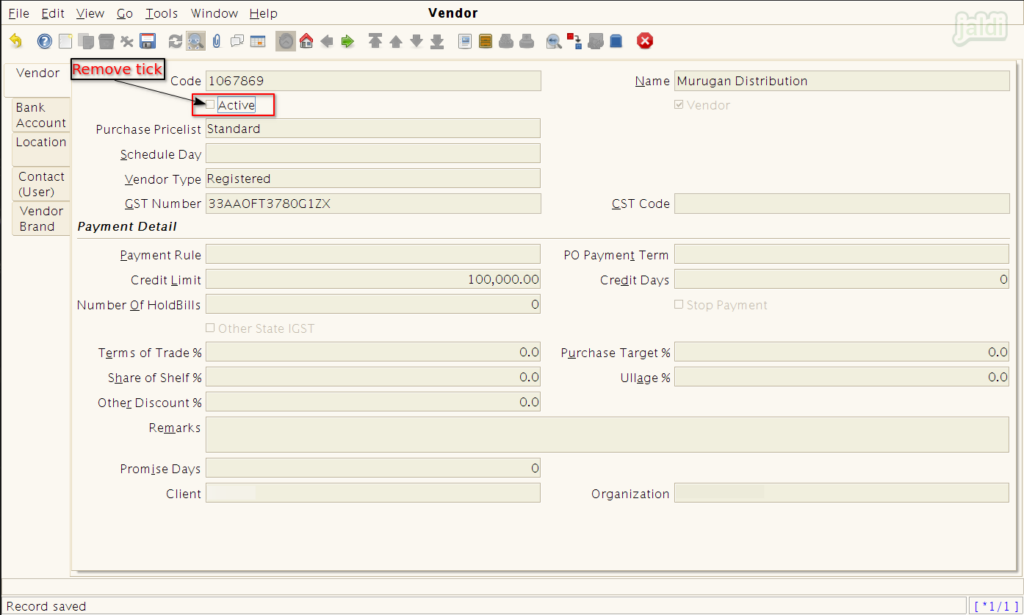
- Remove “tick” from the “active” check box field and save.
- You can also reactivate the deactivated vendor by selecting the active check box.
